JV44 was formed in late February 1945 with Me262s when Galland finally persuaded Hitler that the jet fighter would be an effective weapon against the USAAF 8th AF daylight bombing raids. After initial training, the unit moved to its base in Munchen-Reim in late March 1945 and soon thereafter began operations. It became apparent very quickly however that the jets were extraordinarily vulnerable during take off and landing due to their poor throttle response at slow speeds, and that they therefore needed protection from marauding USAAF fighters.
In response the Papageia Staffel was formed in mid-April and tasked with clearing the skies of allied fighters above their airfield prior to the jets’ departure. They were then to land and await the jets’ return. Interestingly though, there was no specific operational requirement for them to protect the jets upon their return.
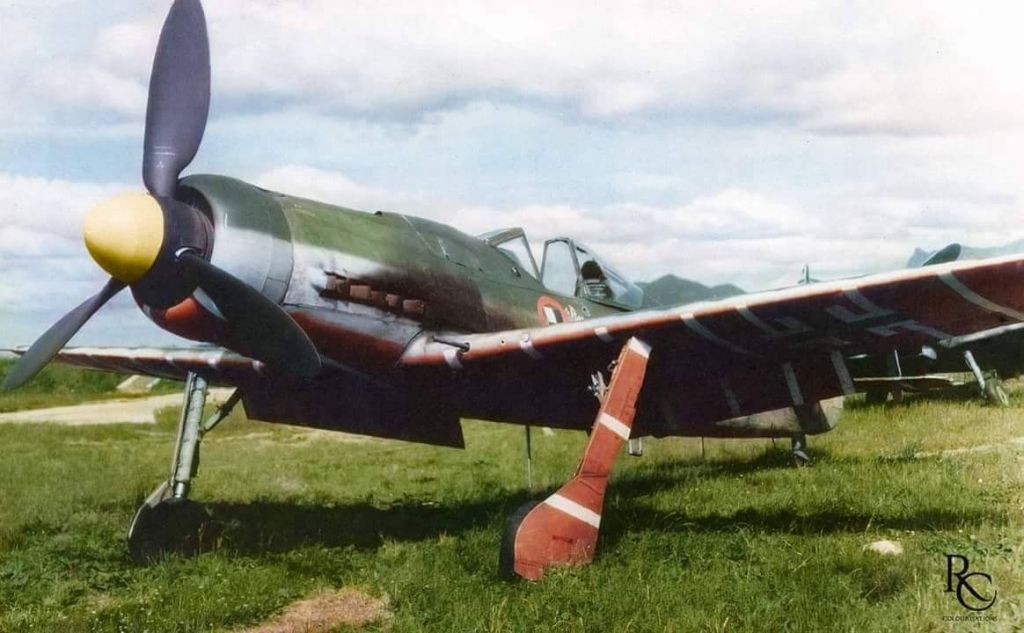
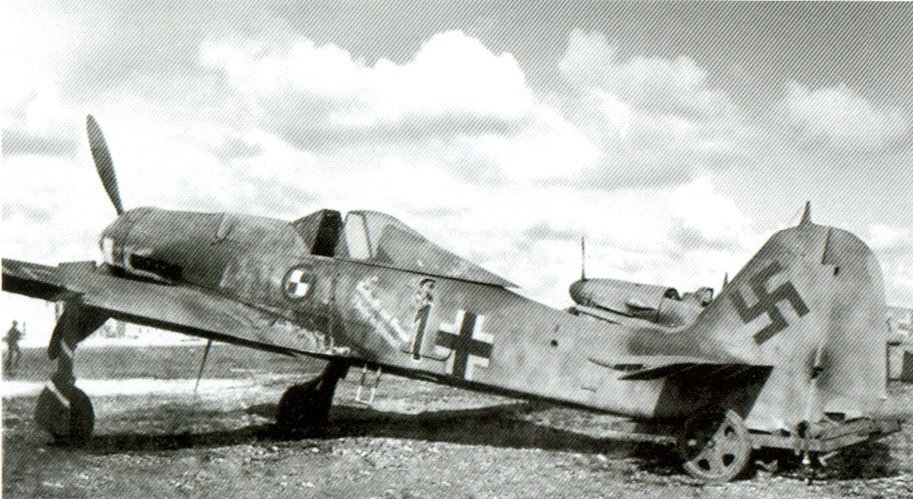
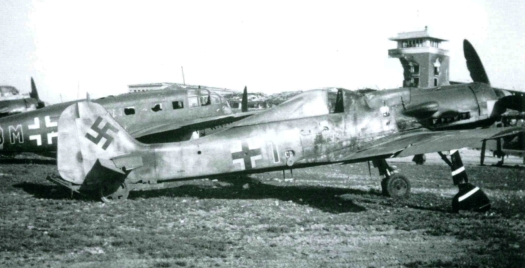
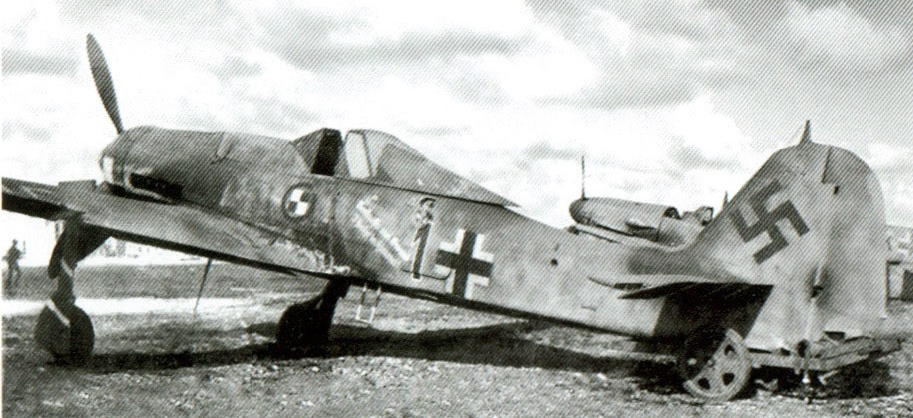
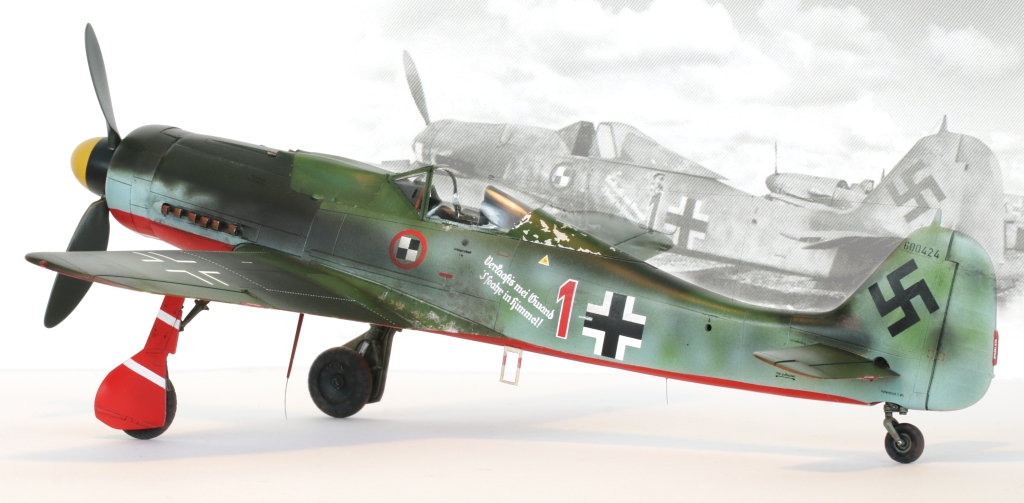
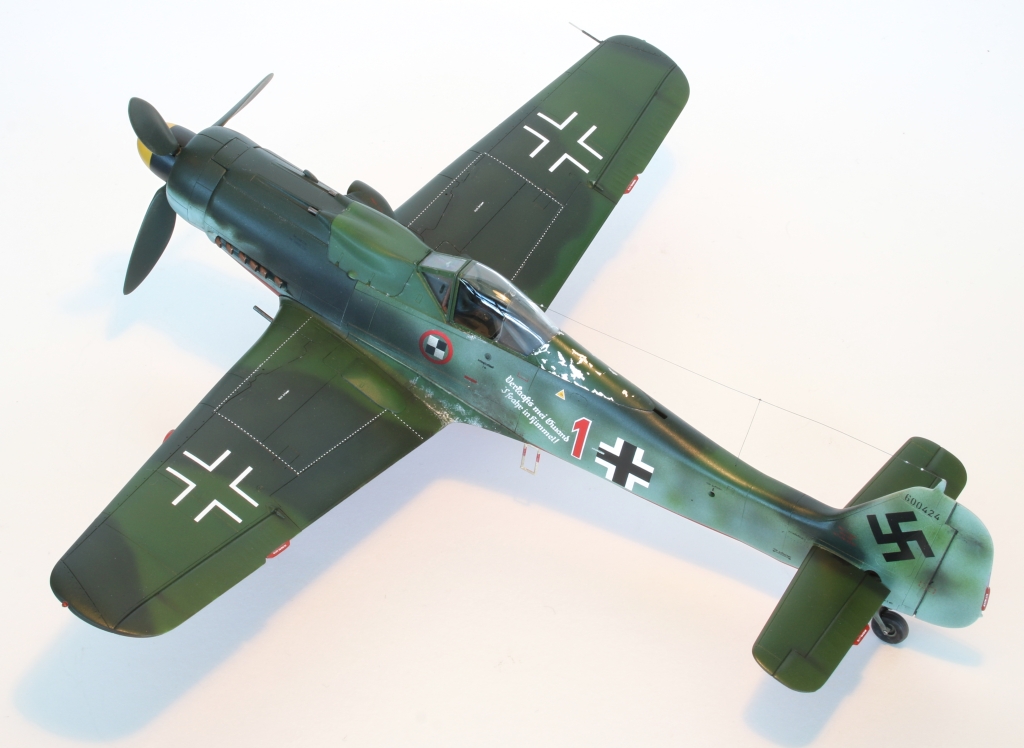
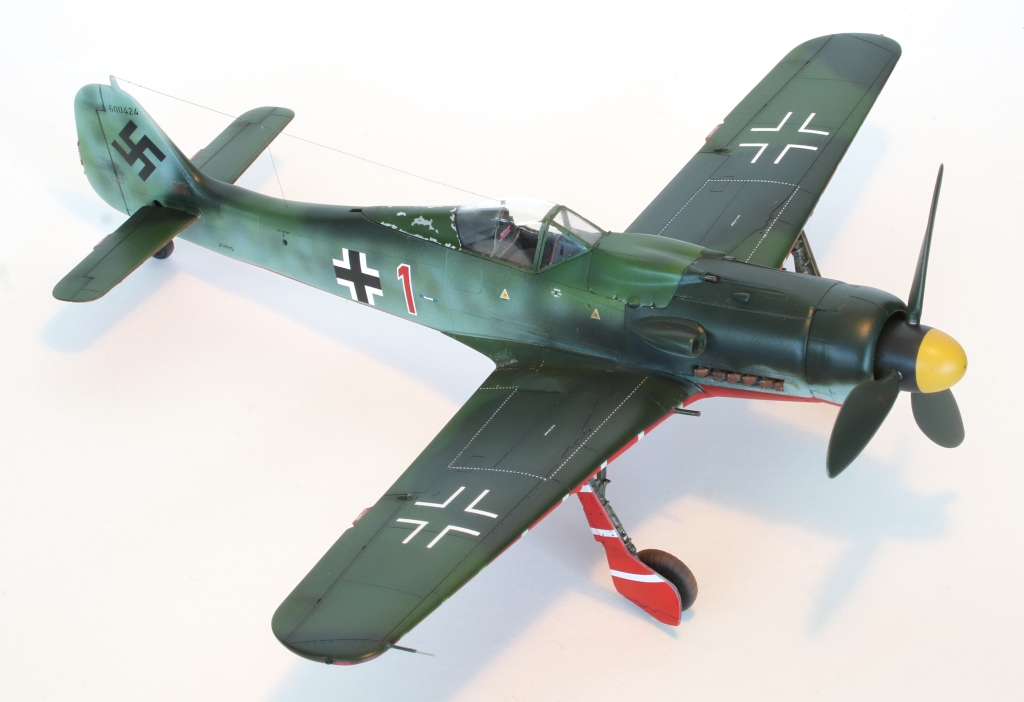
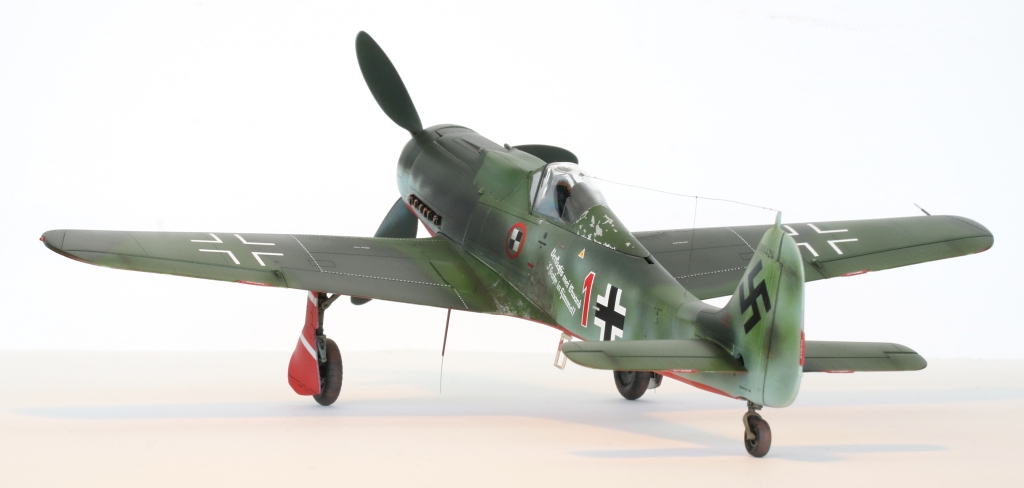
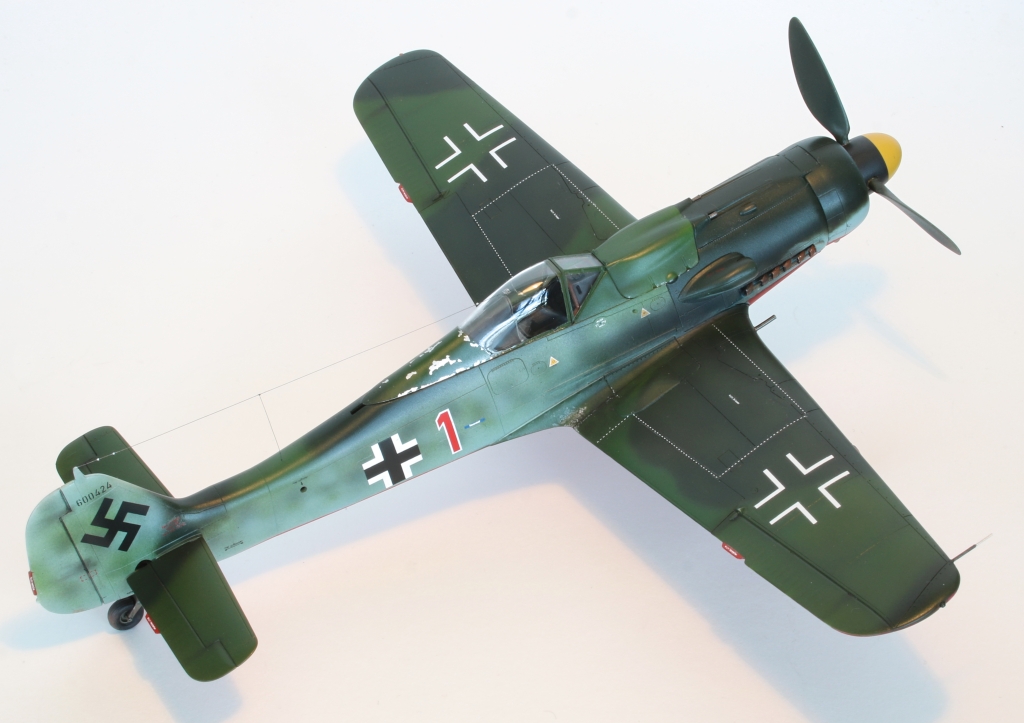
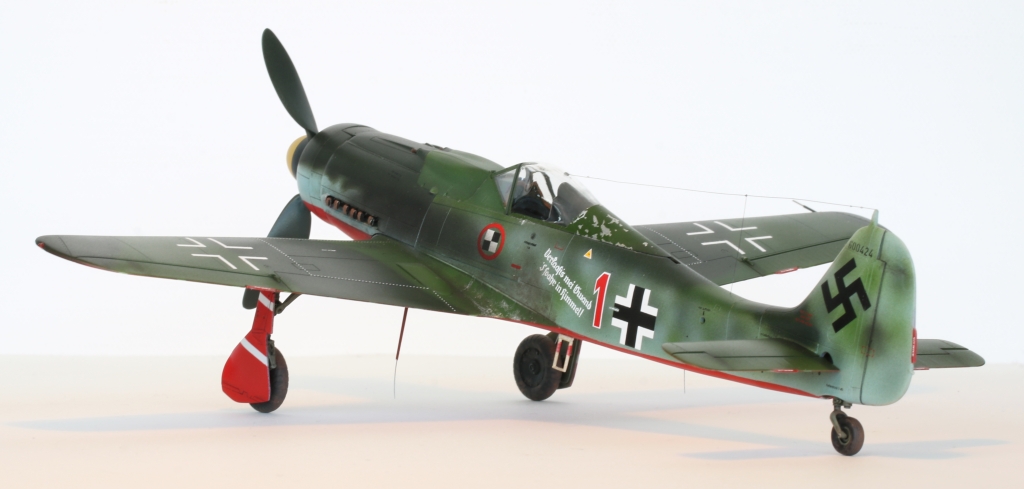
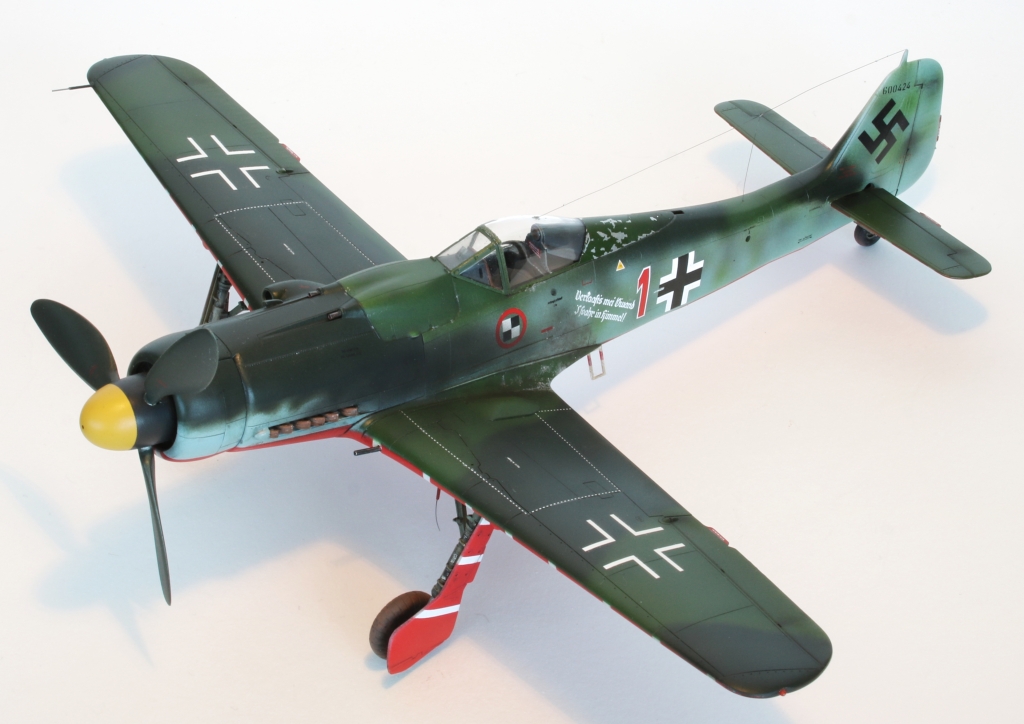
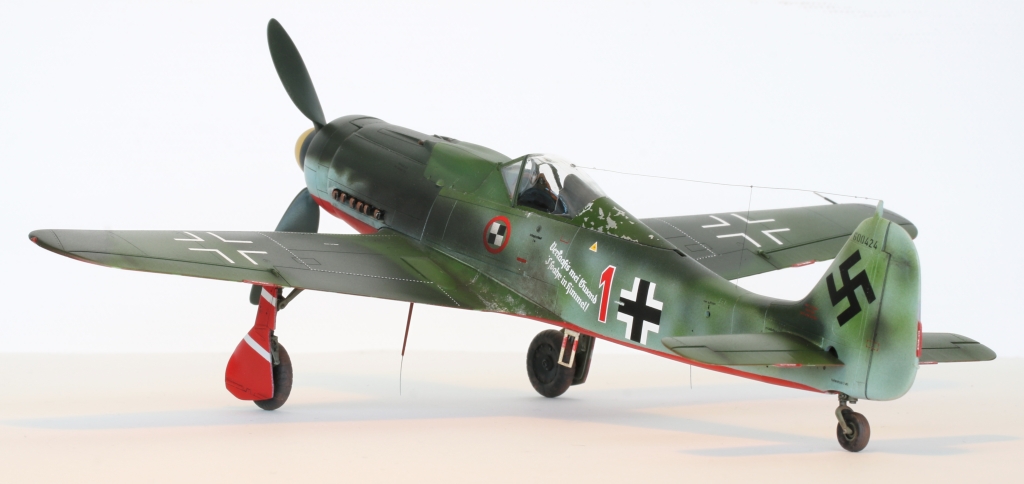
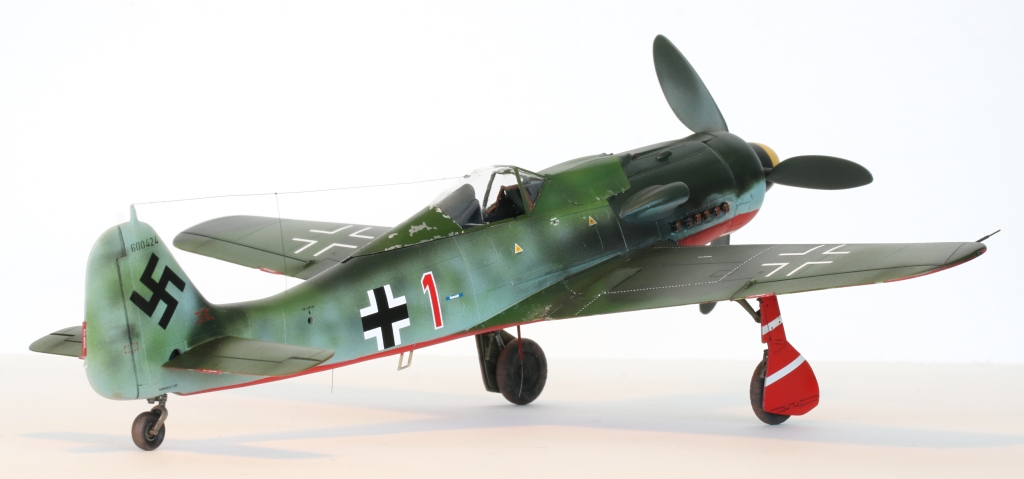
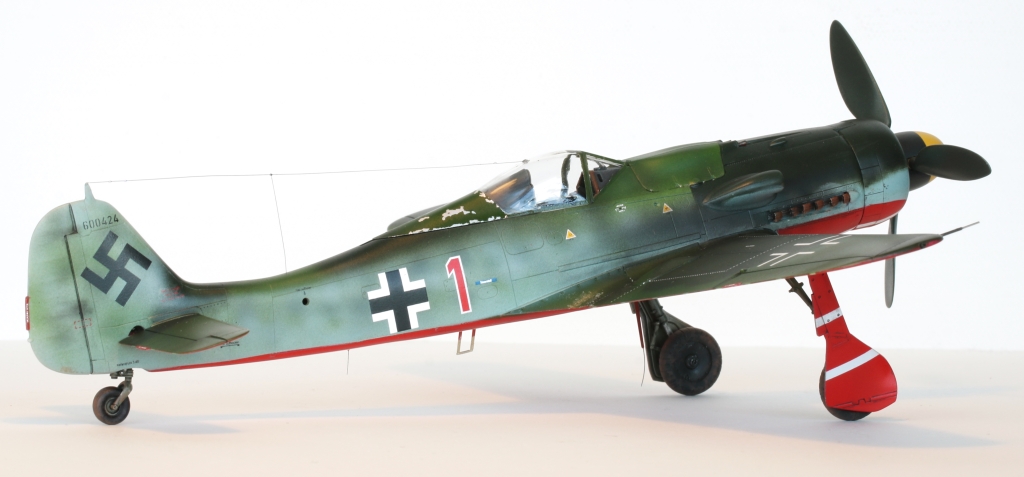
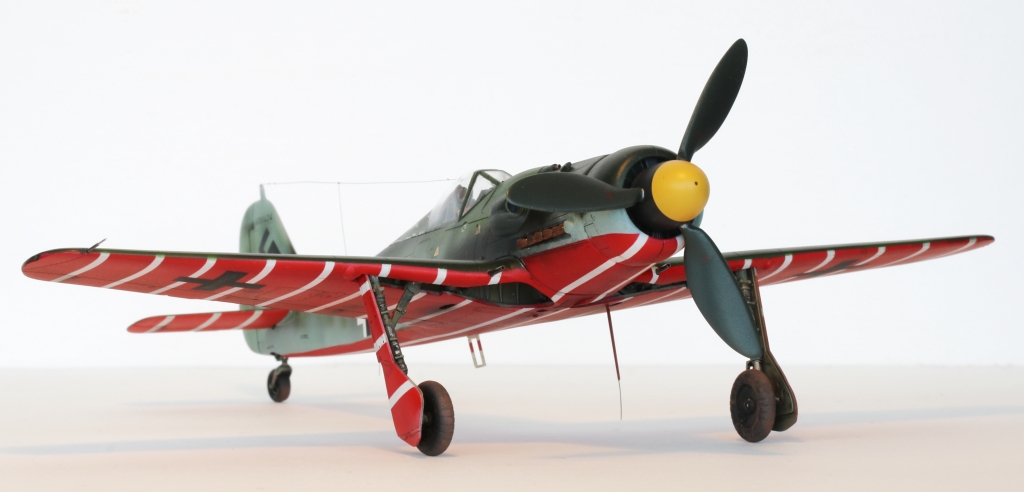
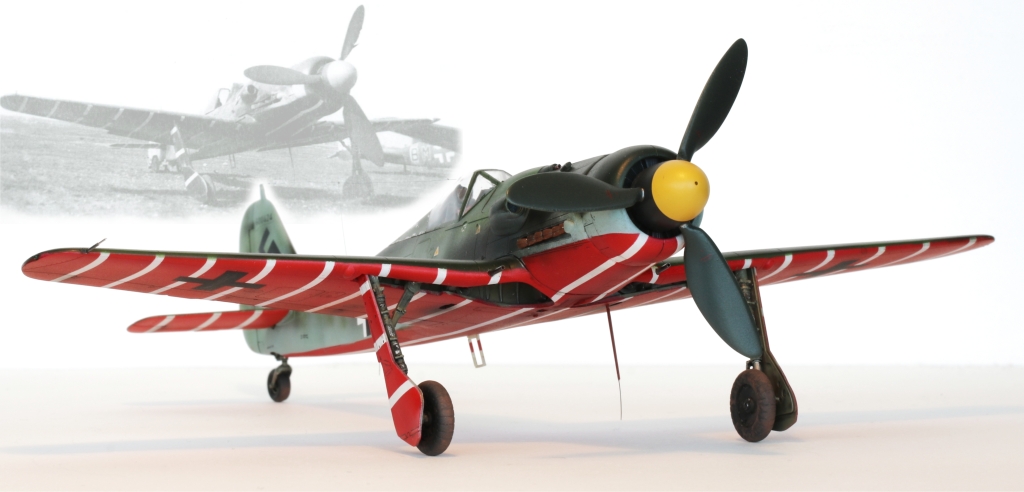
The most striking thing about the Staffel was the paintwork applied to the undersides of their aircraft. The five (possibly six) Papageia Fw190D’s wore their colourful red and white markings (and so earned the nickname “Parrot“) to ensure that the numerous flack units around their base at Munchen-Reim did not mistake them for allied fighters and shoot them down.
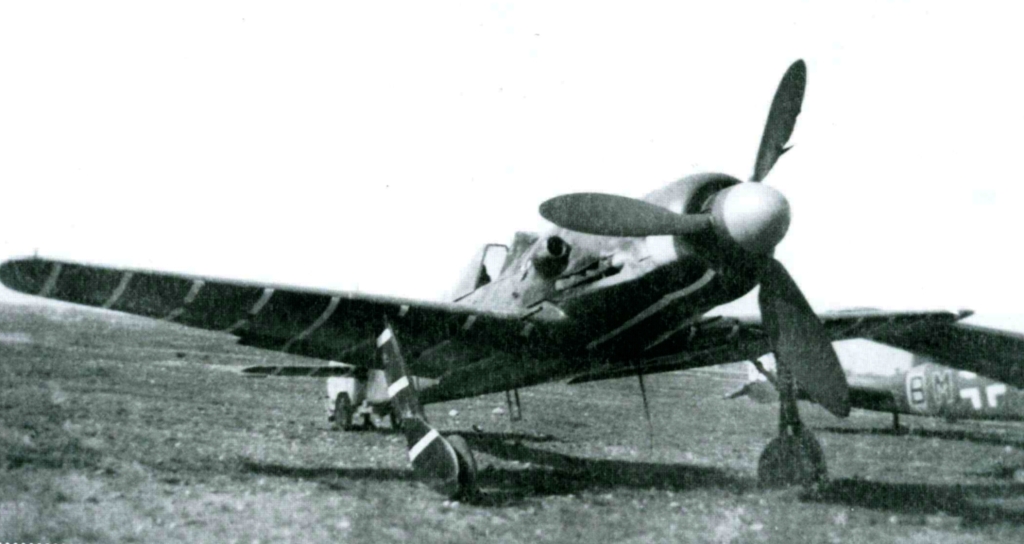
At the end of April however, JV44 was forced off its base and in effect, ceased to be a fighting unit. Most aircraft and their pilots, Me262’s as well as the Fw190s flew west to avoid capture by the Russians. Not the subject aircraft of this piece though, “Rote 1” was found abandoned at Munich on 5th May in an unserviceable condition, missing its rear wheel.
The colourised image above gives a good impression of what the “Papageia” looked like at the time; I started into this project hoping mine would look something similar when done.
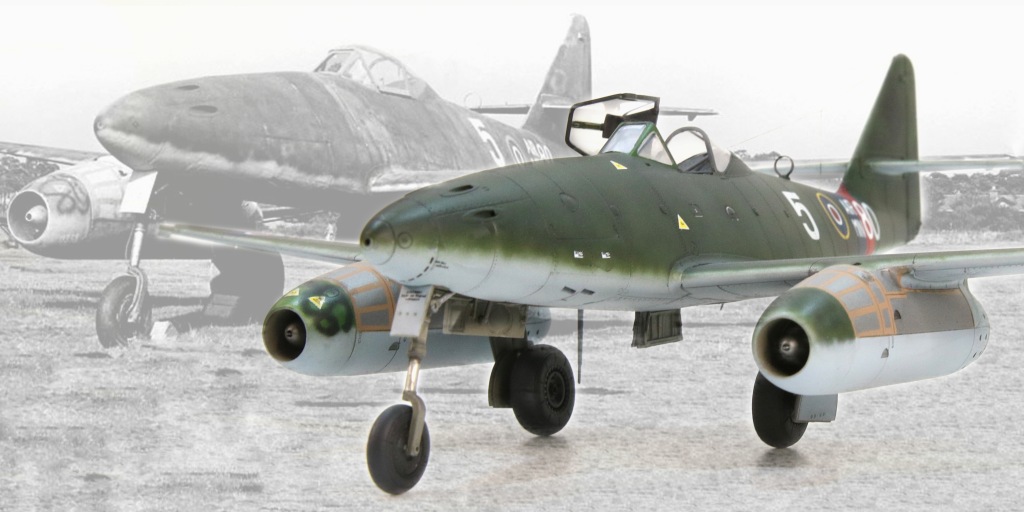
Trimaster 1/48 Fw190-D9
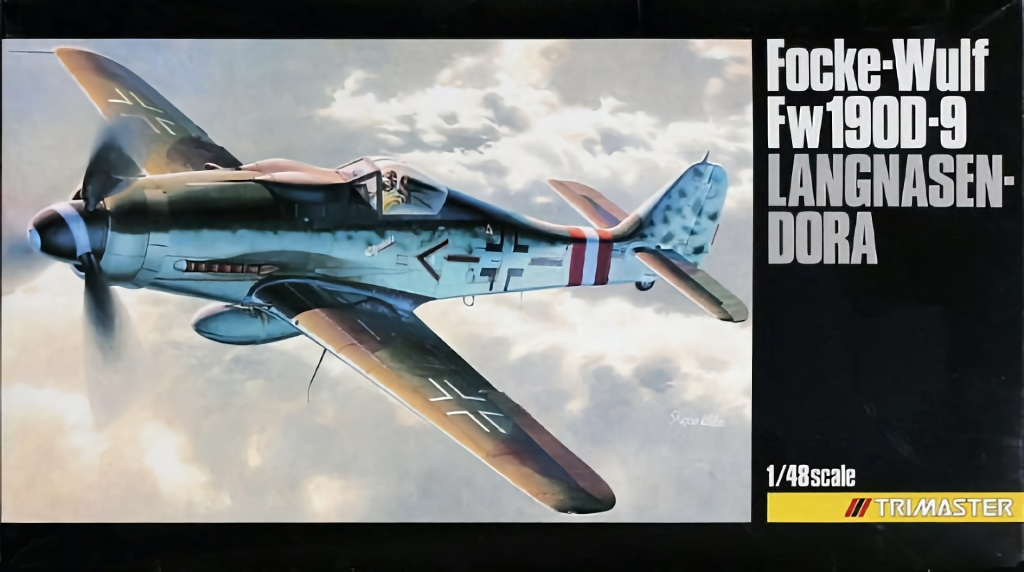
I was fortunate enough to have an original boxing of this kit, one that included the PE as well as white metal undercarriage and exhausts, and even tube for the gun barrels as well as the pitot tube. I got it as a gift from my friend, the late Robert Bracken almost twenty years ago. Having previously built Trimaster’s Fw190A I was confident that not only would this be a pleasurable build, but it would look great when done. It didn’t disappoint in the least.
The Beginning
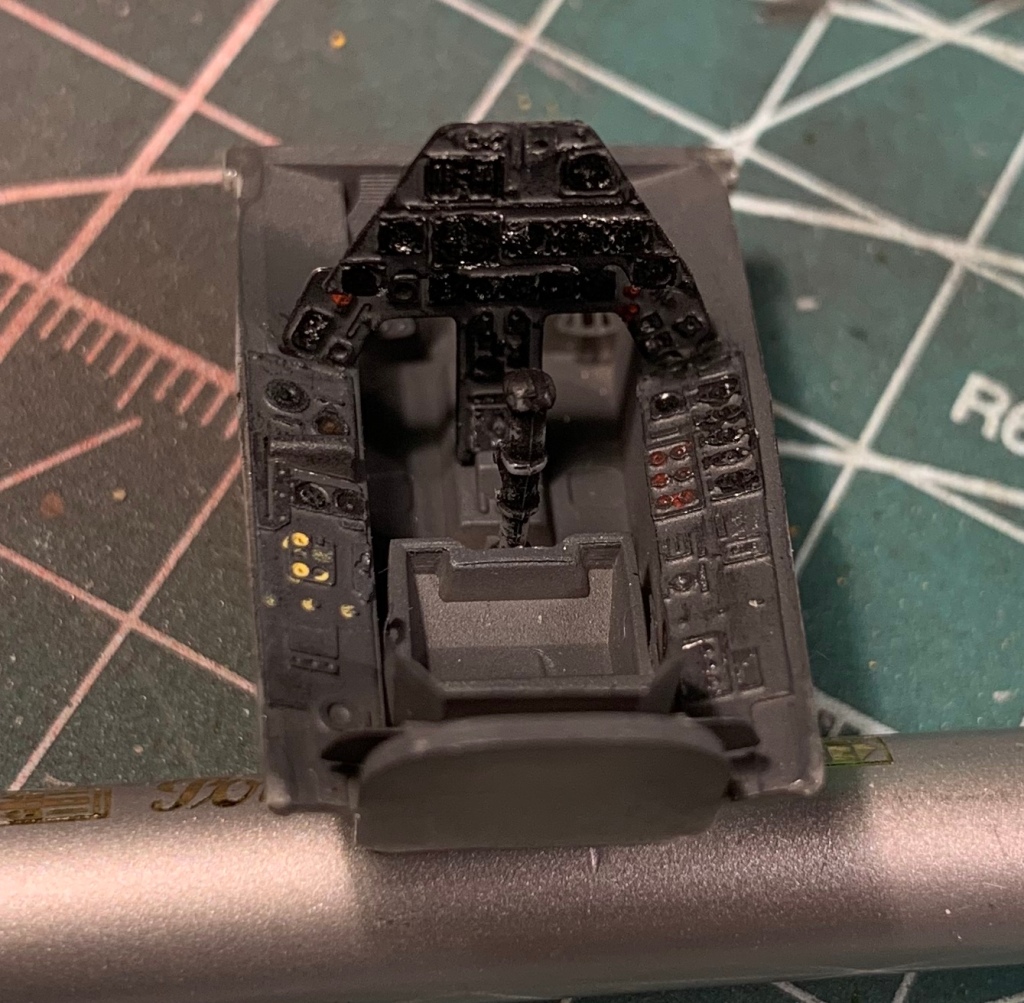
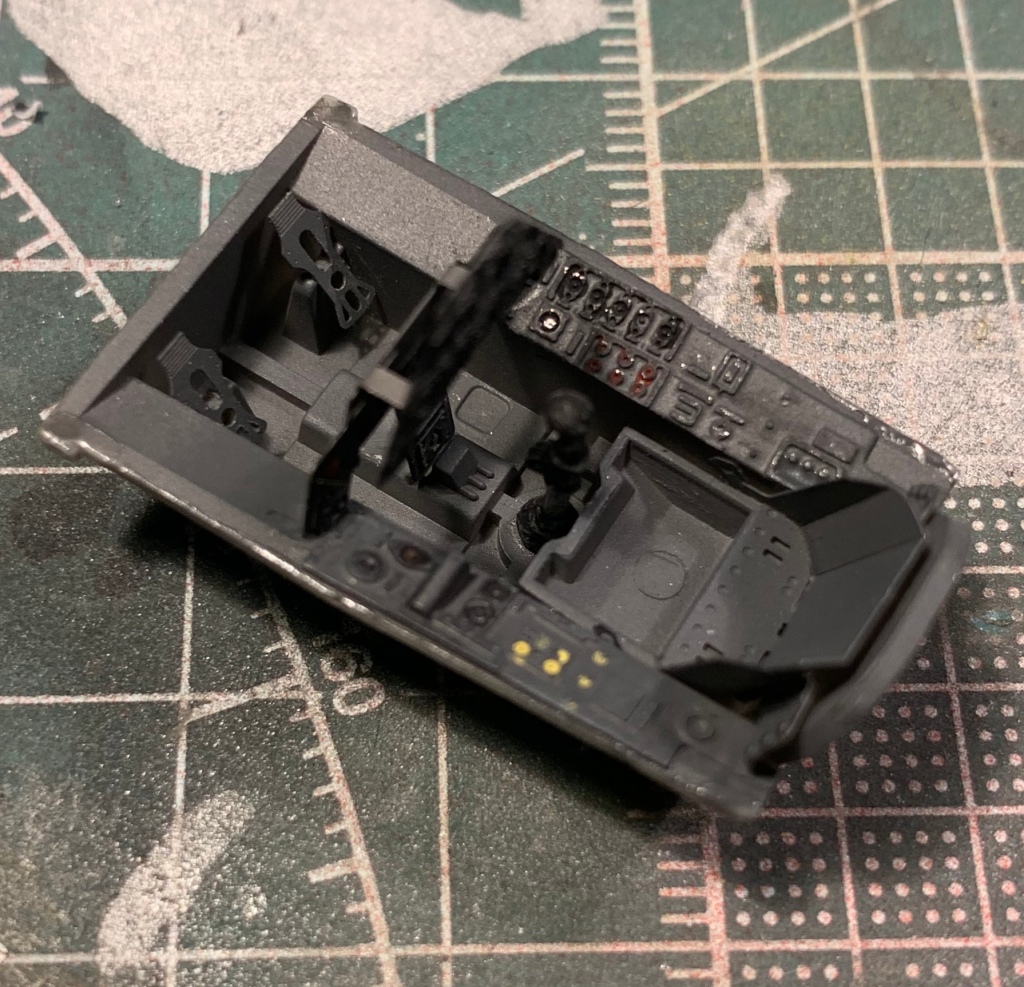
As another of the models rescued from storage in Canada last year, I was somewhat surprised when I opened the box to see that I’d already completed the basic assembly and paint in the cockpit. All that remained was some detail painting and it was done.
With the cockpit out of the way, I began on the base construction phase.
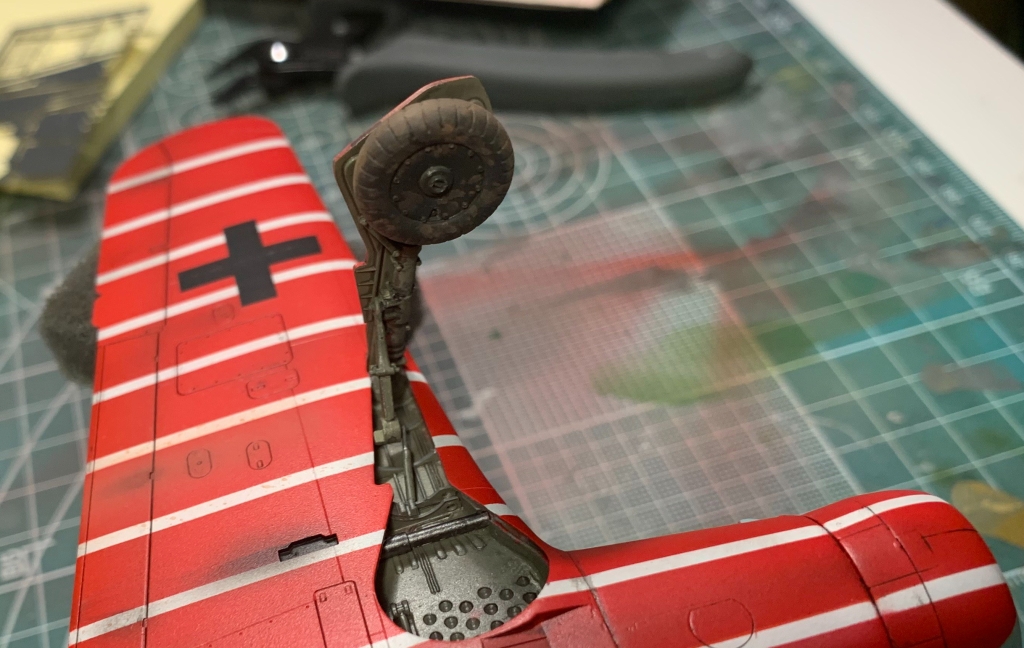
There’s really only one glaring fault with this kit, the treatment of the main wheel wheel. On the real aircraft it’s open to the base of the engine whereas Trimaster moulded it as a closed unit. There is a conversion set to correct this but for me it wasn’t important enough to go to trouble of finding one.
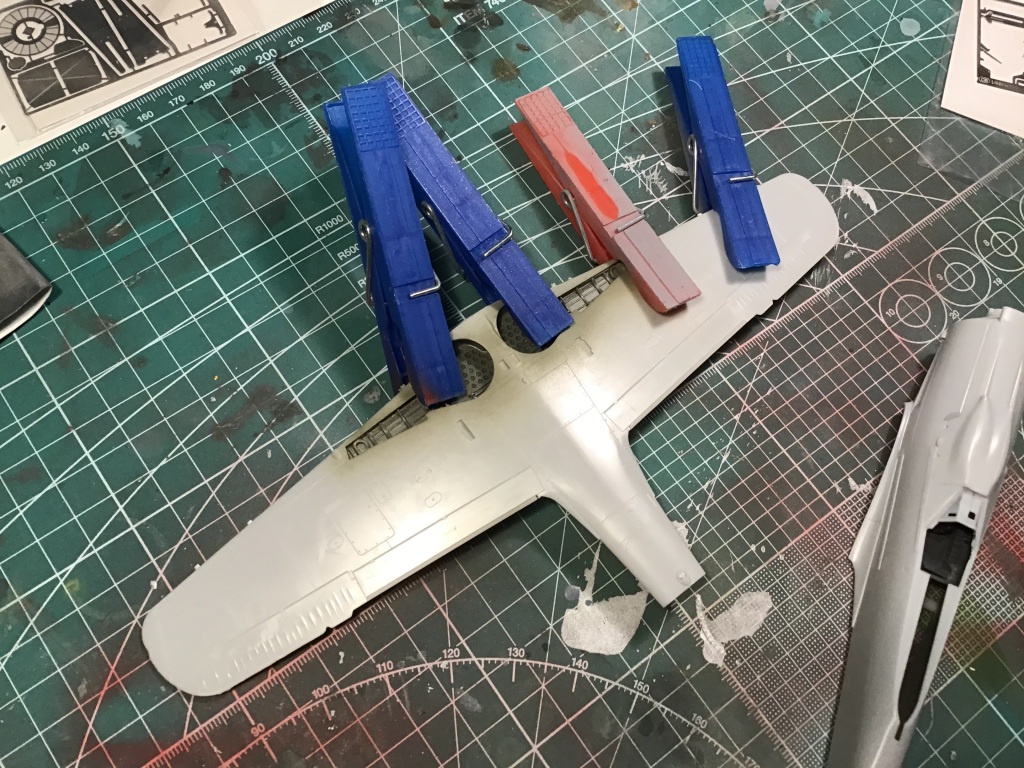
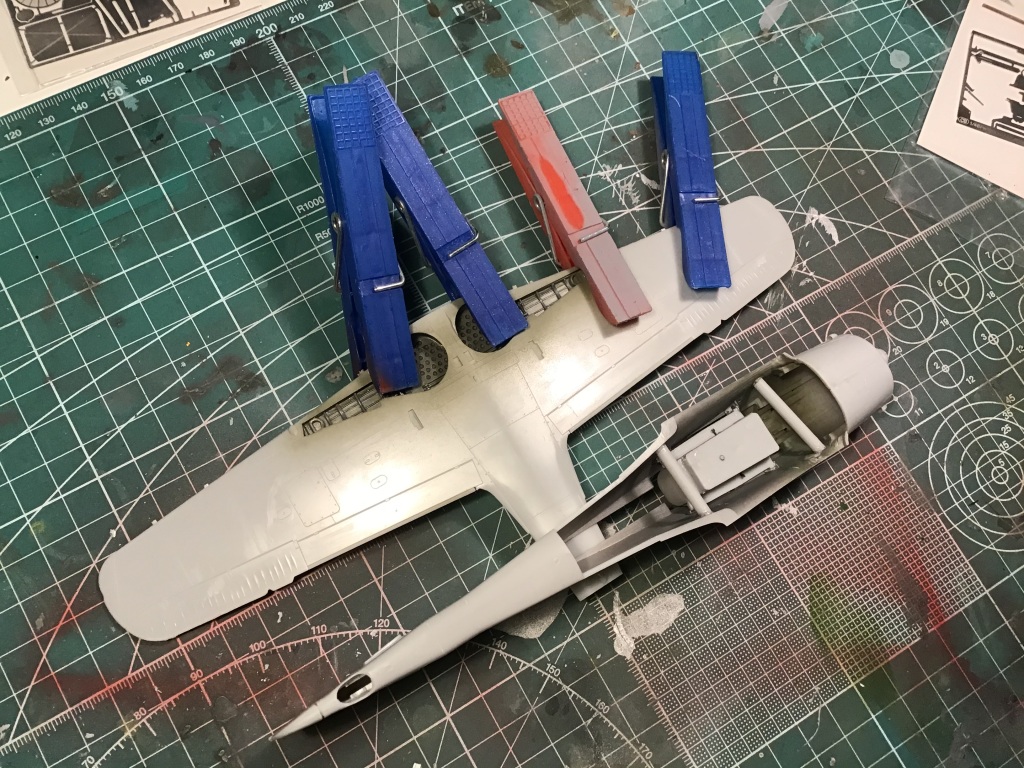
In the picture above right you’ll notice I inserted a couple of spreaders in the fuselage to ensure a clean fir to the wing roots. This solution worked well and the subsequent finished construction need only one very small spot of Mr. Surfacer; can you see it in the pic below?
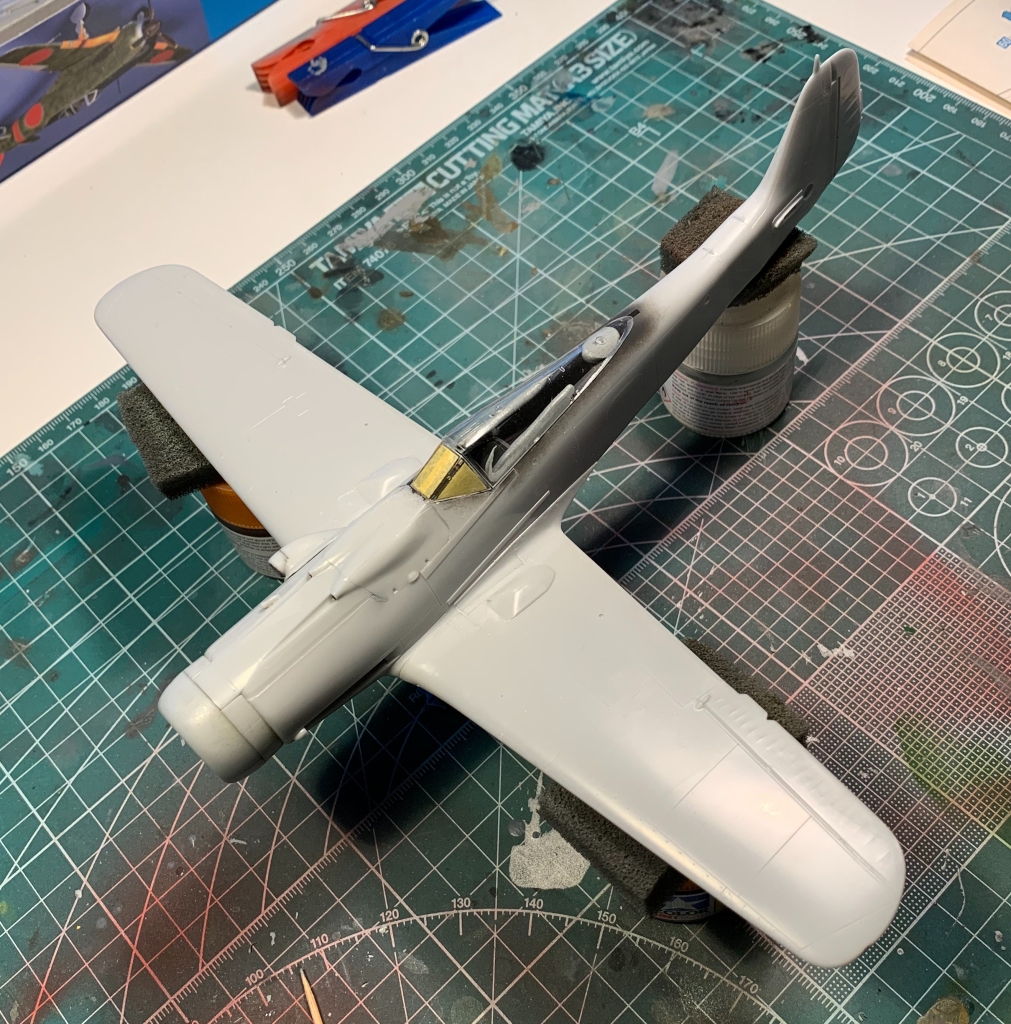
I used the spare main canopy to mask the cockpit and very quickly it was ready for paint.
Painting the Papagei

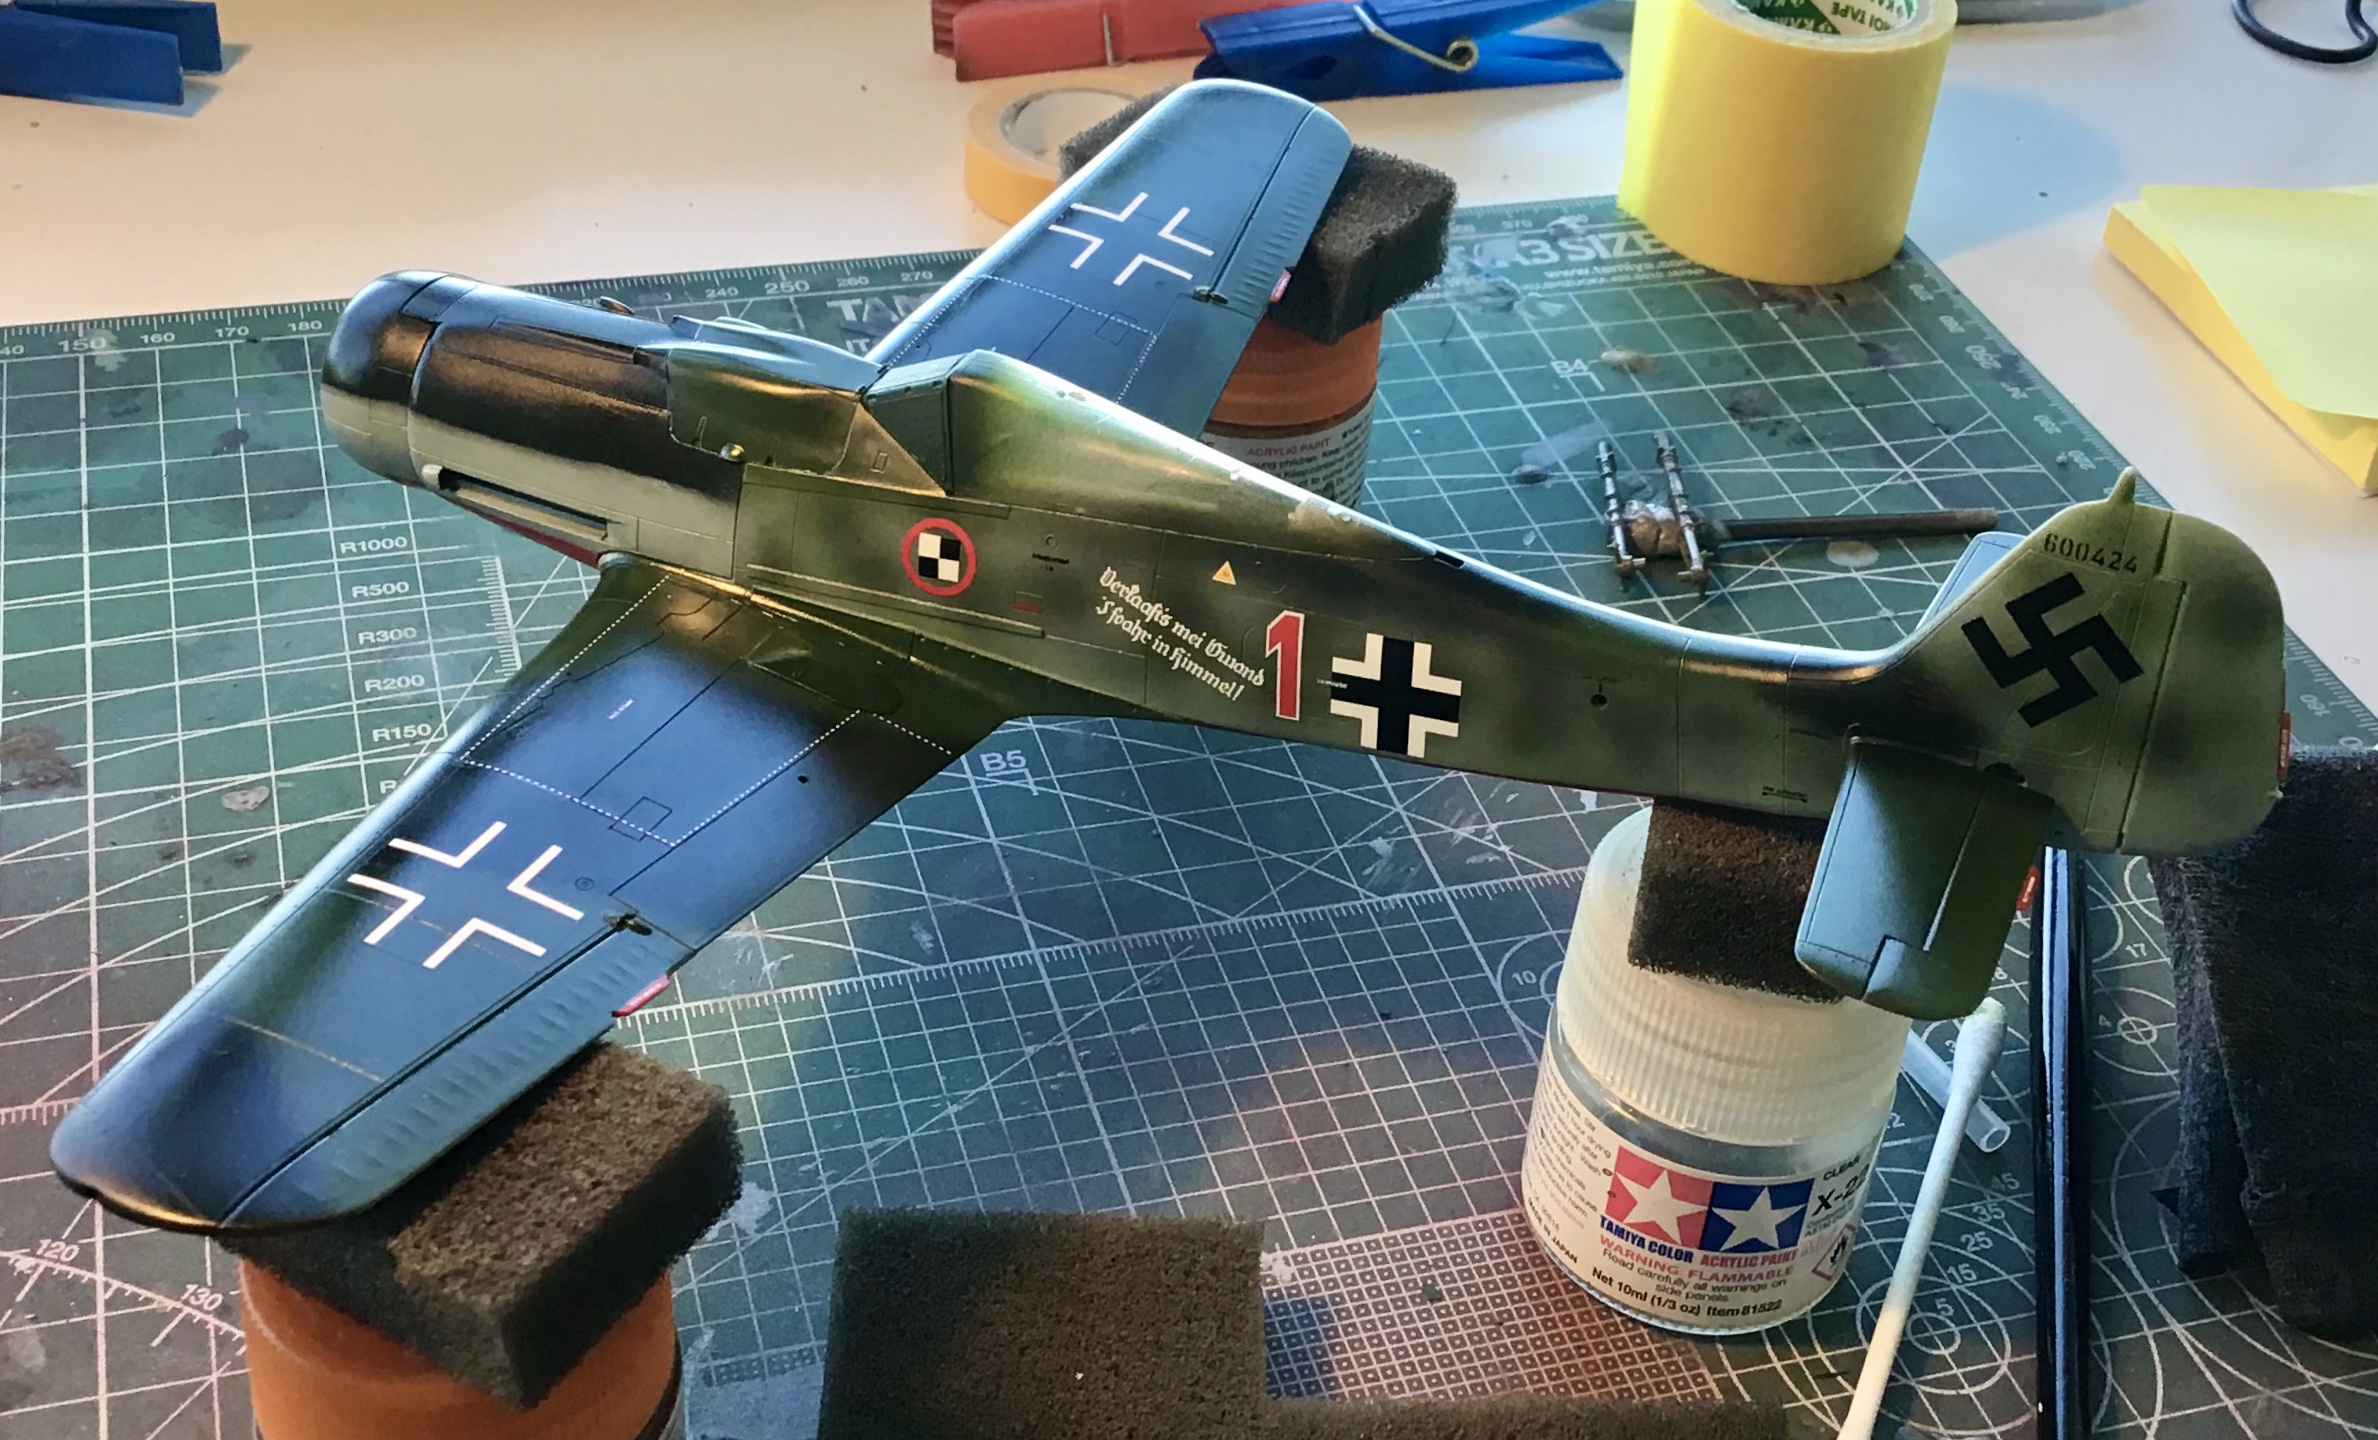
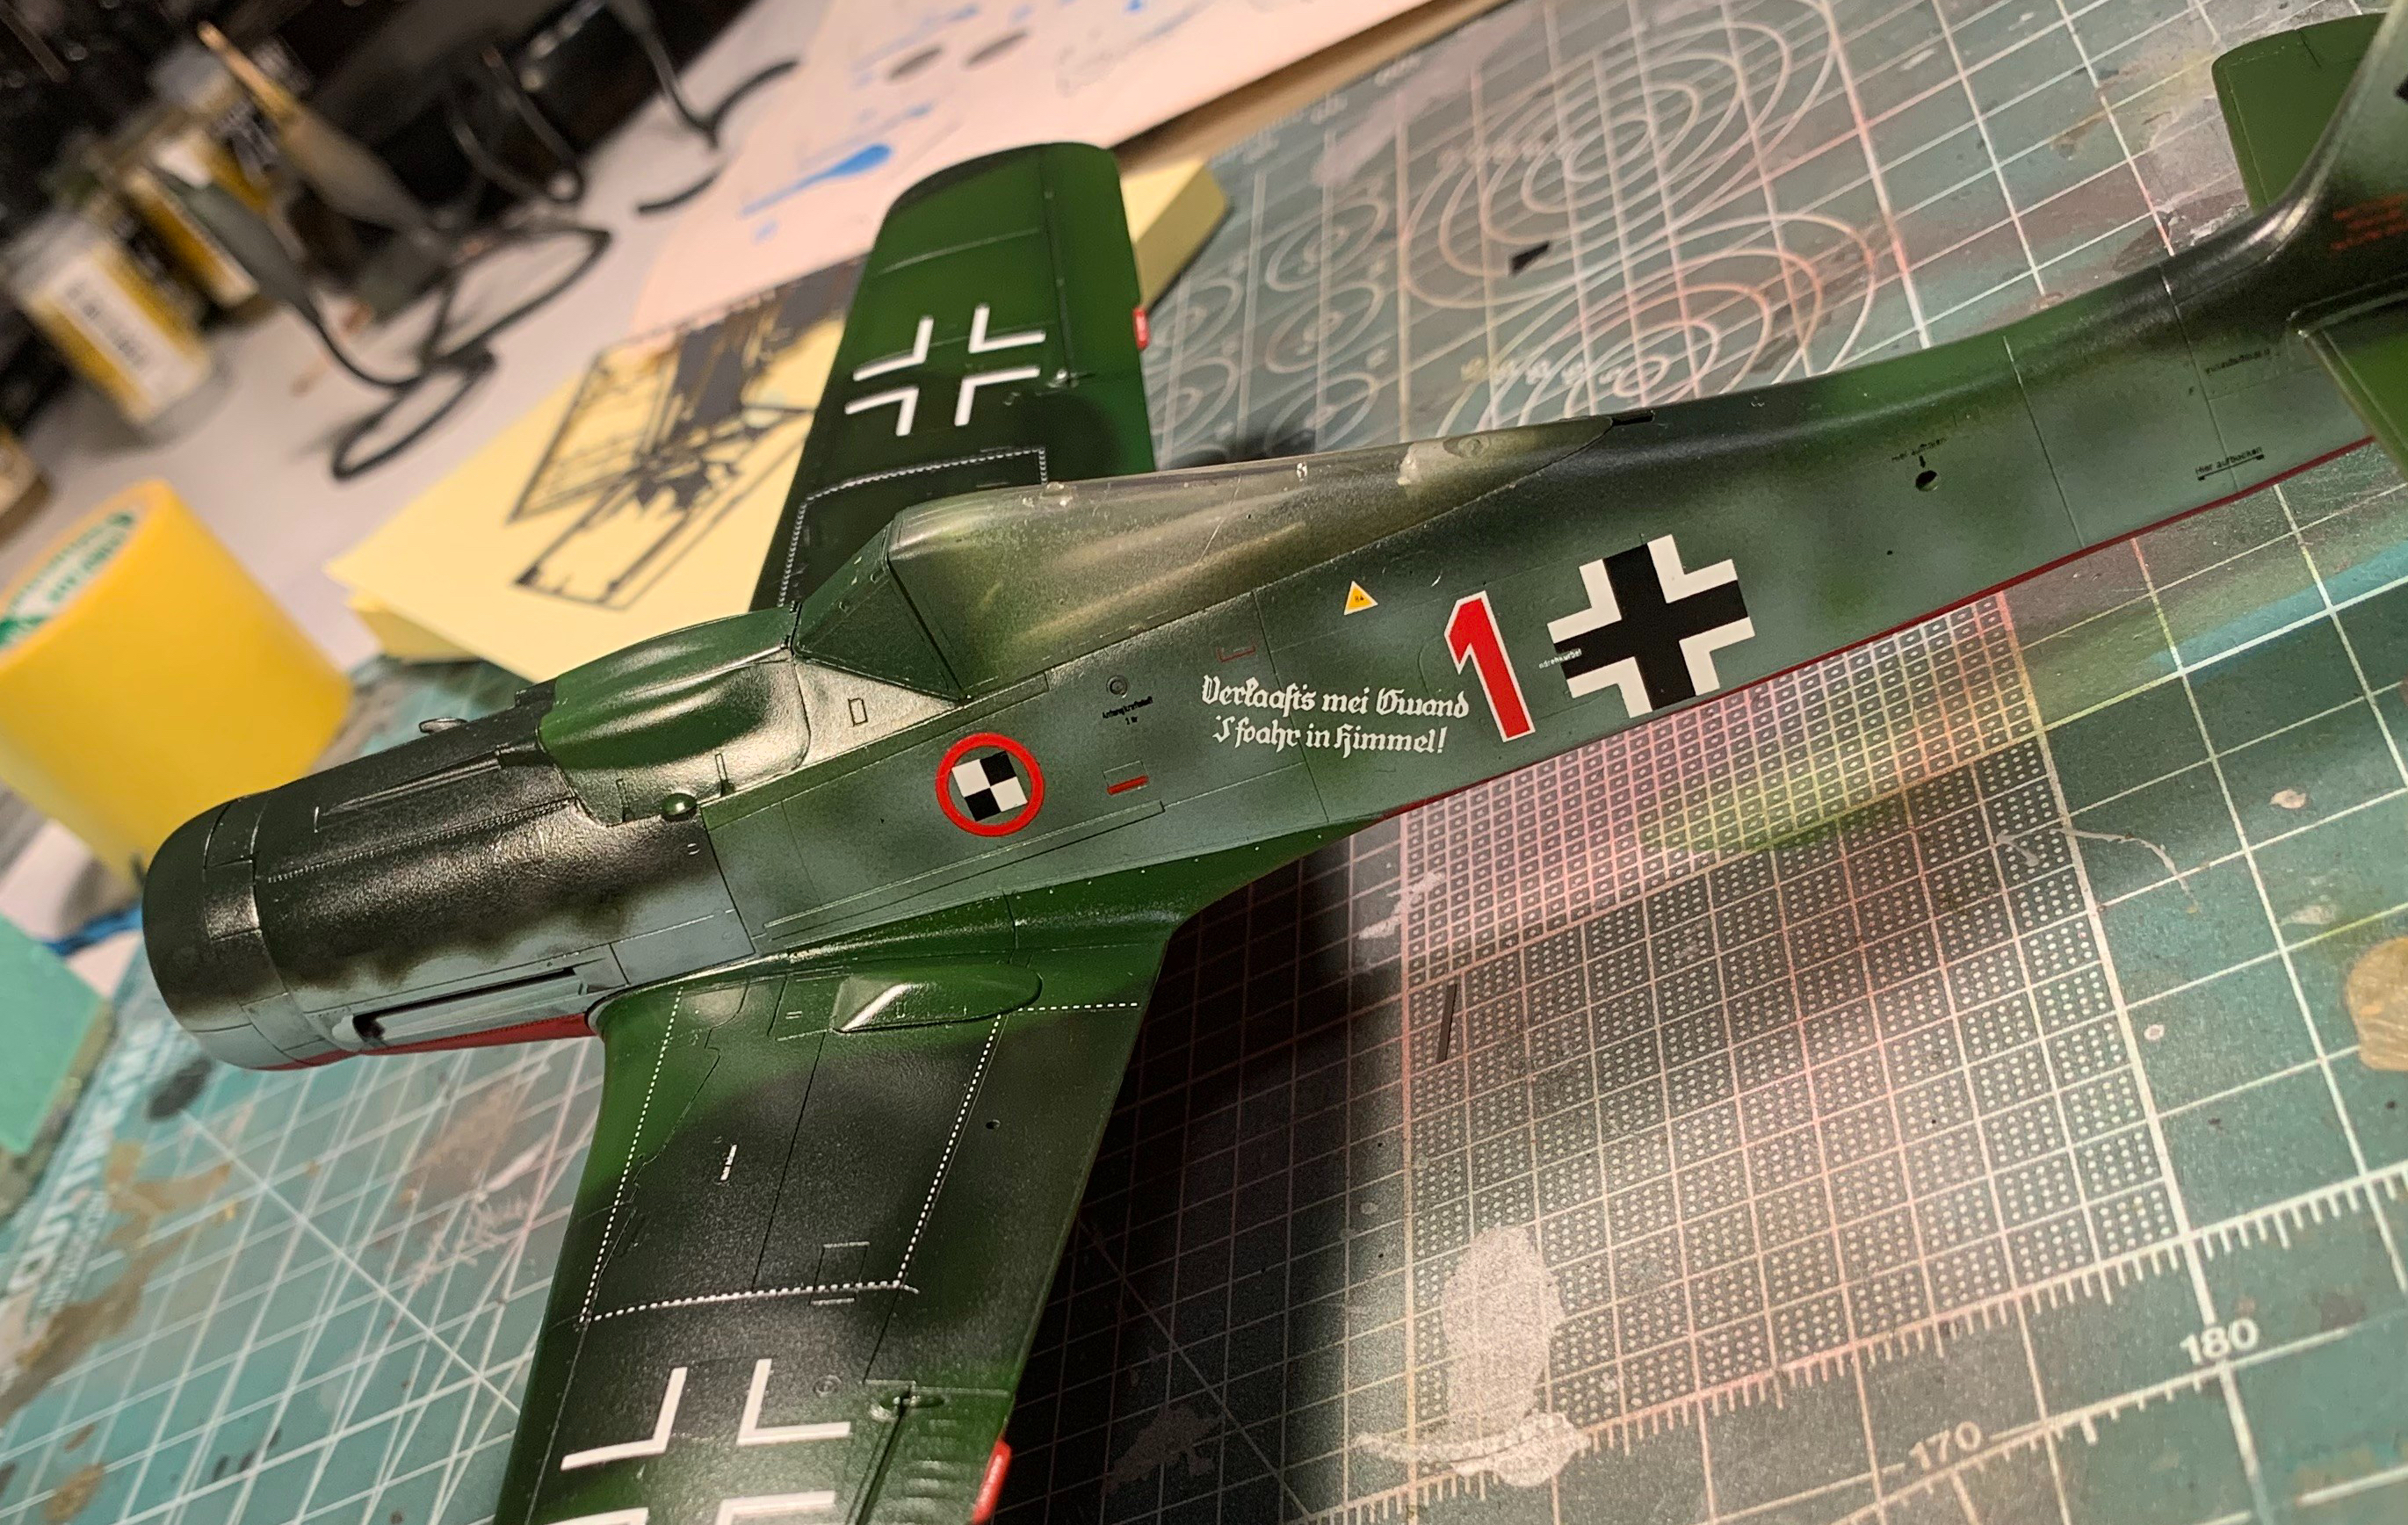
The gallery above shows Rote 1 as it was found at the end of the war. I do not claim to be an expert on either late war Luftwaffe colours, nor the interpretation of black and white images. However, I am pretty good at seeking out solid references and in this case I was fortunate that I had picked up a set of Eagle Editions decals for this aircraft. I’ll come back to the decals later but the research behind them is second to none; the interpretation by Jerry Crandall as well as Dave Wadman and David Brown, all of whom’s reputation in the field is very well respected, is one that I trusted implicitly.
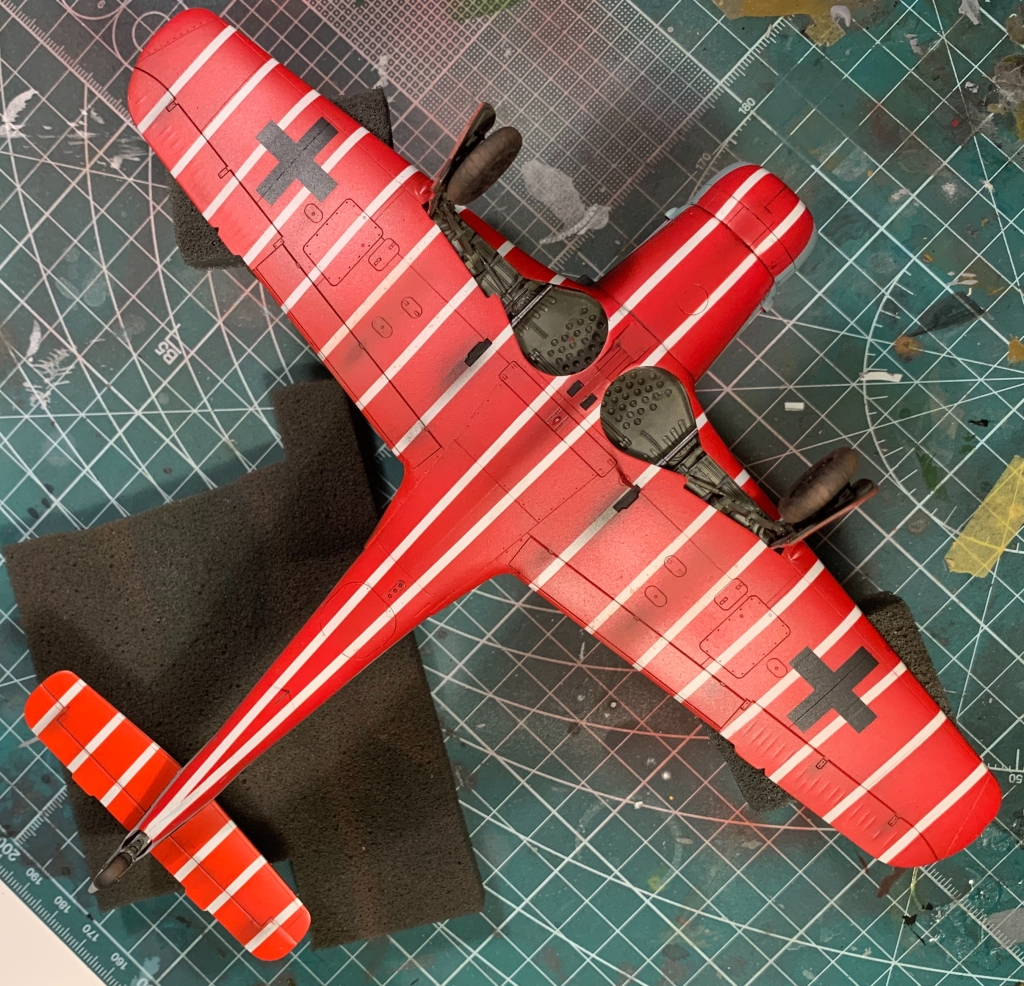
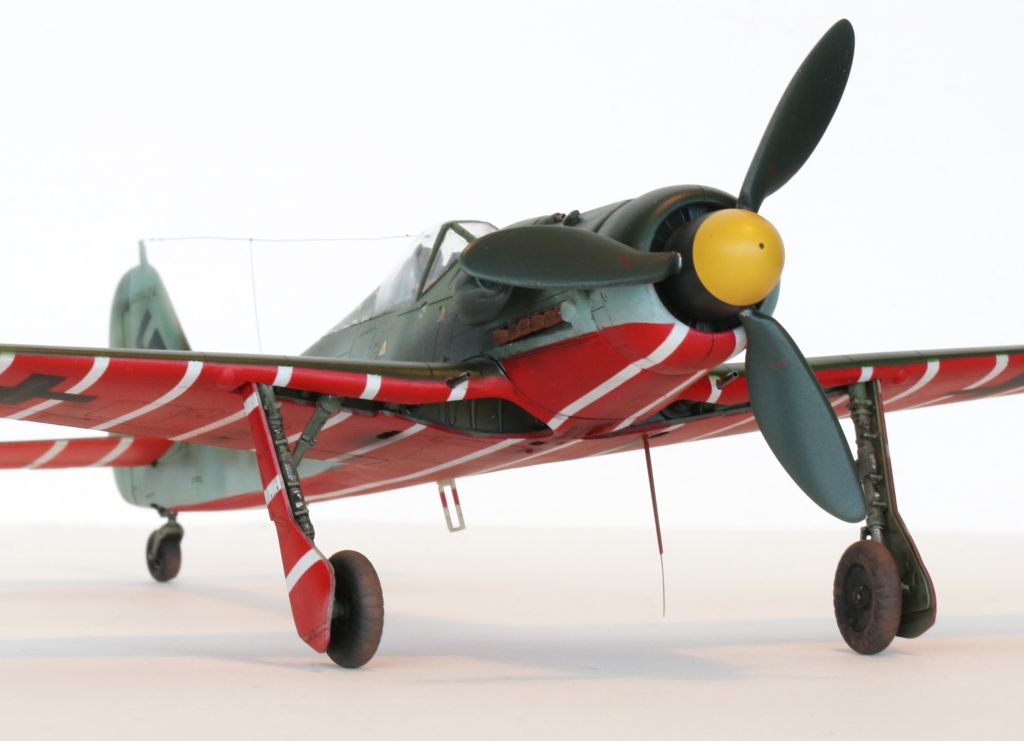
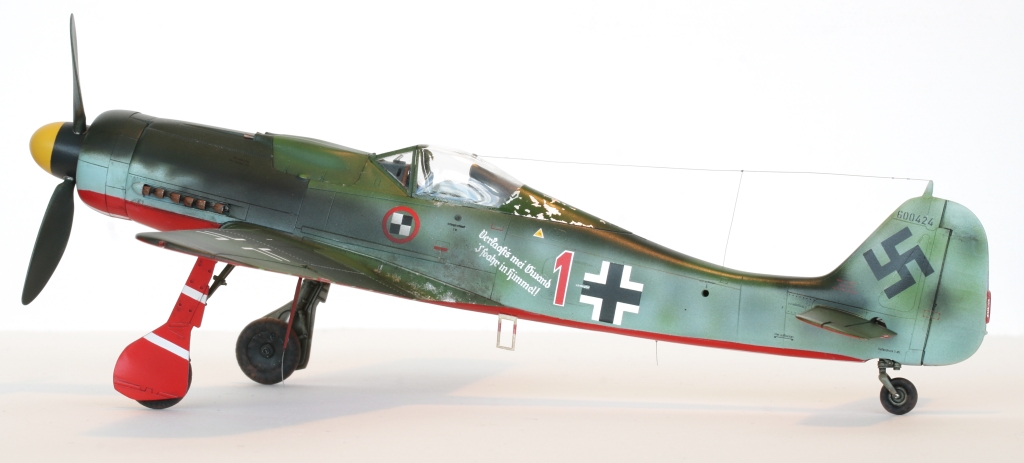
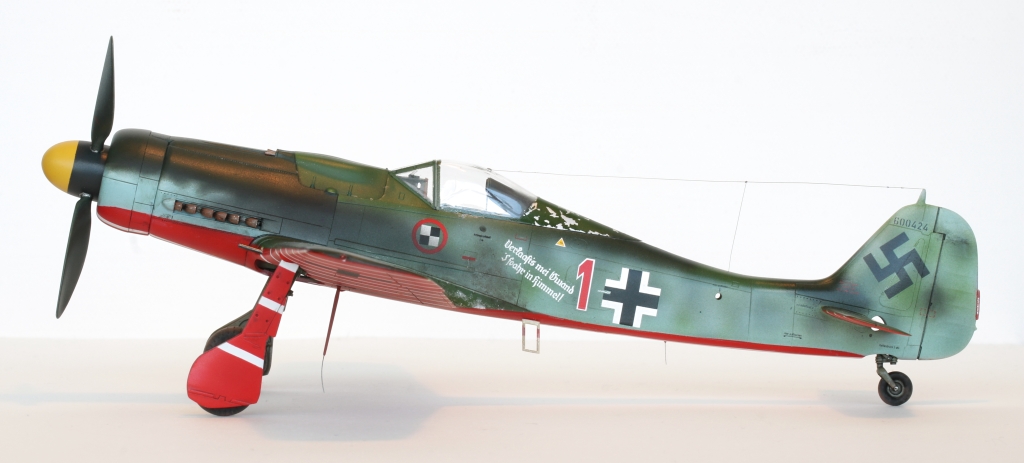
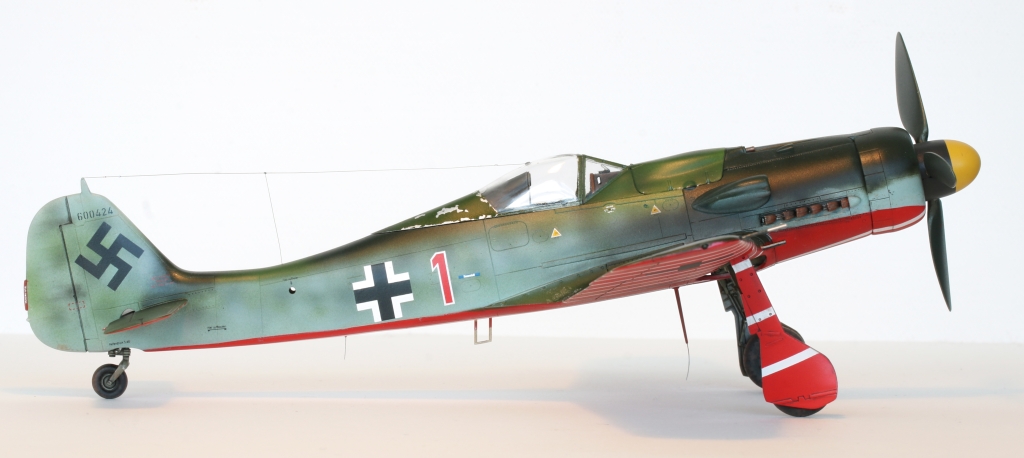
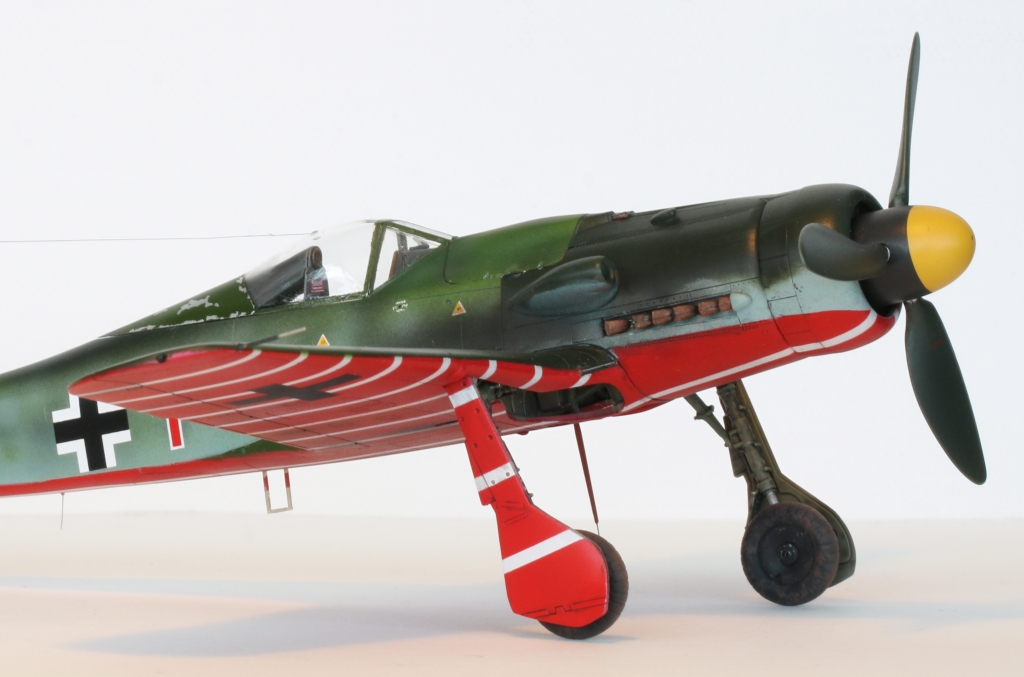
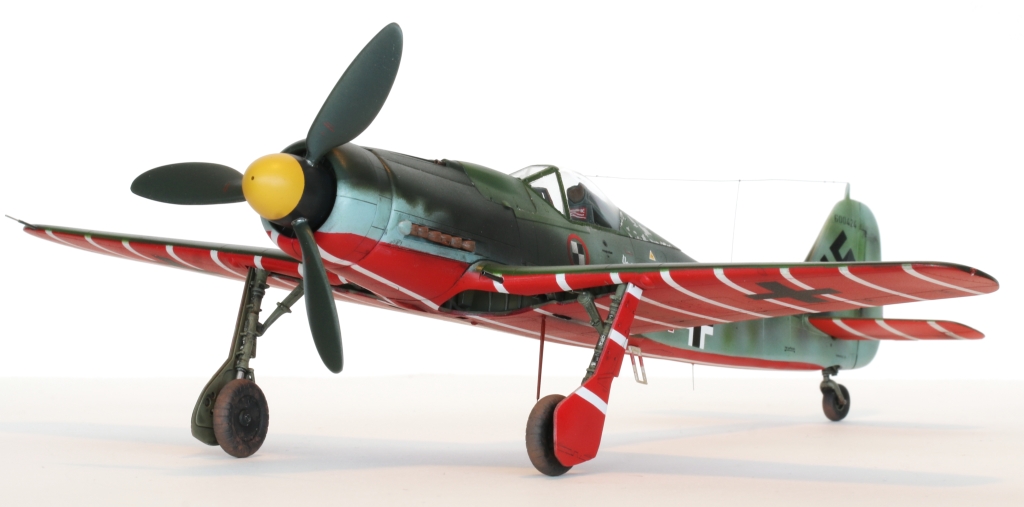
Accordingly, I set up my paints in readiness. The underside was a no-brainer, red with white stripes. The upper surfaces and mottle were late-war RLM82 and 83 with the fuselage sides being based with RLM76. There’s a suggestion that there may be some RLM81 in the mottle, and indeed there may be, but I decided that there wasn’t enough resolution in the available images to decide either way.
I started with the underside, and started that with white, using Tamiya acrylic. Next, I free masked the stripes (because on the real thing there was some variation in spacing and thickness) with 2mm Tamiya tape and then applied the red, using Tamiya’s X-7 Red. Almost immediately though, I knew something didn’t look right but I was so impatient to see how it looked that I removed the masking anyway.

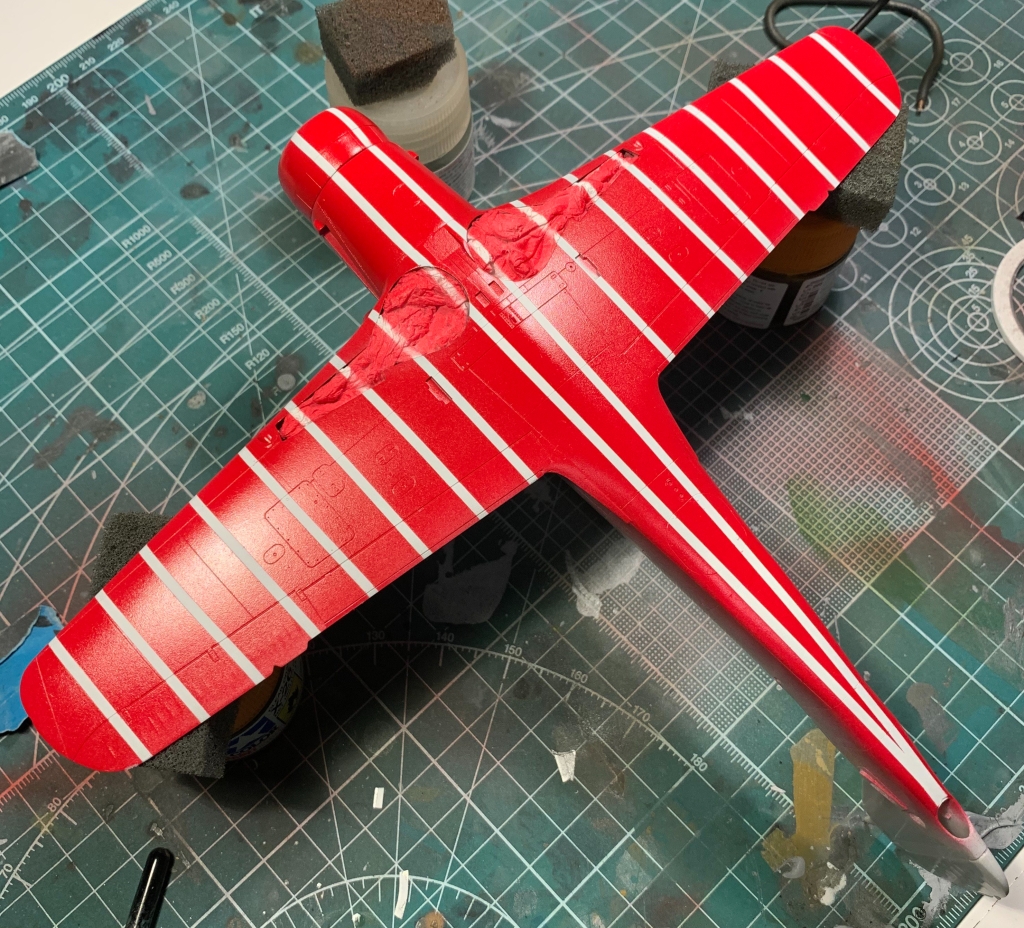
After sleeping on it, I knew what was wrong. The. Red. Was. Too. Bright. Dammit.
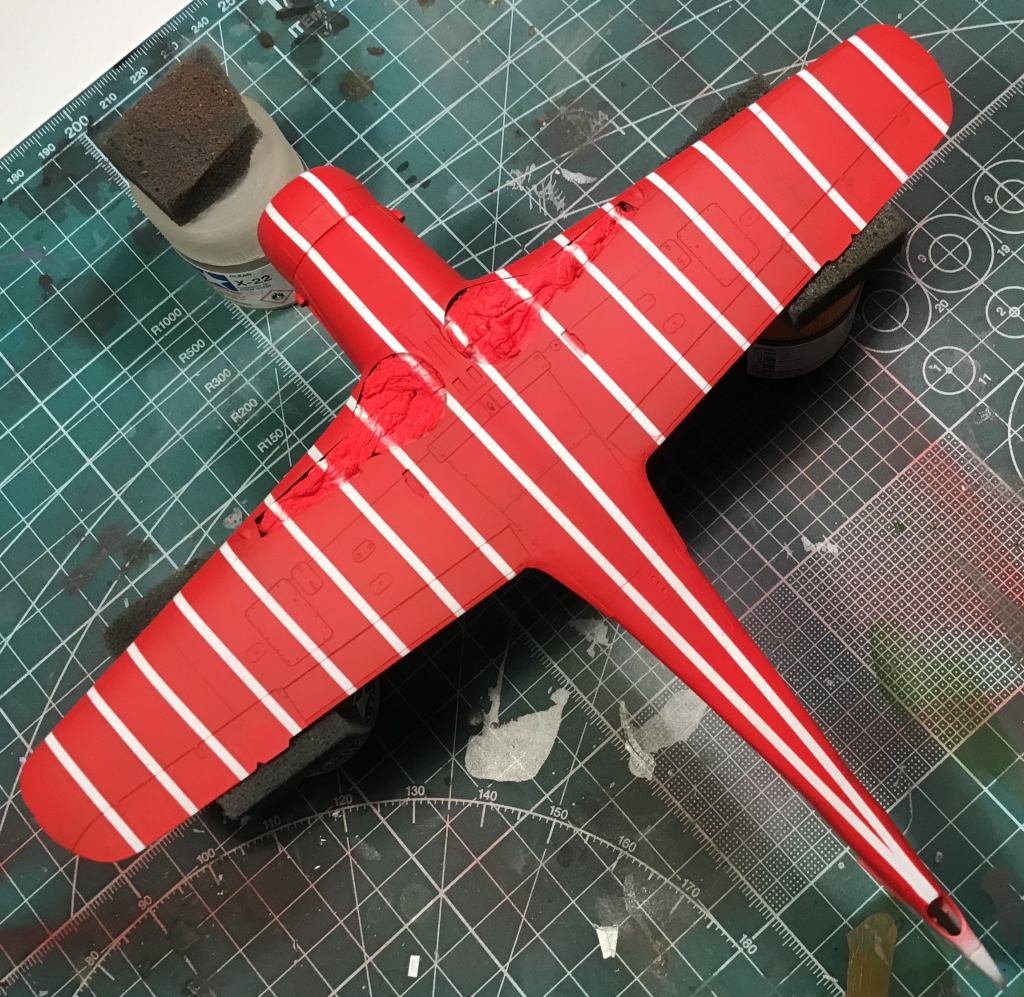
After pondering whether I could tone it down with weathering, or a filter, I decided that it needed to be re-masked and repainted. I carefully masked the white stripes again and this time used Vallejo Model Air Red RLM23 over the previously applied Tamiya paint. I also took the time to add texture and shading this time, too.
Now that I was happy with the underside I left it to fully dry before masking it off in preparation for the next step, the wings.
I really didn’t like Vallejo’s interpretation of RLM82 which was supposed to be a bright green colour. Working from the colour chips on the EagleCal decal sheet as well as other sources on the interwebs, and despite a rummage around my collection of paints, I couldn’t come up with something that was a good match.
So then I looked at my wife’s vast collection of acrylic art paints, surely there would be sufficient to mix whatever colour I wanted? And if so, could they be thinned and sprayed? And then, would they subsequently stick? And if they did, would they stand up to masking? Experimentation was in order…
It turns out that the answer to all those questions is very much yes.
I decided on Windex as the thinner as it sprays well, evaporates quickly and I find it holds the suspension of the pigment better than water. The paint directly from the tube is the consistency of toothpaste so only a little is needed in the Windex.
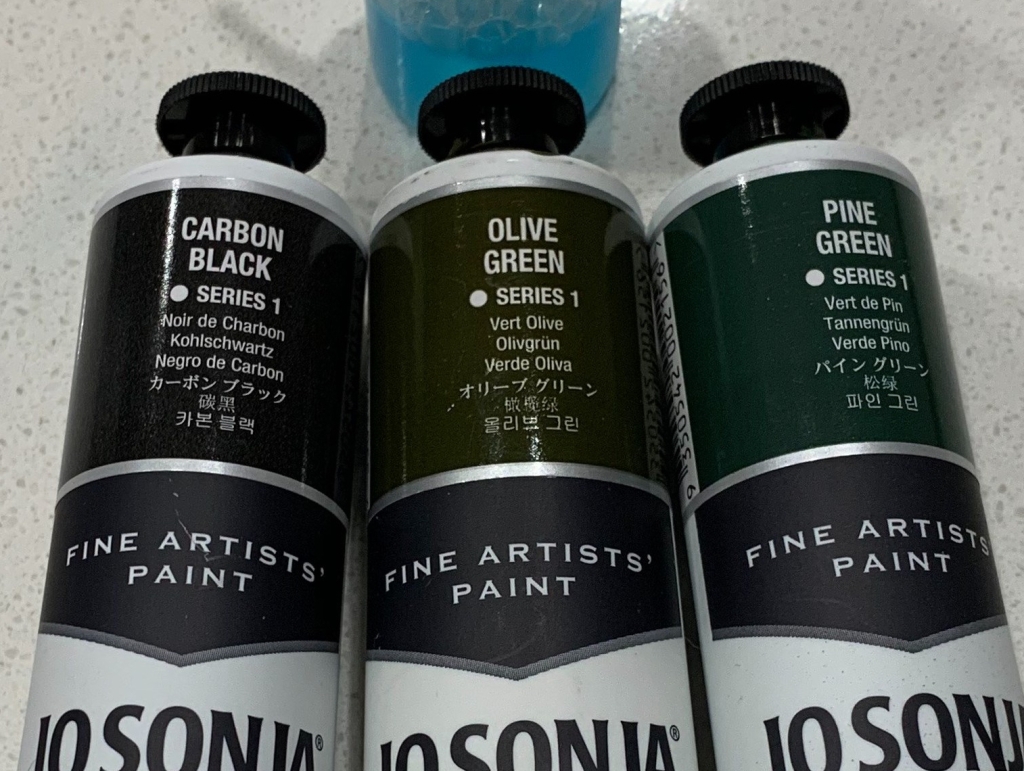
Pine Green was a perfect (to my eye) match to RLM82 and I laid the base RLM82 pattern on the upper surface of both wings. Then, while still working, I played with its shade by adding different filters to the mix in order to build in some texture.
Next, I added some Olive Green and a touch of Carbon Black to the Pine Green until happy with a match to RLM83 and applied a free-hand camouflage the to wings. In the process, I again added different hues to add texture to the RLM83. The paint sprayed very well indeed, especially at the lower pressures I typically use when looking for a tight line, and I was very happy with the result. After just a little back and forth, the wings were done.
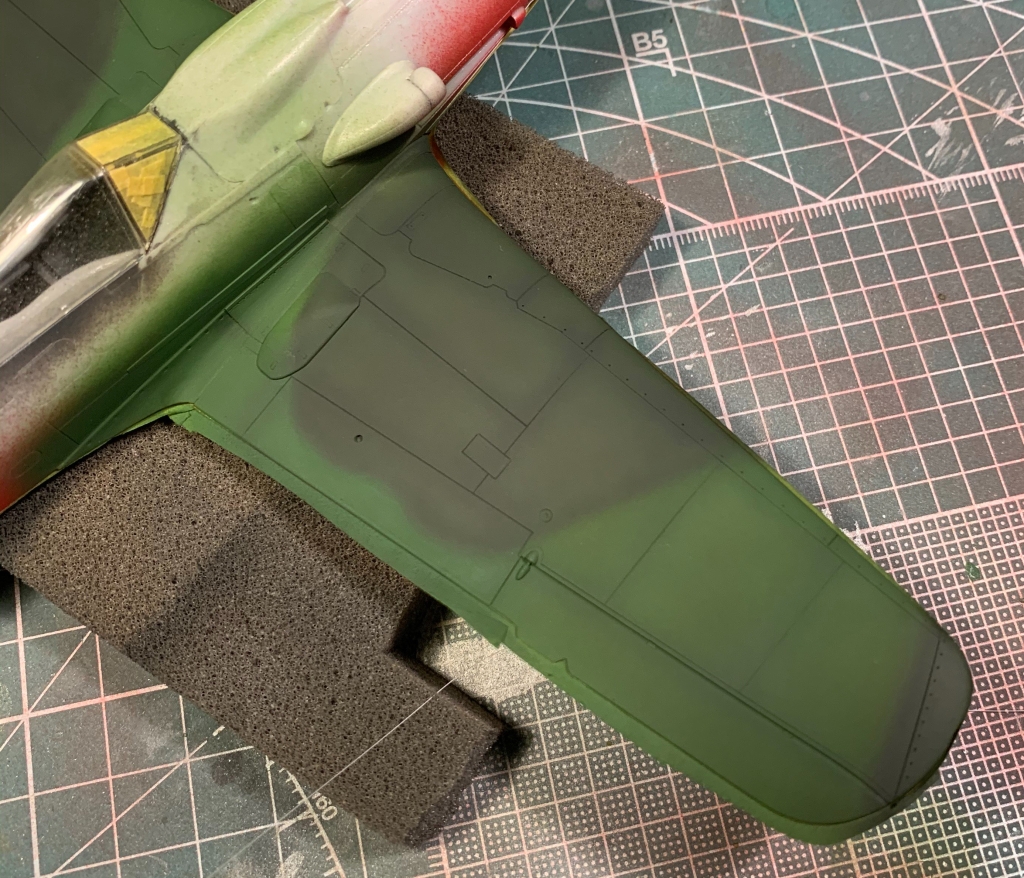

By now, I’m really having fun with this paint. Aside from the requirement to mix colours, there’s literally no drawback to using them. Give it a try yourself, they’re half the price of model paint and will last a modelling lifetime. Before masking the wings, I applied a light coat of Future/Shine to seal and protect the paintwork. I applied some Tamiya tape as a test and pulled it off with some vigour. The paint stayed where it was supposed to, and I then covered the wings completely.
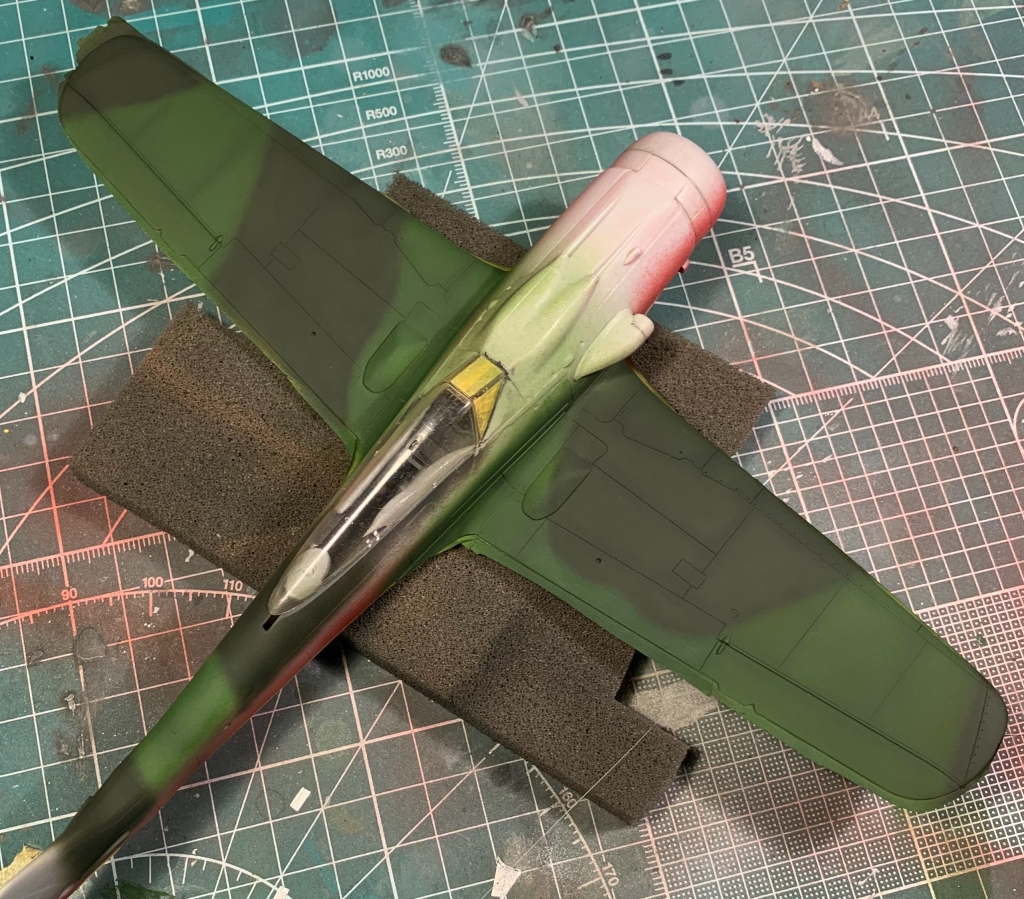
I mixed up a batch of RLM76 with Smoked Pearl, Titanium White and Sapphire and applied it to the fuselage sides and tail. With that done, I applied the mottling and upper colours. Looking closely at the reference pictures it looked to me that the upper engine cowl was a darker shade than the other areas of RLM83. Accordingly, I slightly darkened mine too for that area.
Regular readers will not be surprised that I forgot to take in-progress pics of the remainder of the painting, so here’s what it looked like after I added the gloss coat and started to apply the decals.
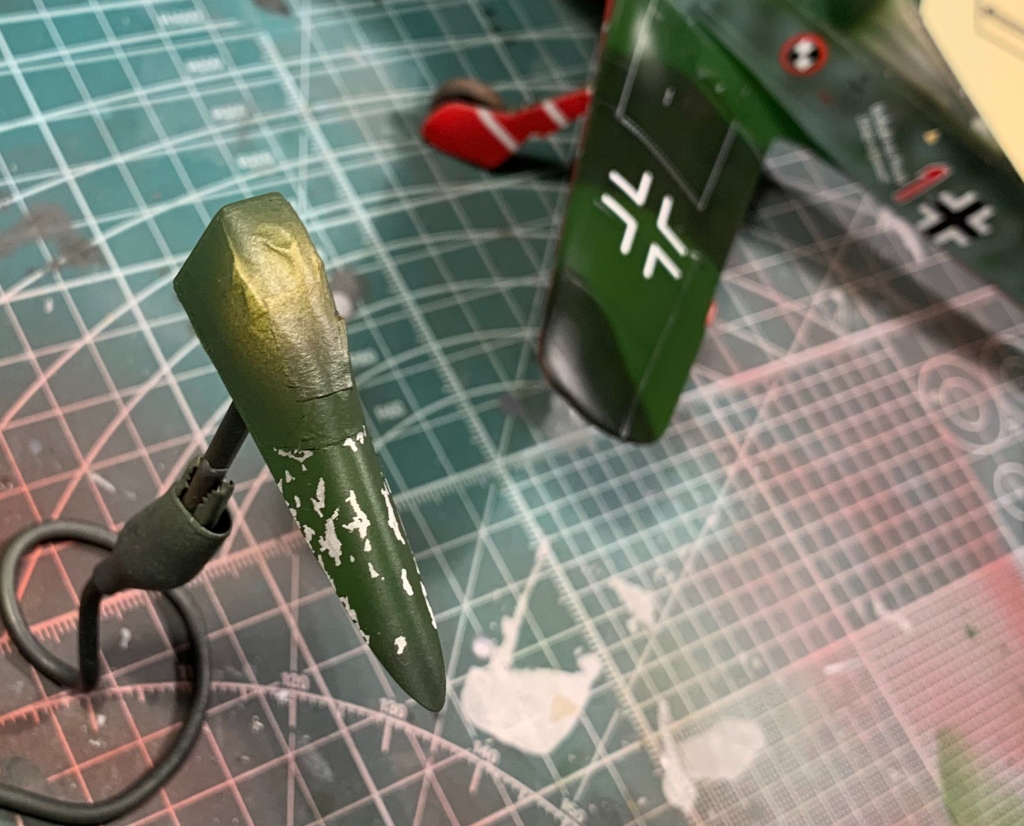
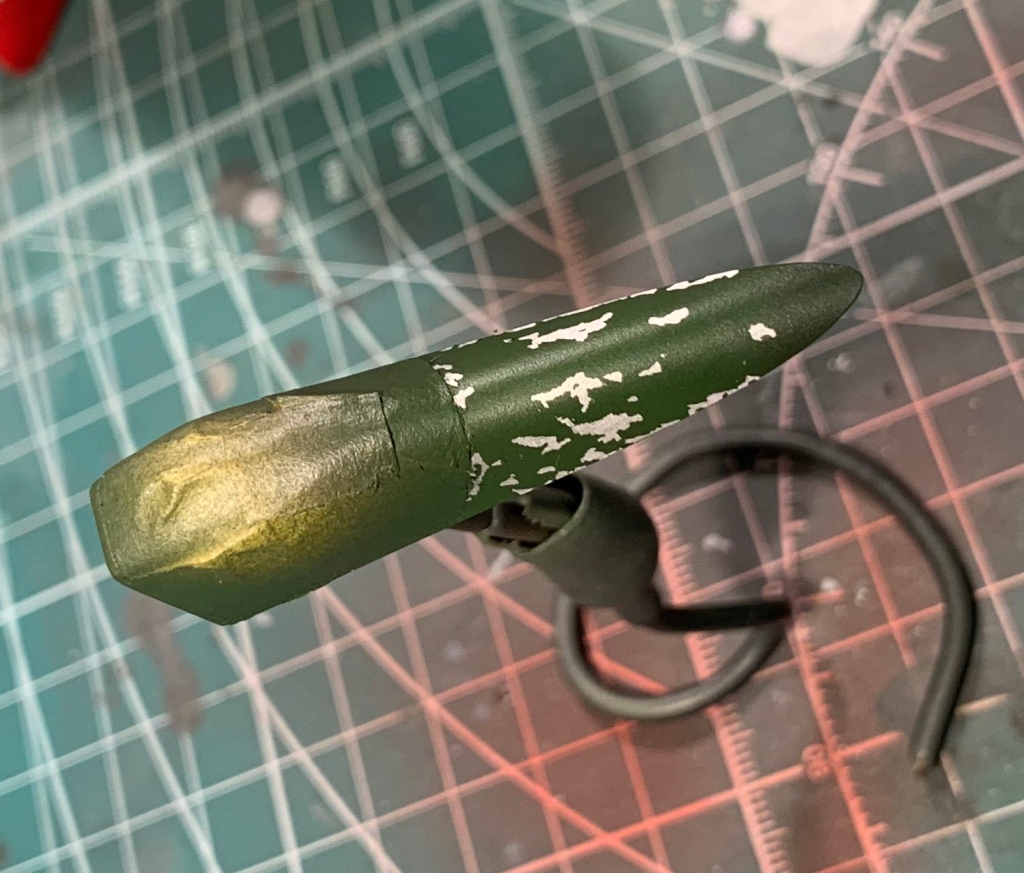
Meanwhile. I worked on the canopy. Images of the real Rote 1 show the paint on the rear portion of the canopy was quite chipped and I wanted to replicate this somewhat more accurately than with a silver pencil or some other surface technique. What better than metal?
I applied some Bare Metal Foil first, then painted. When the paint was well and truly dry, I carefully chipped it away with a toothpick. This is the result;
Markings…
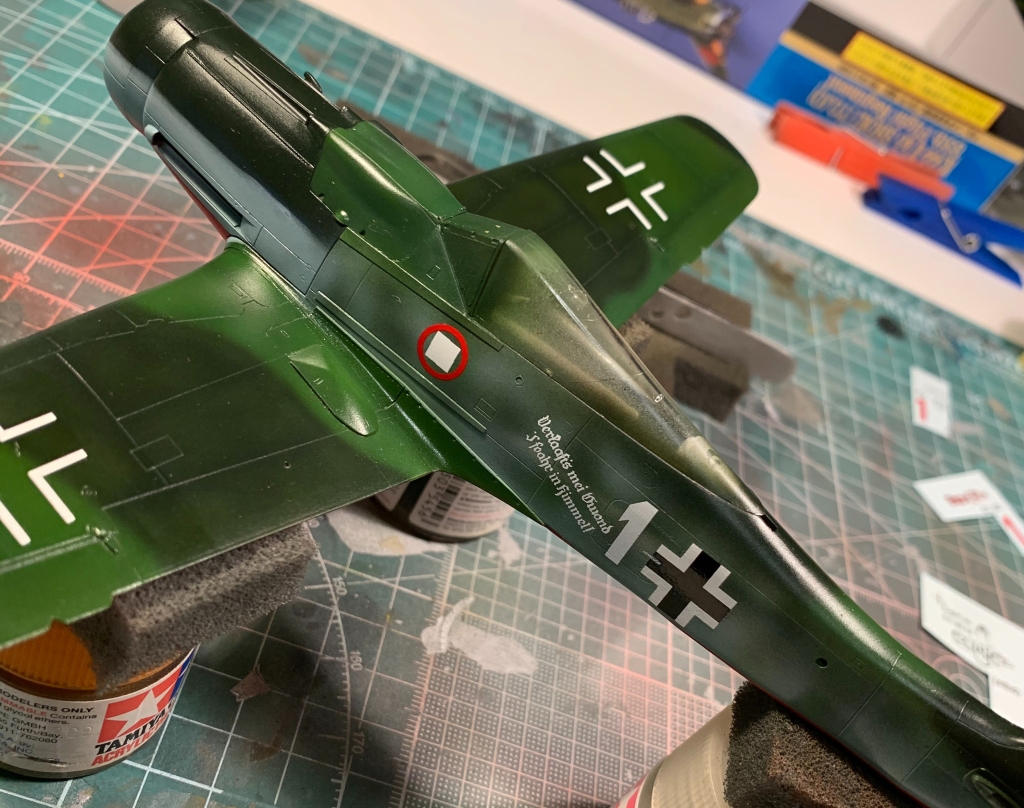
Using the the kit decals was out of the question as they are so old, thick and yellowed; besides which I had the EagleCal decals. I fully expected a trouble-free decalling session as I had a very good clear coat which I’d polished to a very smooth finish.
Unfortunately, the decals were quite tricky to apply and several of the first few showed a irritating tendency to silver. I started by using MicroSol and Set but when they didn’t work very effectively, I moved to Mr. Mark Setter. This worked better but the stencil decals in particular silvered at the slightest opportunity, even when great care was taken with both the preparation and application.

I finally found a measure of success with Future/Shine floor polish; I’ve used this technique sparingly in the past because it has its own [potential] issues, but by floating the decal on to a small dab of Future and letting it dry naturally, the Future shrinks and sucks the decal down snuggly, eliminating the possibility of silvering.
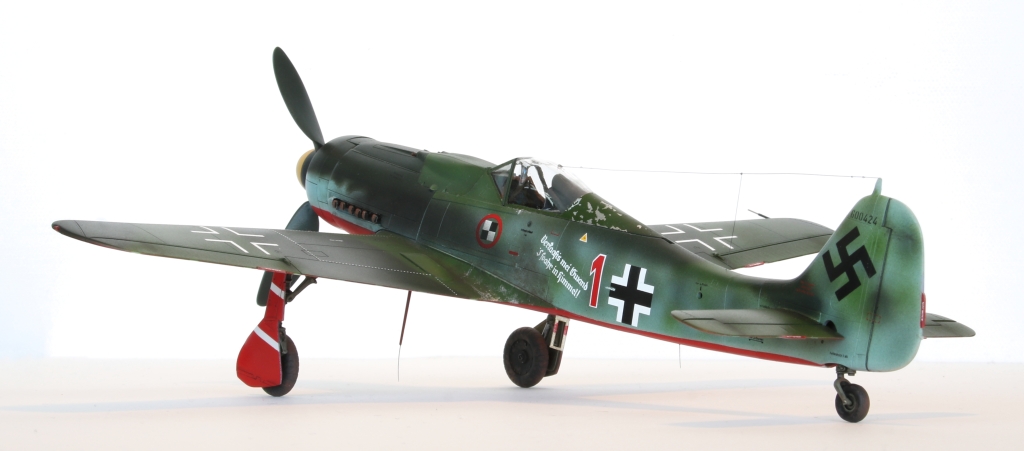
As the pics of “Rote 1” show them quite clearly to be present, I applied all of the stencil decals except those on the underside. Luckily there weren’t too many and the task didn’t take more than a couple of evening sessions.
I think [hope] the issue with the decals was likely due to their age; they were quite thin but the adhesive seemed non-existent as they floated off the backing paper and this is what I think caused the issues.
Finishing it all up…
How to weather…? The Papagei saw little action in their role with JV44, and while it’s true that the aircraft themselves had come from other units, I assumed (I know, that’s a minefield in itself…) that they’d have seen some measure of care as befitting aircraft belonging to Galland’s last unit.
Certainly, the undersides having been freshly painted with the red/white stripes would have been clean. From that starting point, I decided the undersides would need to be fairly clean on my model with only some panel line accent and a little staining required to represent my Papagei.
The uppers, though. A study of the pics above led me to following conclusions;
- As Werk Number 600424 was built by Fieseler, Kassel and was one of the last blocks of 190Ds to be built, it seems likely that it was approximately four months old when transferred to JV44.
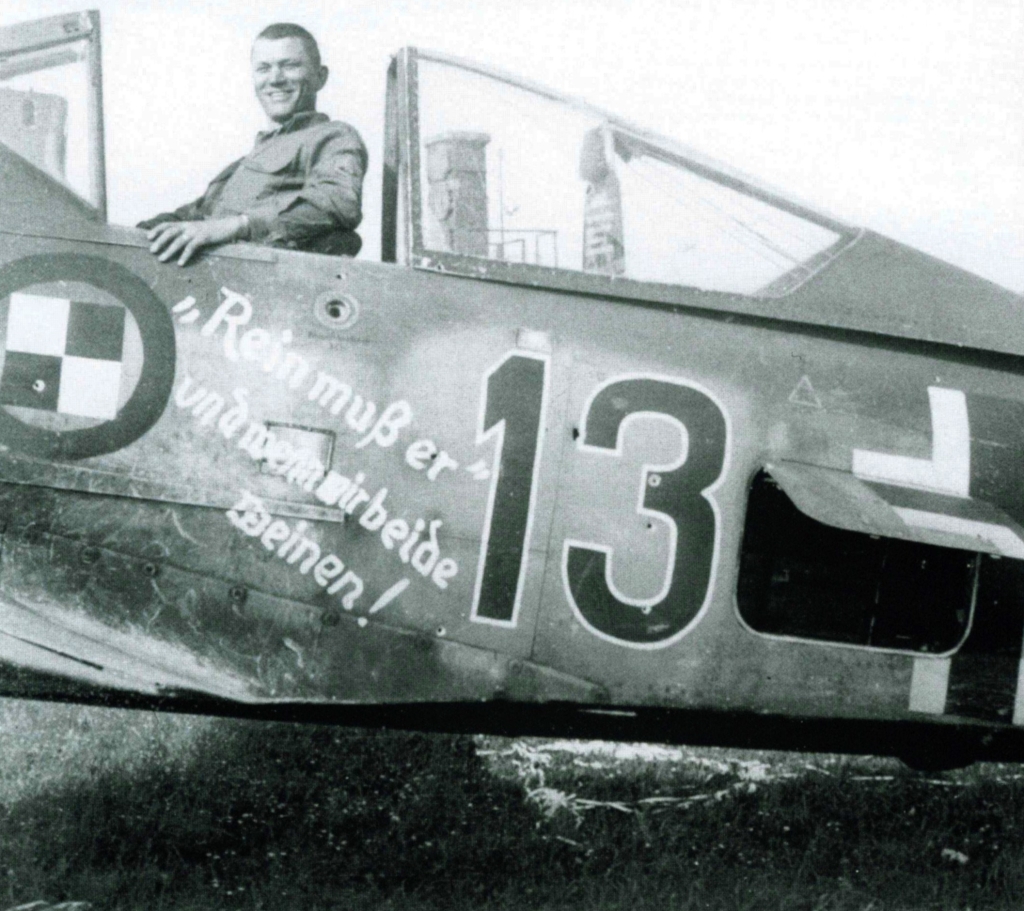
- The pics at top left (not my subject but same unit) and at bottom indicate here was some, but not excessive paint chipping and wear on the wing roots and therefore it could be surmised the same would have been true for the rest of the airframe.
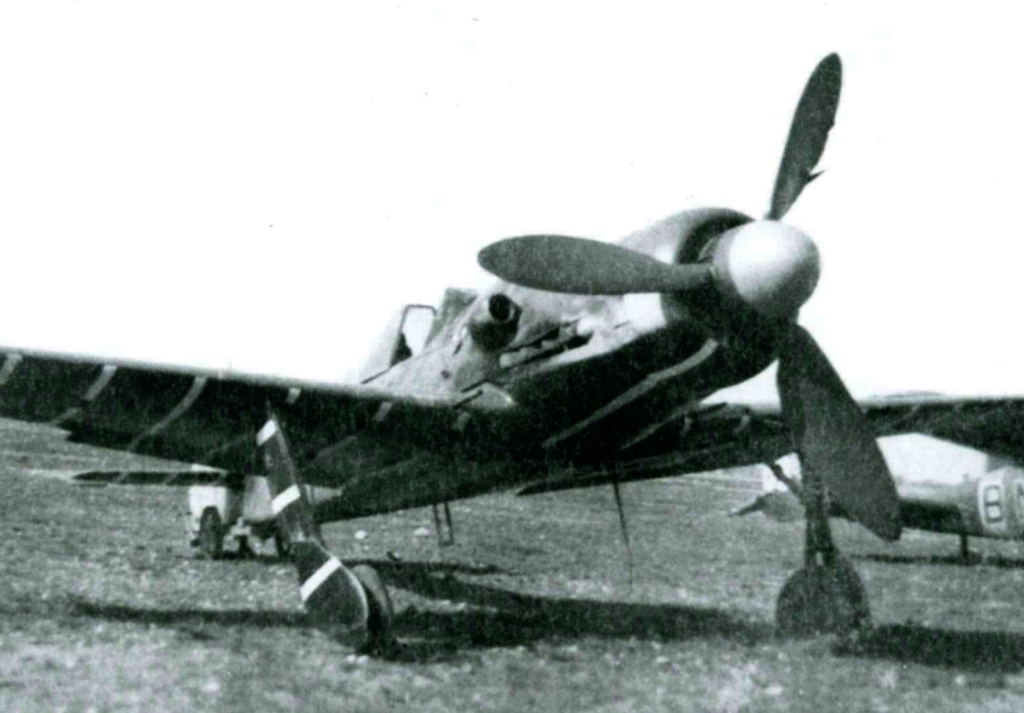
- The pics at top middle, top left and bottom show there isn’t a a great amount of exhaust staining though there is obviously some visible on both sides. As usual for very late war aircraft, the staining is very dark, almost totally black.
- Based on the preceding assumptions I’ll compound the risk by assuming that the general griminess of the airframe would be at low to moderate intensity.
- As usual, the photos do NOT show every panel line, hatch or contour in stark relief so I’d stick to my normal approach of accenting only the control surface panel lines along with those hatches that would have seen a lot of maintenance such as weapons, ammo and engine access.
- The weather in Munich during the second half of April 1945 was quite wet with around 19mm of rain between the 20th and 24th and a further 25mm between the 26th and 30th (source http://www.weather.us); as the unit operated off a grass airfield I surmised the underside and wheels would exhibit some mud spatter and staining. It’s possible this could be visible on its wheels in the upper right picture.
As is my usual practice, I started with the undersides. I think I do it this way so that if I mess anything up it’s going to be less visible; call it practice.
I started with a wash to accent a few access panels and the control surfaces. Next, I applied some light staining with the airbrush, blowing in a little grime around the hinges of the ailerons and flaps as well as some discolouration from the shell casing ejectors.
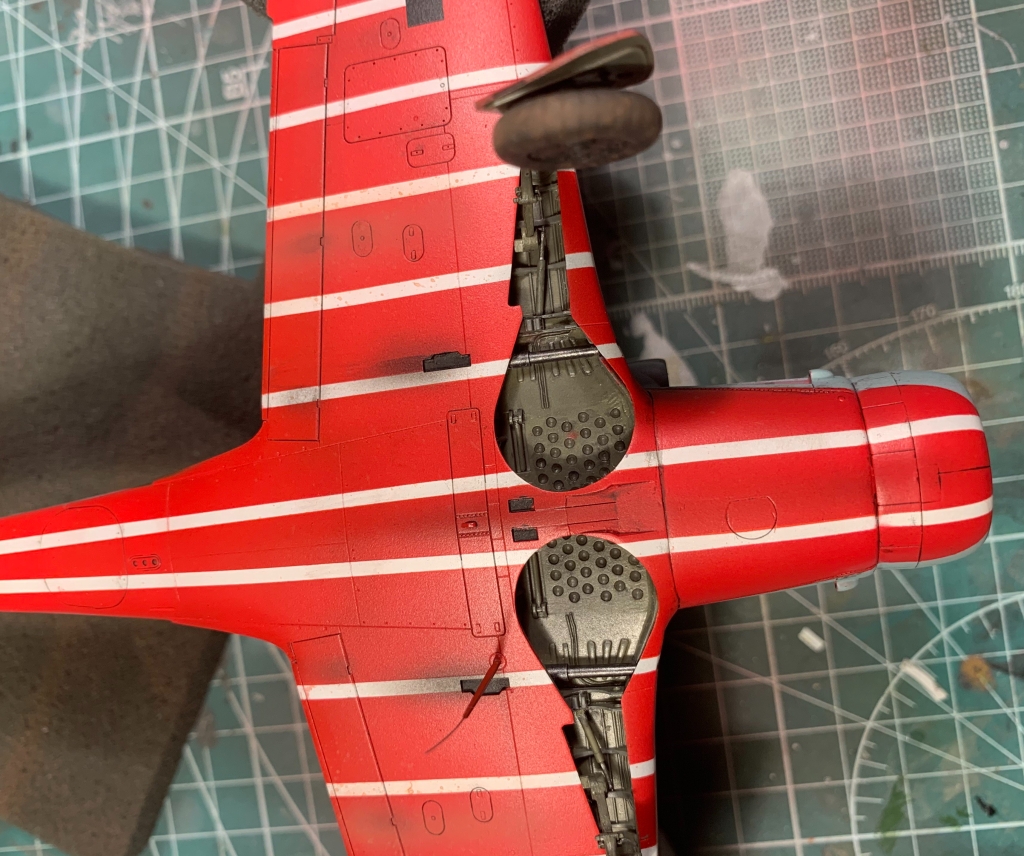
I also applied some mud splatter where the main gear and prop wash would have sprayed back some on to the wings. With that done I sealed it all with a flat coat. Finally, I added some mud splatter to the main wheels.
With that completed, I applied a very light, well thinned coat of gloss again; I find this give a very smoothed out metallic property to the finish. No matter how flat the paint finish, these things were made of very smooth metal and I’ve come around to the viewpoint that a slight sheen represents this well.
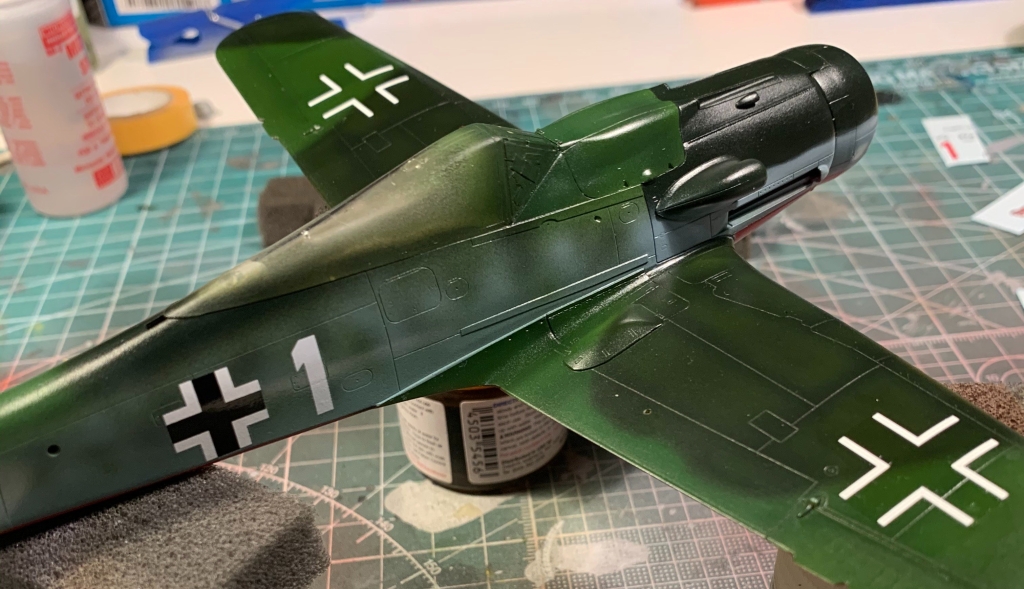
Next, I began on the upper surfaces. The process was the same but there are more of bits and pieces to attach. I actually began by improving the forward cowl RLM83 paint line which I though I could live with but ultimately could not. That done, I accented the control surfaces and engine cowl panels and sealed all that with a very light coat of thinned Future.
Next, I tackled the exhaust and other staining with the airbrush. Always a bit scary, but another huge benefit of using the craft paints is that mistakes can literally be cleaned up instantly with a moist cotton bud. Literally. More than once when I didn’t like how a particular stain was shaping up I simply wiped it away and started again.
Once I was satisfied I’d struck the right level of grime, I applied some paint chipping with a silver pencil – I’m not completely happy with how that turned out but I couldn’t make it any better. In addition, I also added some staining with pastels; there are two particularly stained areas, one at the rudder hinge and also on the fuselage side where the pilot climbs into the cockpit.

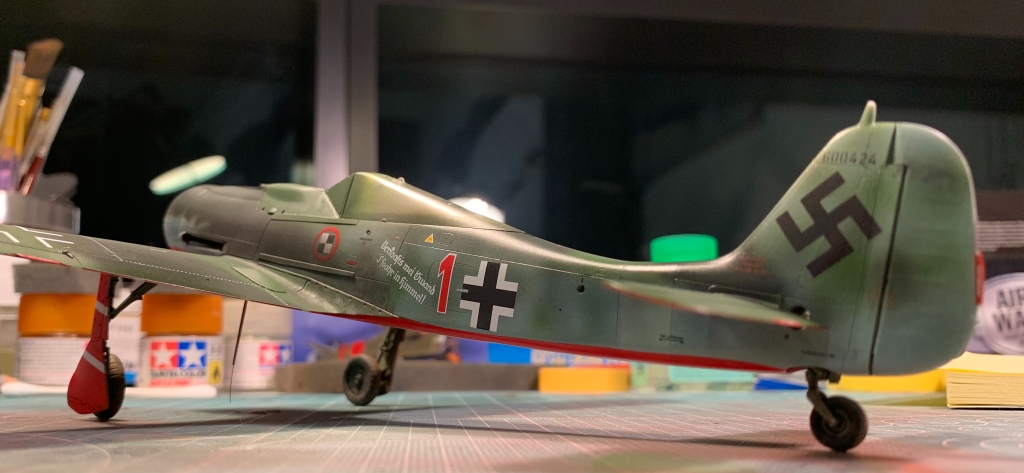
After sealing all down with a final flat coat, I applied a final thinned coat of Future, just as I had on the underside. I varied the intensity of the sheen between as some parts of the airframe and wings would have been more or less exposed to wear, traffic and elements than others.
There were two main sets of tasks remaining to finishing the model off; the various gun barrels and pitot tube plus the sub-assembly which is the main canopy and antenna line. The gun barrels were straight forward and I used the kit-supplied tubes. In tackling the canopy it became apparent very quickly that 90% of the effort, had I followed the instructions, would have been for naught as it would all be hidden. So I didn’t bother with it. Although the contemporary images show that Rote 1 was captured with its canopy open, I chose to display mine with canopy closed (it looks better that way IMO), and consequently the antenna line would be tight. Finally, I left off the undercarriage indicators on the wings as they aren’t present in the contemporary photos above.
Gallery
References and Credits
- http://fw190.hobbyvista.com/werkn.htm
- https://www.eduard.com/out/media/1154.pdf
- https://www.eagle-editions.com
- https://www.asisbiz.com/history.html
Copyright
Copyright: I claim original work and Copyright 2020 for the text in this article and the photos of the model. As usual though, I am indebted for the material used in research listed above in the References and Credits section. Except where noted otherwise, I sourced all other images and photos from the internet and are used under fair-use. Any copyrighted images will be removed or credited forthwith upon request by its rightful owner.

Leave a comment