

The basic munter hitch, steps 1 to 3
Get Hitched: Munter Hitch Tips & Tricks
Coffee Pot
Read Time - 10+ Minutes
July 2020
If a climber were only to learn four knots, the munter hitch should be one of that four.
A munter can be used for belaying and lowering, depending on its orientation. To change from belaying to lowering, the hitch needs to rotate through the axis of the carabiner, however the load strand should always be parallel to the spine of the carabiner. Using a munter hitch generates a large amount of friction and this should be considered when using it.
However, the munter hitch can be recruited for further uses and broaden your arsenal of skills, with the following tips and tricks.

Tying an MMO steps 1 to 3
The Basics
Munter-Mule-Overhand (MMO)
The mule hitch allows a climber to tie off a munter hitch. Combined with an overhand, when tied on top of a munter, it is commonly used in more complex sequences using munter hitches. One of these is described below.
The mule is a type of slippery hitch which is easy to untie after loading. But, should always be backed up with an overhand on a bight. If you are short on rope, it is possible, but less preferable to clip the loop formed by the mule hitch with a carabiner.
For tying adding a mule-overhand to a munter (MMO), the steps are as follows:
Step 1: Make a loop with the brake strand over the load strand.
Step 2: Take the bight from the brake strand, run this behind the munter and pass the bight through the loop.
Step 3: Pull the hitch tight against the munter. Tie an overhand with the bight, and clip both strands with a carabiner.
The auto-locking munter hitch
Going Up
The Auto-Locking Munter Hitch
A munter can be converted into an auto-locking knot. This is useful for quickly going hands free, or for using the munter as an improvised progress capture. It is worth noting however, that once the auto-locking munter is weighted, it cannot be released.
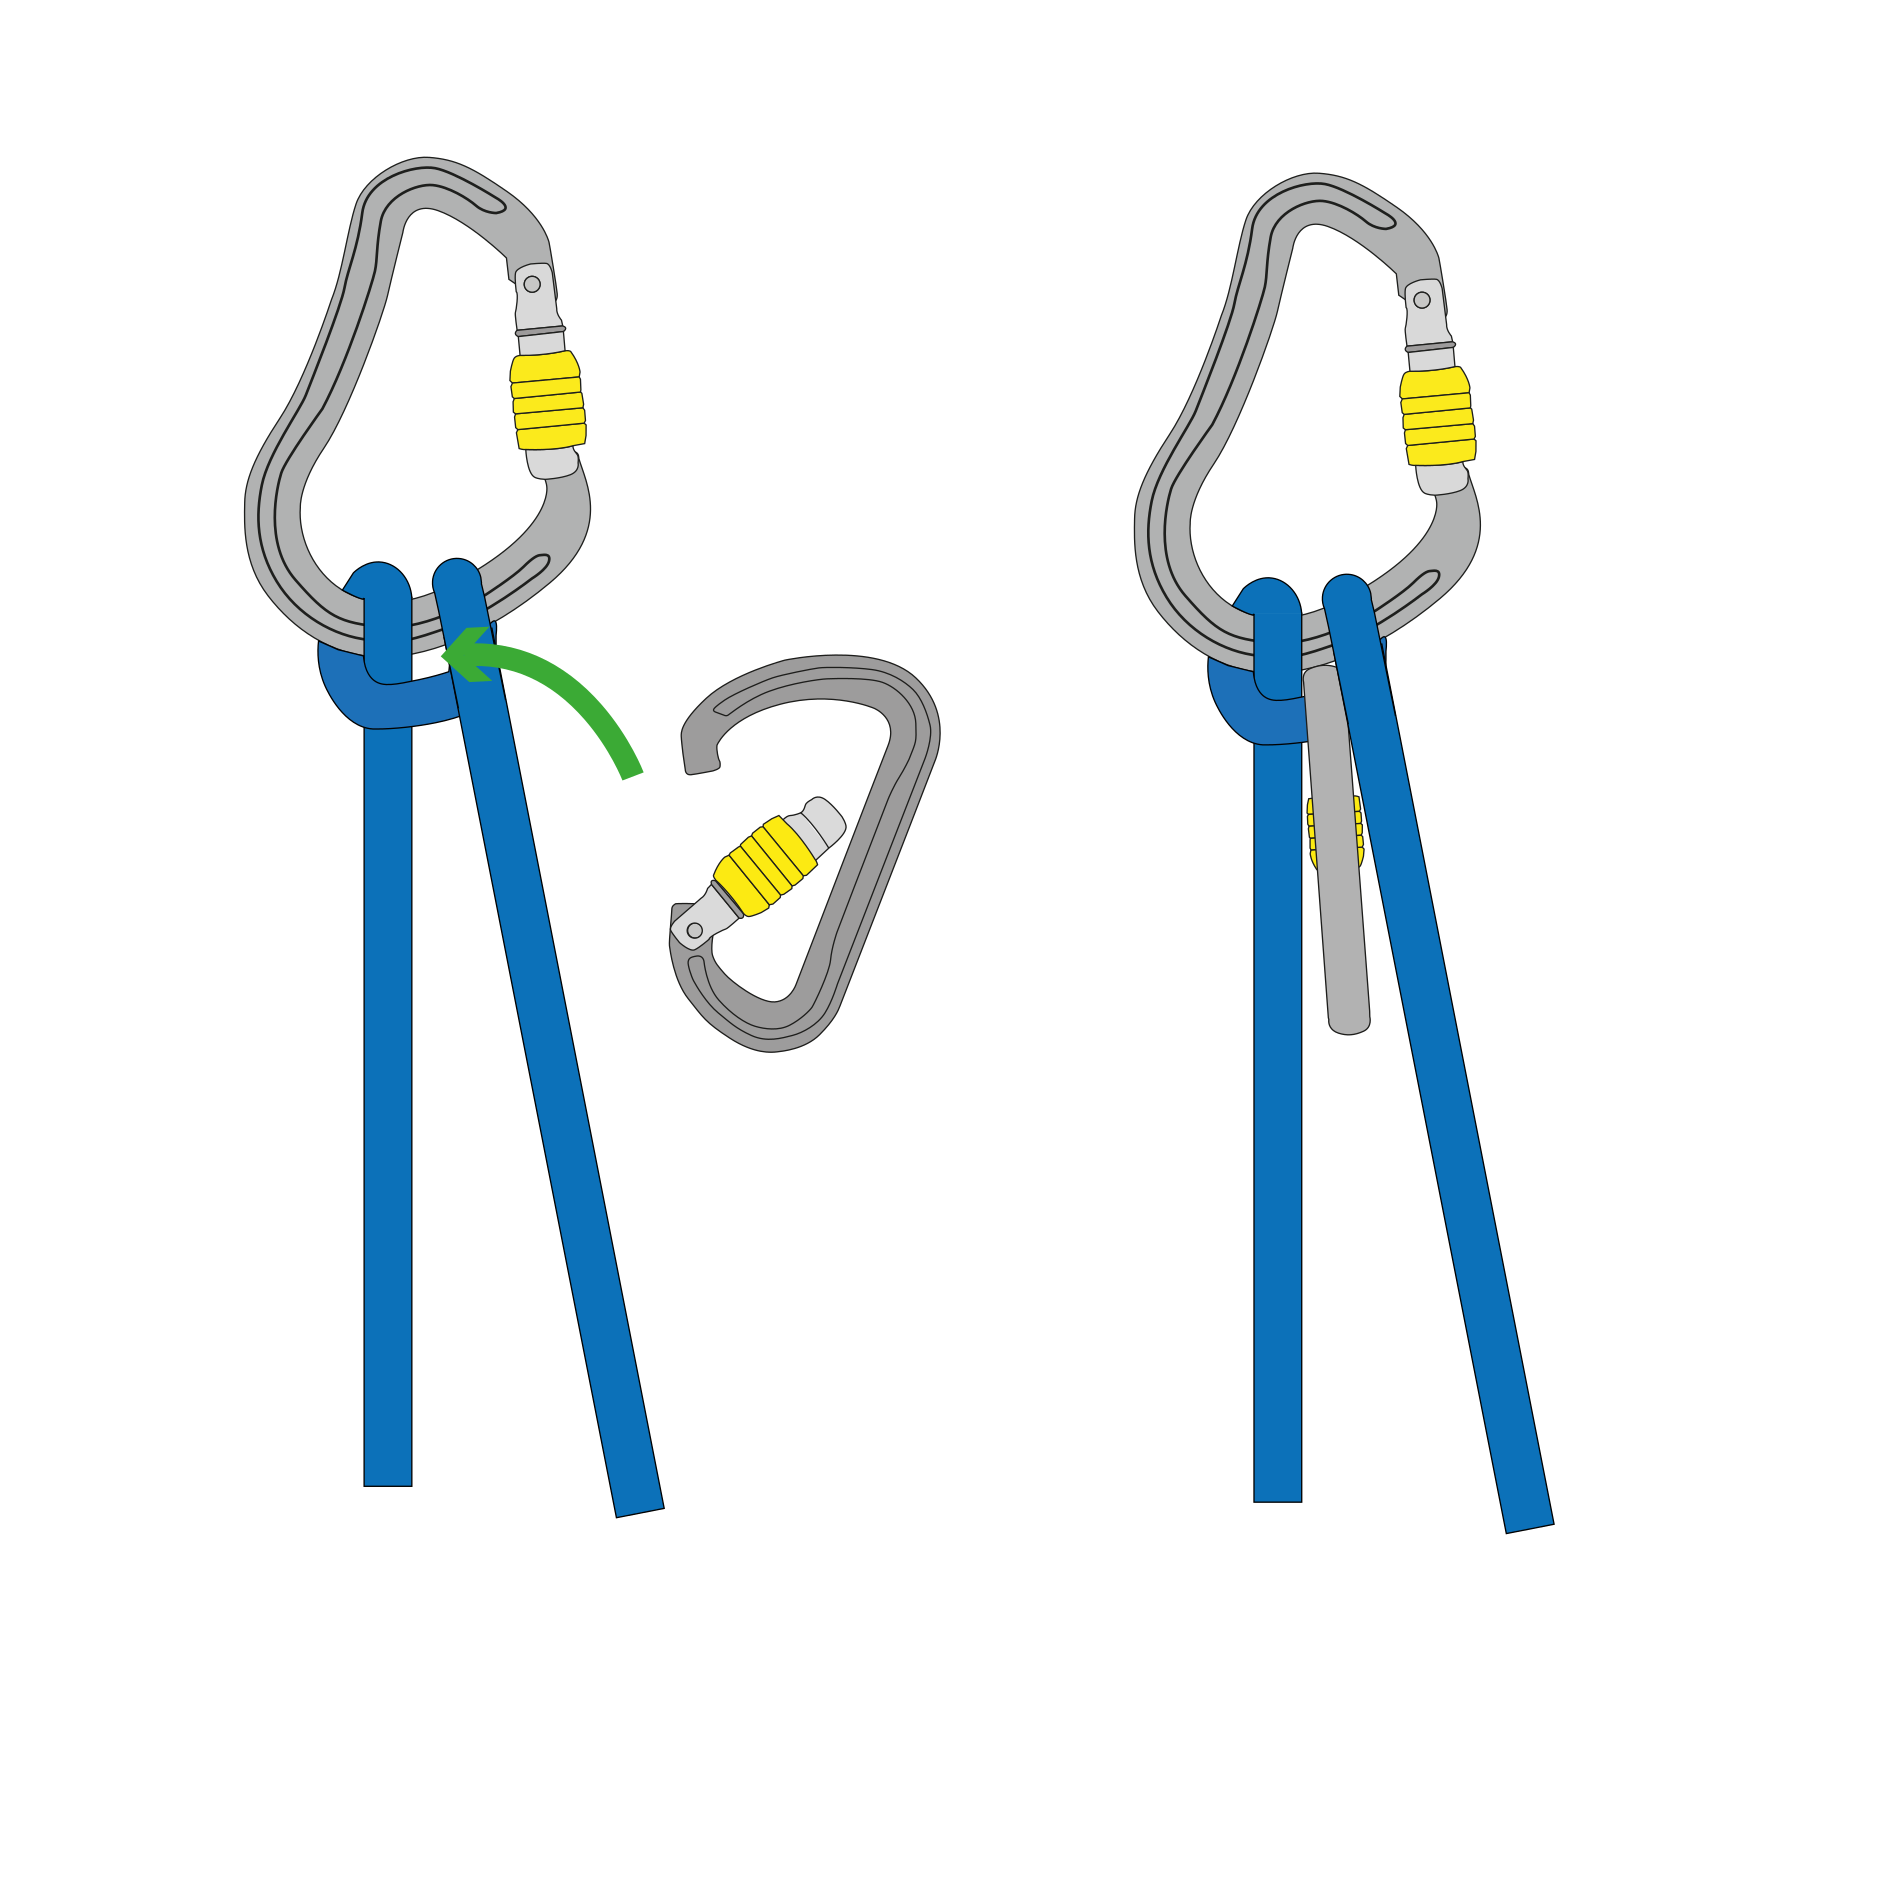
Step 1: Ensure the munter is oriented to bring up a second.
Step 2: Clip another large locking carabiner around the load strand and the loop which passes around the brake strand.
Step 3: Test to ensure the munter locks, before committing to it.

The munter force through
Going Down
The Super Munter
When working with large loads, it is advisable to use a ‘Super Munter’. After tying your first munter, simply tie a second over the top. The Super Munter lends a great deal of control when lowering.
The Munter Force Through
On adventurous or multi-pitch climbs it is common to climb with two ropes. Here, climbers have the option to conduct a long lower by tying their ropes together. Although, doubling your lower length, you are in effect placing a knot half-way down your line. As such, you need to set up accordingly.
The munter force through is the simplest set-up, requiring only a single large HMS locking carabiner, and no additional rigging. However, it is also the least secure, and easiest to get wrong. A hand should always be kept on the brake strand when conducting a force through.
Step 1: Tie your two ropes (X and Y) together with an overhand, leaving sufficient tail.
Step 2: Tie your climber into the end of rope X.
Step 3: Tie a munter on rope X and orient it to lower.
Step 4: Lower the full length of rope X until the knot joining ropes X and Y nears the munter.
Step 5: Allow the knot to pass around the munter until it begins to drag the main loop down.
Step 6: Forcefully push the knot and its tails through the munter, and continue to lower on rope Y.

The munter pop steps 1 to 7
The Munter Pop
The munter pop is a technique for releasing a loaded munter from a carabiner. It can be appropriated for use in a lower scenario.
Step 1: Tie your two ropes (X and Y) together with an overhand, leaving sufficient tail.
Step 2: Tie your climber/load in to the end of rope X.
Step 3: Attach a 60cm sling to the mastpoint of the anchor, and clip an HMS locking carabiner to the end of it.
Step 4: Tie a munter hitch on the locking carabiner on the sling with rope X.
Step 5: Tie a munter hitch on an HMS locking carabiner at the anchor on rope Y, just before the knot. Finish this munter hitch with a mule-overhand combination to make a munter-mule-overhand (MMO).
Step 6: Lower the climber through the full length of rope X, the MMO on rope Y will now be holding the load.
Step 7: Open the locking carabiner on the sling with the munter on line X, and pull rope X downwards and out of the gate. The locking carabiner should ‘pop’ the rope out and flip.
Sometimes it may be necessary to strike the carabiner against the rock behind at the same time to get the munter to ‘pop’ out.

The munter redirect rappel
The Munter Redirect Rappel
Is it possible to use a prusik with a Munter hitch whilst rappelling?
Yes, absolutely.
Step 1: Step one attach a prusik to yourself with ~60cm or extension, on a sling girth hitched to your belay loop.
Step 2: Tie a Munter hitch on your belay loop.
Step 3: Redirect the brake strand back through a locking carabiner clipped to the locking carabiner on the prusik.
Learnt something? This article is an extract from our book ‘Self-Rescue for Climbers: The Essential Skills’.
Enjoyed it? Buy the No Thrills team a coffee to say thanks!