There are few things quite as captivating as seeing the rings of Saturn for the first time.
On 27 August 2023 Saturn will reach opposition, when it lies directly opposite the Sun relative to Earth and will be at its brightest and highest, clearly visible at magnitude 0.4 and reaching around 25˚ in altitude from the UK.
You can find Saturn in Aquarius in 2023 and into 2024.

At the start of August, Saturn will be at its best after midnight.
It rises earlier as the month goes on, becoming more of an evening object and by opposition is up all night.
It will be relatively low, so we’ll be looking at Saturn through more of our own atmosphere.
Normally, this isn’t ideal for imaging, but you’ll want to catch the planet this year, as over the next few years Saturn’s rings are going to disappear.
Don’t worry! They’ll be back. It’s just that the apparent tilt of Saturn’s rings varies over its 29-year orbit.
Saturn's tilt and rings
. Credit: NASA")
In 2023Saturn's rings are tilted down at a 9˚ angle at opposition
In 2024 they’ll be just 3.7˚
By 2025they’ll disappear into an almost imperceptible line as Earth views them edge on.
After that they’ll become increasingly visible as the southern pole of the planet tips towards us, reaching their maximum inclination of 27˚ in 2032.
In a way, the rings being less tilted is an opportunity as you can watch the rapidly orbiting moons more easily.

Personally, I love to image Saturn, capturing the planet’s bands on camera and tracking how the moons move around it.
Why not make 2023 the year you get started in planetary photography and record the rings before they go?
Doing so is now easier than ever, and it’s even possible to capture the planets under skies with a lot of light pollution.
I encourage you to have a go – the results can be extremely satisfying.
Planetary imaging takes practice. You might not immediately get prize-winning astrophotos, but with this guide you should be able to get an image you can be proud of.
Recording a video of Saturn's rings

There are several types of cameras you can use for astrophotography, such as DSLRs, smartphones, modified webcams and dedicated CMOS planetary cameras – all of which I’ll come to in a moment.
They all follow the same basic principle of recording a video of the planet, thereby capturing thousands of images in quick succession.
The weakest link in any optical setup is Earth’s atmosphere and an effect known as seeing, which causes light travelling through it to shimmer.
We can’t predict moments of low shimmer, but videoing means we can be sure to catch them and then only use the best frames from a video during the processing stage.
Before you begin photographing the planets, it’s important to make sure your optical setup is as sharp as it can be.
Make sure refractors are well-collimated if needed and then focus using a nearby star. You may want to consider using tools like a Bahtinov mask to make sure your optics are pin-sharp.

There are two main planetary image-capture programs nowadays: SharpCap and FireCapture. FireCapture is freeware.
SharpCap has a pro version, currently £12 per year, with some handy extensions such as a method of polar alignment for equatorial mounts, but there is also a stripped-down, free version.
Planetary cameras are generally supported via their own drivers.

For webcams, you may need to set up a driver using an app called the ASCOM platform, obtainable for free from ascom-standards.org.
ASCOM drivers can do all sorts of things, from controlling filter wheels to managing electric telescope focusers, and ASCOM’s capability is increasing all the time.
With all cameras, it’s best to very slightly overexpose the image and pull back during processing, using the ‘gamma’ control.
Be sure to capture the planet in a movie format – the most commonly used are AVI and SER.
Smartphones and DSLRs

It’s possible to take planetary photographs with a DSLR or even a smartphone, with the help of adapters.
DSLR adapters fit directly into your telescope’s eyepiece holder, and you can find out more about this in our guide on how to connect a DSLR to a telescope.
Smartphone telescope adapters will also require an eyepiece as they hold your phone’s camera over it, allowing you to capture a view similar to what you’d see with your eyes.
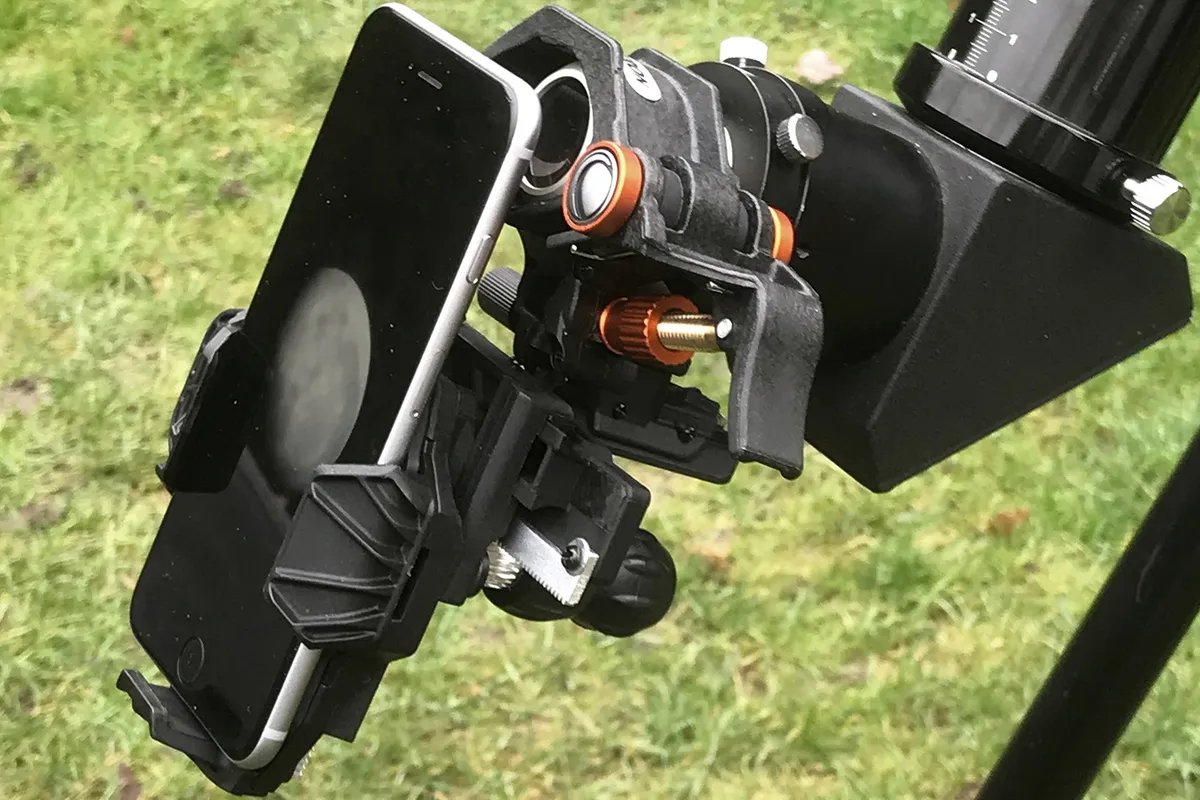
Be sure to align the smartphone holder precisely or the brightness of the image will fall off catastrophically.
The camera needs to be centred over and laid flat against the eyepiece so that the edges of your view through the eyepiece appear sharp.
These kinds of images are great if you’re just looking for a quick snap to remember the night or want to test the waters of planetary photography, but they’ll be of limited quality.
Although DSLRs can be excellent for serious deep-sky astrophotography, I have never seen detailed planetary images taken with either DSLRs or mobile phones.

You should be able to see the outline of the planet, the rings and perhaps Saturn’s largest moon Titan, but that’s about it.
If you overexpose, you can pick up more moons, so long as you don’t mind the planet being whited out – a technique you can use with any of the cameras described in this article.
Using a webcam
 and Microsoft LifeCam (bottom) are a cheap option for imaging planets.")
One budget-friendly option to capture good planetary images is to use an adapted webcam, which can cost as little as £35, though it will need to be connected to a computer to operate and collect data.
Many cameras are suitable, for example the Logitech C270 or Microsoft LifeCam.
Preferably, you’ll want something that shoots in AVI format, though other acceptable formats are SER and MPEG files.
If yours only does MOV files, you will need to buy a program to convert them. It’s also wise to check whether your image-capture software supports your particular model.

To adapt the camera, carefully prise off the front of the housing with a knife or a screwdriver and unscrew the lens.
In its place, attach a 1.25-inch telescope-eyepiece-to-webcam adaptor ring, which needs to be purchased separately but will make keeping the camera in position in your telescope’s draw tube much easier.
Cover over with tape any LEDs which might affect your imaging, then close up the front of the camera.
You can usually use at least part of the original housing to do this, then seal any gaps using waterproof glue or tape to prevent dew falling into the camera.
CMOS cameras
, Celestron scope and driven mount all linked to her PC.")
Low-cost, high-speed CMOS cameras are well-suited to astrophotography and have come down tremendously in price over the last few decades.
You can now get an excellent one for under £300.
I have an ASI662MC from ZWO’s almost bewilderingly large range of planetary cameras.
Other brands you may want to look at are the Atik GP colour camera and the Opticstar range, which have lower frame rates, but the latter are around half the price of ZWO models.
You can either use a colour camera or a monochrome camera with filters.
I strongly favour colour cameras because the images are easier to process.
Plus, the fickle British climate does not always allow time to take four separate luminance, red, green and blue images, and the filter wheels required to make the rapid filter changes are expensive.
But is it worth buying a separate planetary camera if you already have a cooled colour camera for deep-sky work?
The answer is simple: you can obtain much higher frame rates with purpose-built planetary cameras.

My ZWO ASI662MC can shoot hundreds of frames per second.
My cooled deep-sky camera, a ZWO ASI2600MC, can only manage a few frames per second. It’s designed for long exposures, not short ones.
Fast cameras can capture planets even if there’s a lot of cloud around.
At 100 frames per seconds, you can shoot 6,000 frames in a minute, which is great for ‘snatching’ images in between the clouds.
Specialist planetary cameras do need a laptop or PC to control them and to store their image data.
I used to use a laptop, but as I now have my own observatory, I use a desktop PC with lots of USB ports.
ZWO now offers the ASiair – essentially a Raspberry Pi in a fancy cover – which will elegantly serve this purpose if you want a mobile rig.
It is controlled from your smartphone and costs about £330.
Whatever you use, make sure you have lots of digital storage space to keep your 5,000–10,000-frame movies.
Processing your images
, then stacks them into one image.")
Once you have your first movie, you will quickly notice how seeing makes the sharpness of the image come and go.
Fortunately, you should have plenty of frames, ideally a few thousand. Software can select the best of these, then combine them together using a technique called ‘stacking’.
Stacking combines your best frames to create a single image with a total exposure time of all the frames you end up using.
I may, for example, stack 10,000 frames and, because of poor seeing, only keep 1,000.
If each exposure is 1/100 of a second, I effectively have a 10-second exposure.
Those 10 seconds weren’t continuous, but the best frames gathered during the periods of good seeing; the remaining 90 seconds is thrown away.
The best software for this is AutoStakkert! It’s unbelievably easy to use and a huge improvement on earlier stacking programs.
- Find out more in our guide to image processing

The only decision you need to make is how many frames to keep.
Remember to select ‘RGB align’, which compensates for Earth’s atmosphere behaving like a prism and separating these colours.
This is especially true if the planet is low in the sky, but I always use it, even for high-altitude planets.
Once stacked, you can output a variety of file types.
I use TIFF files, which can be fed to the next stage: sharpening.
For this I use freeware called RegiStax. RegiStax can also select lucky frames and stack them, but AutoStakkert! is considered better and faster.
RegiStax, however, has a wavelet function to sharpen up images.
You can also use the waveSharp package or AI sharpening tools such as Topaz Sharpen AI ($80).
There are many options for sharpening and in my experience no two images require the same treatment.
You’ll probably need to experiment, but there are lots of great guides out there. I learned a lot from the planetary imaging playlist at youtube.com/@wwgeb.
Once you’ve completed this part, you’re done! All you need to do is sit back, admire your image of Saturn and start thinking about which planet you want to image next.
Have you captured an image of Saturn and its rings? Don't forget to send us your images.
This article originally appeared in the August 2023 issue of BBC Sky at Night Magazine.