
After my first self portrait attempt, I’m trying to deconstruct the process and to establish a meta-learning protocol for how to improve over the next month. Some stages will emphasize basic fundamentals, such as drawing shapes, that are universally applicable to any kind of drawing. Others are more specific to drawing the human form, and in particular the head. So as I work through my plan for March, I thought I would start with the ol’ noggin.
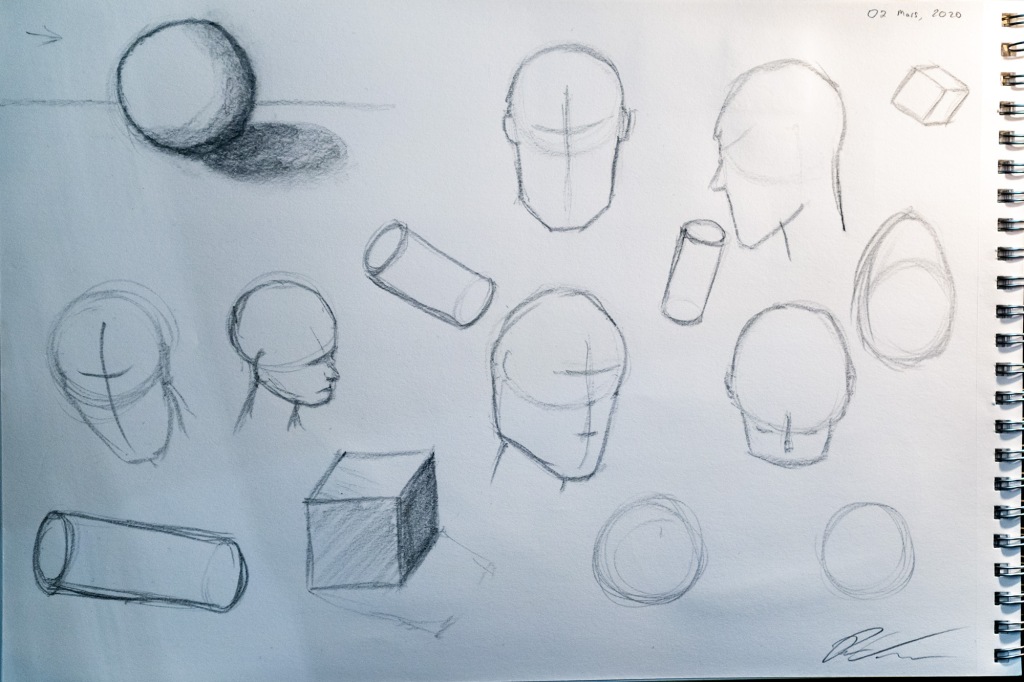
A quick YouTube search yielded a video about how to draw simple head shapes that had been recently uploaded. I had seen similar ‘wire outline’ sketches of figures before, but didn’t know where to start and had thus never attempted them. But it turns out that it is pretty simple. Begin with a circle for the skull, box in the jaw, add curved horizontal and vertical lines on the face, and it already starts to resemble a head.
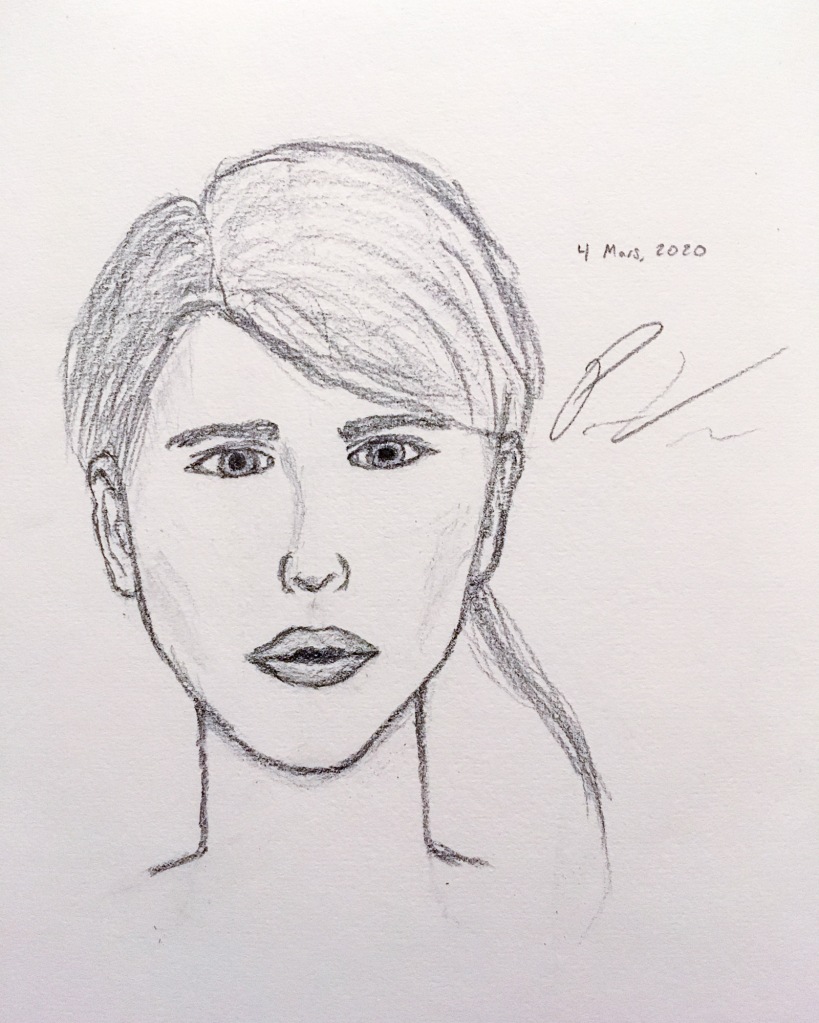
After a little practice, I thought I’d give a tutorial with a little more detail a try. In it, the artist draws one masculine and one feminine face, which I decided to attempt over two different days. She speeds up her process, so I needed to frequently pause the video to try to fill in each step. Also, I didn’t have an eraser with me at the time, which made it much more challenging when she later went in and corrected little mistakes that she had made. But in the end I feel like I ended up with something that more resembled a human face than I have ever done before without tracing.
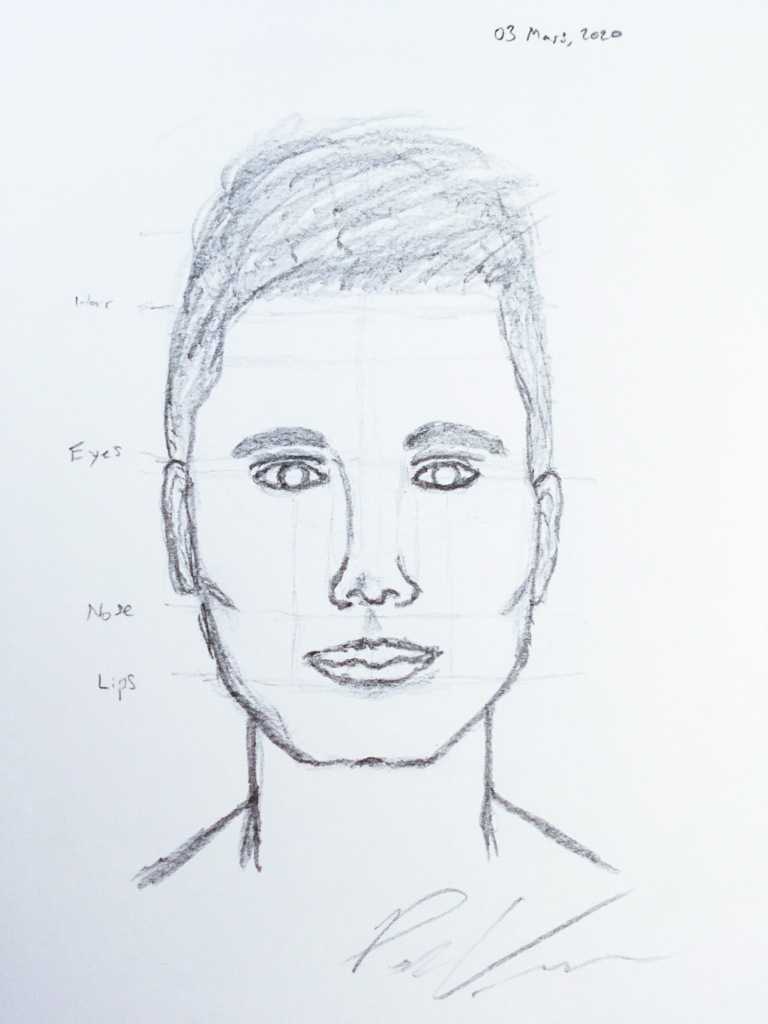
For the female head, I tried to erase and fix the eyes and mouth a little bit, but each time it wasn’t just quite right. So I’m thinking of going back a few steps and trying to concentrate on each element.
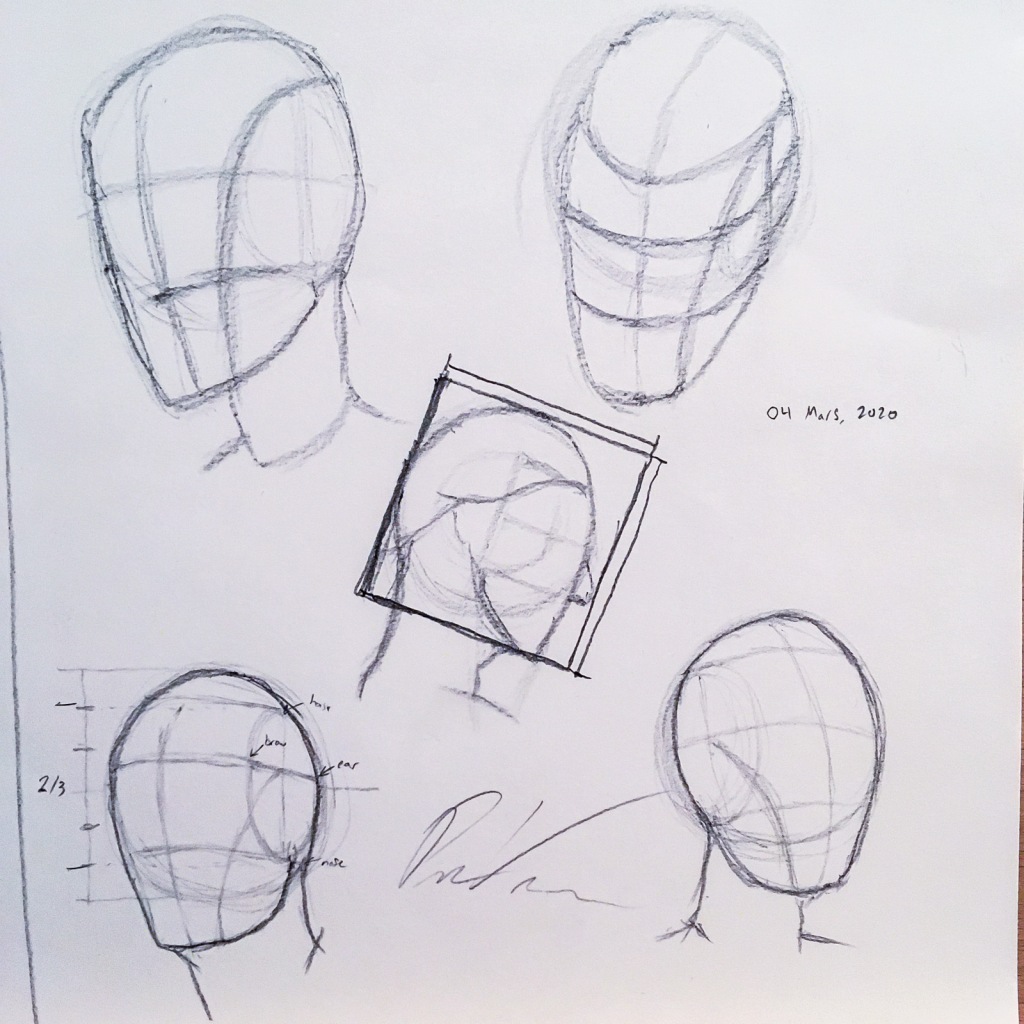
So yesterday I returned to head shapes and learned about the Loomis Method, developed by Andrew Loomis in his 1956 instructional guide, Drawing the Head and Hands. The idea is to use a circle, an oval, and a few arcing lines to construct the basic forms of the head from any angle. It is essentially the slightly more sophisticated version of what I had done a few days before. At the recommendation of a friend, I started following Proko and found this tutorial:
The video is only five minutes and worth a watch, but here are the basic steps:
- Draw a circle. This represents the majority of the cranial space.
- On the side of the circle that will be the back of the head, draw a vertical oval that is two thirds the height of the circle. The oval represents the removed volume from the sphere created by the circle, as our heads are not spheres but flatter on the sides. The width of the oval is determined by the angle the head is turned towards. More to the side, wider oval; more to the front, narrower oval.
- Draw a semi-horizontal line across the oval. The angle of the line determines the tilt angle of the head. So if the head is tilted up, so will the line. Then continue the line across the face as if it were a rubber band wrapping around the head. This line represents the brow and top of the ears.
- Draw two similar lines that wrap around the form starting at bottom and top of oval. These are the locations for the bottom of the nose and the (average) hair line, respectively.
- Draw a mark below the nose line that is the same distance below as the brow line is above. This is the bottom of the chin. Square off the line and arc it up to the bottom of the oval to form the jaw.
- Draw a vertical line down the middle of the face (for later use in adding detail).
- Draw a curved line from the side of the jaw to the open of the oval.
- Then add a few neck lines to place the head in space.
And that’s it! That may seem like a lot, but if you watch the video then the visuals help clarify the instructions. One interesting special case is the profile view, where the oval become a smaller circle centered inside the larger one. At this angle, the head becomes a perfect square, with the width from the back of the head to the tip of the nose equaling the height from the top of the head to the bottom of the chin. I read Walter Isaacson’s fabulous biography of Leonardo Da Vinci recently, and I couldn’t help but think of how Da Vinci would dissect human (and animal) cadavers and take detailed measurements, obsessing over the proportions of the body for his art. There is an exhibit currently going on here about Art and Anatomy to celebrate the 800th anniversary of the medical school. (Quick aside: you know things are older here when the university talks about how it has been around for eight centuries and Nostradamus went there after they had already existed for 300 years!) I’m excited to see the exhibits this month for further inspiration.

Pingback: Art and Anatomy – Chortles and Harrumphs
Pingback: Paperazzi – Chortles and Harrumphs
Pingback: One Month Drawing Challenge – Chortles and Harrumphs