Quantize MIDI in Pro Tools
This blog is part of our new series of tutorials based on Avid’s flagship Digital Audio Workstation, Pro Tools.
Want to learn how to use Avid Pro Tools in real time, with a professional digital audio trainer? It’s faster than blogs, videos, or tutorials. Call OBEDIA for one on one training for Avid Pro Tools and all digital audio hardware and software. Mention this blog to get 15 bonus minutes with your signup! Call 615-933-6775 and dial 1, or visit our website to get started.
Need a Pro Audio laptop or Desktop PC to run Avid Pro Tools software and all of its features at its best?
Check out our pro audio PCs at PCAudioLabs.
Getting started with how to Quantize MIDI in Pro Tools
Pro Tools is a software that lets you produce, record, edit and mix audio as well as MIDI performances.
If you are a musician or producer, you will benefit from recording MIDI performances that you can use to trigger your favorite Virtual Instruments in your songs.
Now, if you are not a keyboard player, there is a chance your keyboard performance will not be as “precise” in timing compared to the one a keyboardist would do!
But, can you actually fix timing issues of your MIDI performances?
Yes you can! The process is called Quantization, and it is available for all MIDI-related clips in Pro Tools.
On this tutorial, we will learn How to Quantize MIDI in Pro Tools:
-
Create or open an existing Pro Tools session:
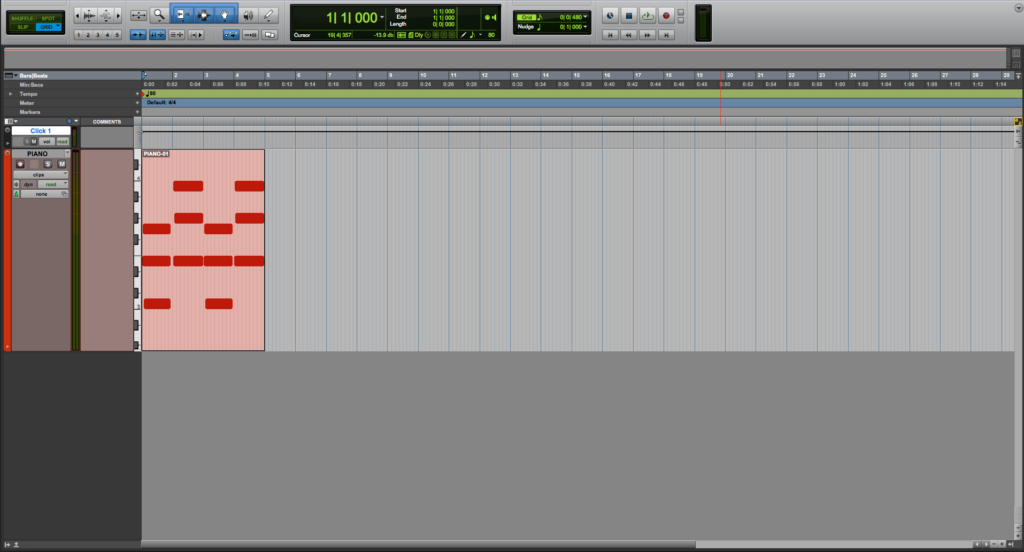
Make sure the Pro Tools session contains at least one track with MIDI information:
As you can see we have a Click track and an instrument track labeled as “Piano” that contains a very short MIDI recording in which we played four chords following the tempo.
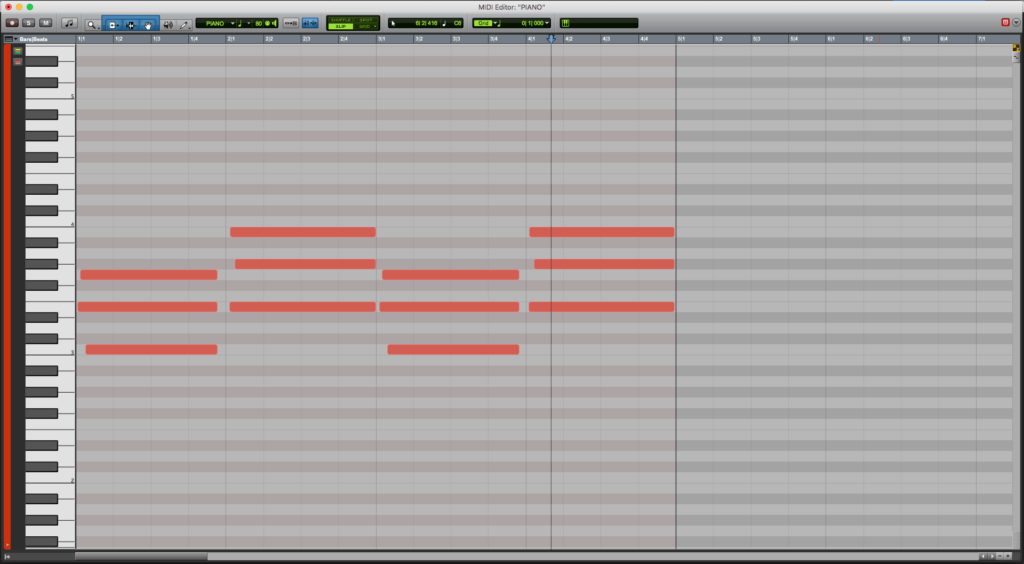
2. Double click on the MIDI clip to open the MIDI editor and see the MIDI information:
It can be easy to see, the performance was not very precise. The timing is a little bit off, specially where the notes start. They were supposed to land right on the quarter note, but they actually happened later, making it sound “out of tempo”.
We can totally fix this, with Quantization!
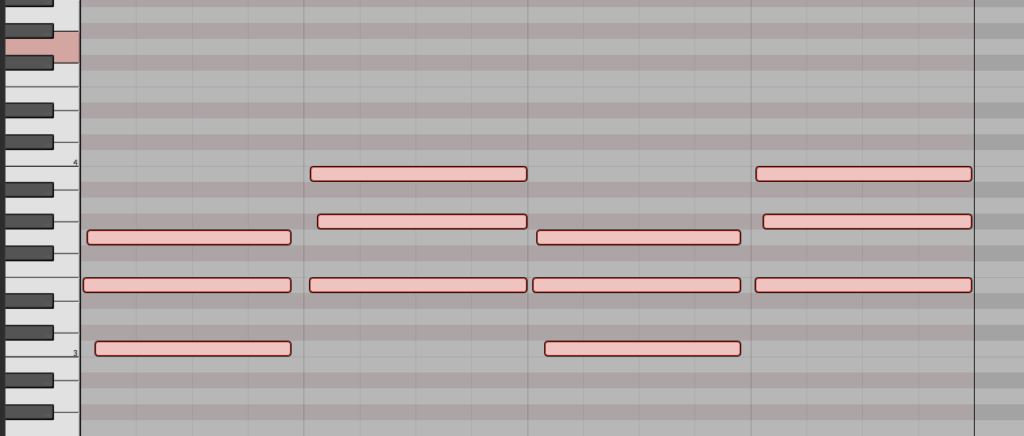
3. Click and drag over the MIDI notes to select them:
The notes will appear highlighted as:
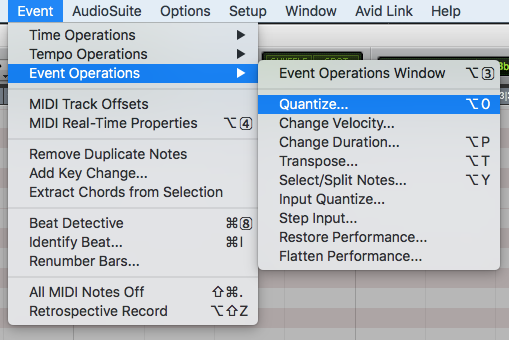
4. On the top menu bar, click on: Event -> Event Operations -> Quantize:
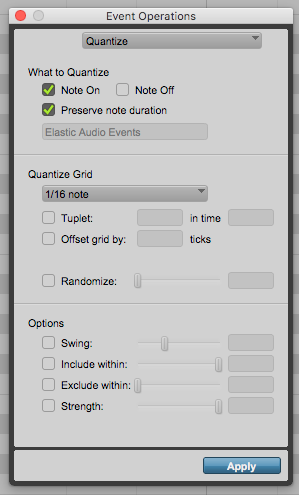
The event operations window will open as:
This screen has several parameters that we can describe as:
- Note ON: When this option is enabled, the Quantize operation will drag the start of the notes to the nearest grid.
- Note OFF: When this option is enabled, the Quantize operation will drag the end of the notes to the nearest grid.
- Preserve Note Duration: When this option is enabled, the Quantize operation will maintain the length of the notes.
- Quantize Grid: This drop-down list determines the grid boundaries to which MIDI notes start points are aligned. The recommendation is to set it to the smallest note value played during the passage.
- Tuplet: When this option is enabled, the Quantize operation will quantize according to irregular note groupings.
- Offset grid by: This option lets the user offset the quantize grid forward by an amount of ticks defined by the user.
- Randomize: When selected, MIDI notes are moved randomly forward and backwards in time following the predefined percentage value.
- Swing: When selected, every other Grid boundary is shifted by the specified percentage value.
- Include within: When selected, only the MIDI notes located between the specified percentage will be quantized.
- Exclude within: When selected, the MIDI notes located between the specified percentage will not be quantized.
- Strength: When selected, the MIDI notes will be dragged to the nearest quantization grid according to the percentage amount.
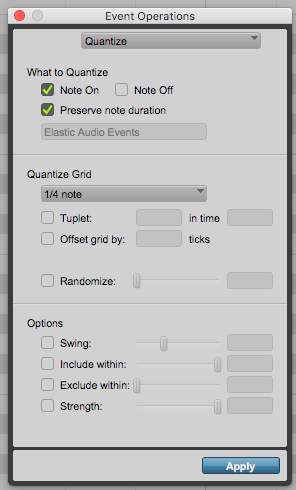
For the purpose of this tutorial, we want to quantize all the notes to the nearest quarter note grid mark 100%. We also want to quantize the Note ON (not OFF) and preserve the note length.
The window should be configured as:
- Note ON: ON.
- Note OFF: OFF.
- Preserve Note Duration: ON.
- Quantize Grid: 1/4.
- Tuplet: OFF.
- Offset grid by: OFF.
- Randomize: OFF.
- Swing: OFF.
- Include within: OFF.
- Exclude within: OFF.
- Strength: OFF.
5. Apply the previous configurations and the window will look as:
6. Press “Apply” and the Quantize operation will happen:
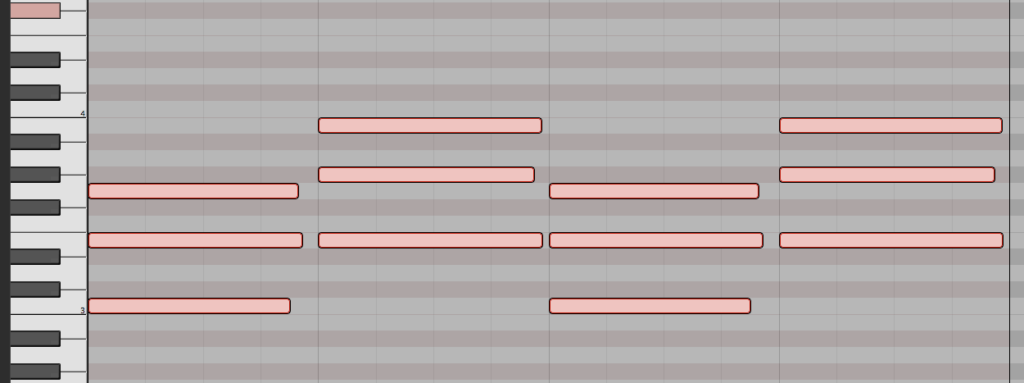
Go back to the MIDI editor and the notes should now appear to be quantized to the quarter note value as:
As we can see, all the notes were aligned to the nearest quarter note grid mark. Also, the note lengths were kept intact.
Since the strength was OFF, all the notes were dragged 100% to the grid mark.
The remaining parameters do not affect the procedure because they were disabled.
This is the simplest procedure you must follow in order to Quantize MIDI performances in Pro Tools.
At this point, we have successfully explained How to Quantize MIDI in Pro Tools.
Using Avid Pro Tools software to produce music would be ideal with one of our professionally designed PCAudioLabs Systems due our high-performance specifications in order to work with any of the Digital Audio Workstations supported. If you would like to order one of our PCAudioLabs computers, please call us at 615-933-6775 or click this link for our website.

