

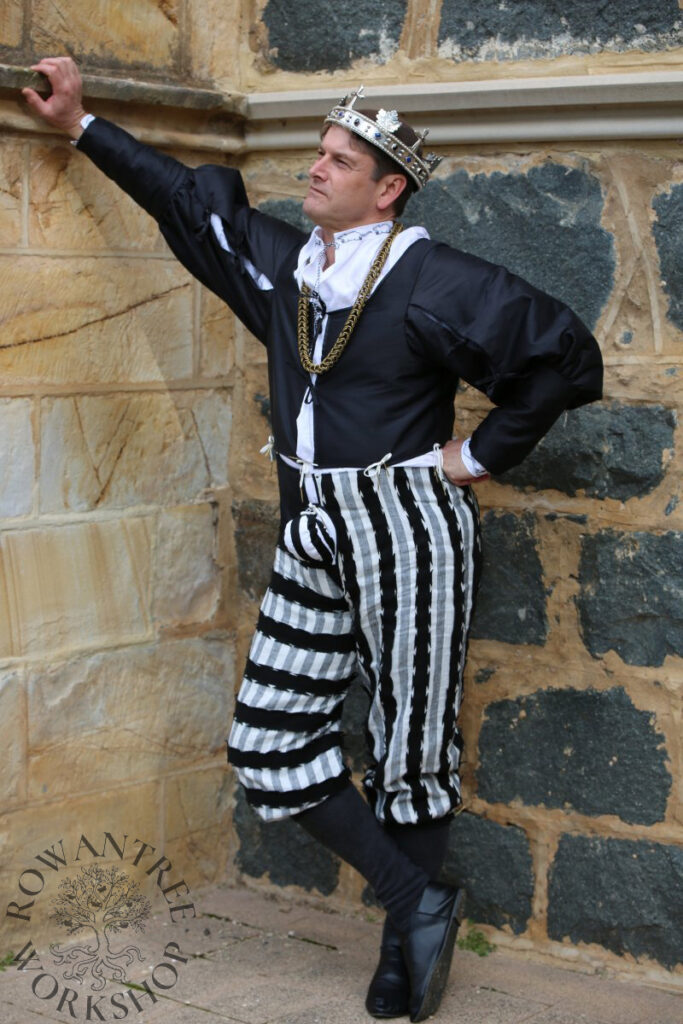
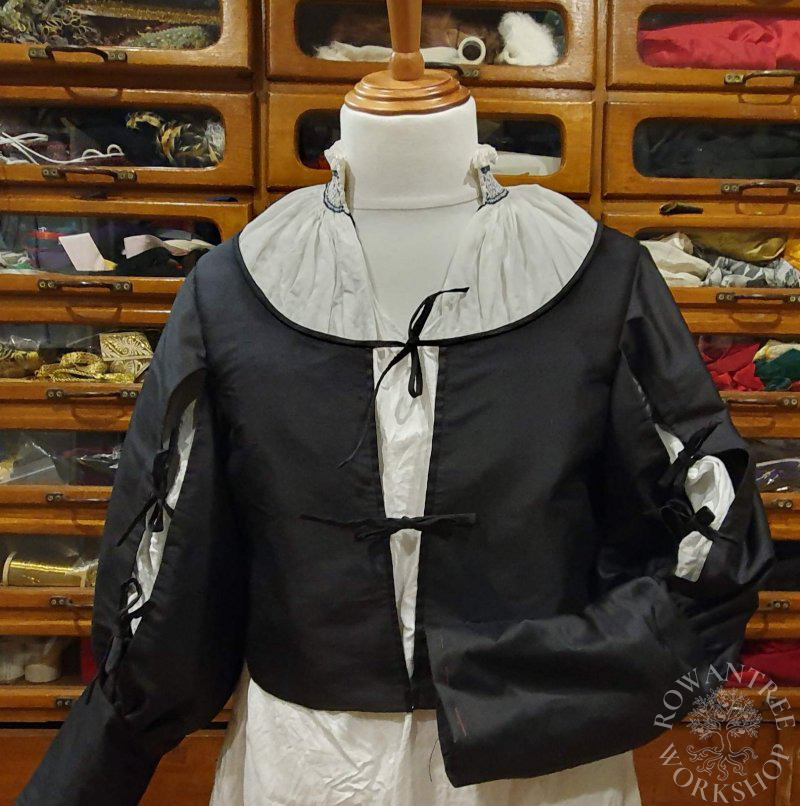
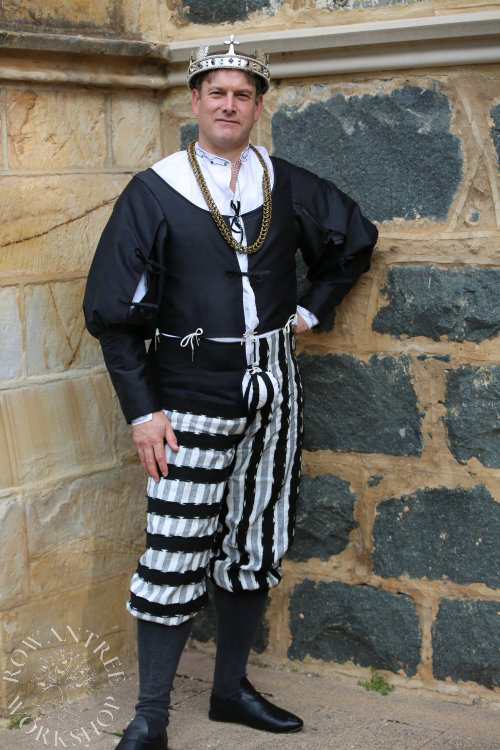
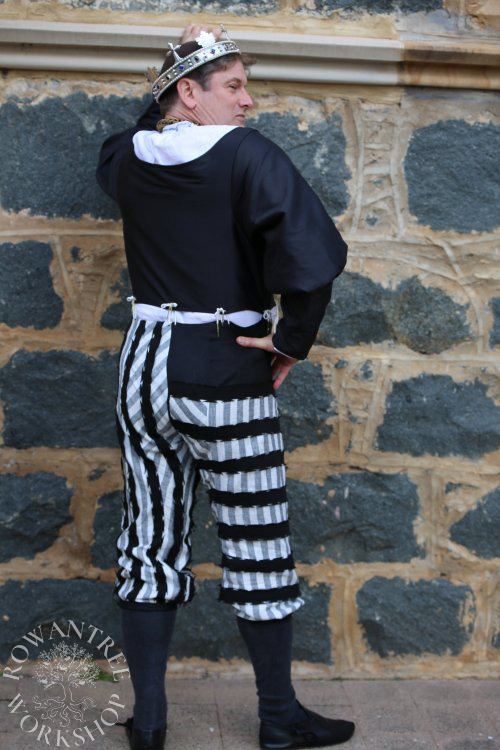
A German man’s Wams (doublet) and Hosen (hose) suitable for a fashionable man in the early 16th century. Although this style is often associated with ‘Landsknecht’, the elaborate decorations were also loved by the well-off, fashion-concious young men of the time.
I made this outfit for Radbot von Borg, who wanted something that was black and white, subdued but still fancy. And cool to wear, since he overheated quickly. His original thoughts were more along fantasy Landsknecht lines, while naturally I wanted to make something as authentic as possible.
I offered help in March, but was then focussed on finally getting this website out (!), and then a week-long event and clean up afterwards, and then delays in getting a final design agreed on….
All of which meant I only had a week to pattern and make the outfit!
There were other challenges with this outfit: not only was I short on time, but Radbot was in another country, so I could not test out a toile; and the short time-frame meant I was limited to the fabrics I had in stash.
Luckily, I found a picture which we both liked and I could make with available fabrics. Someone else was already making a Hemd (shirt); I would focus on the Wams and Hosen. Onwards…
Research & Design
The inspiration came from a painting of Matthäus Schwartz from his Klaidungsbüchlein (little book of clothes). This amazing work was published as the First Book of Fashion (Rublack & Hayward, 2015) and is a treasure trove of ideas for men’s clothing in southern Germany throughout the first half of the 16th century.
The black Wams (doublet) and striped grey and white Hosen with black decoration in the first image below was perfect for this outfit. Other paintings from the same source provided useful additional details.
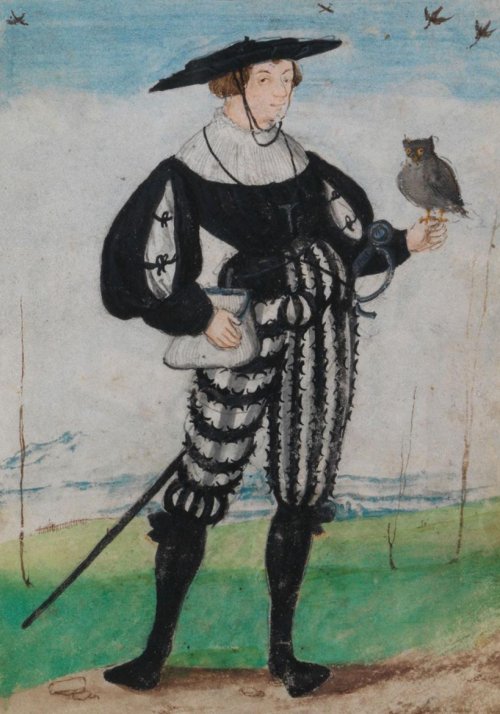
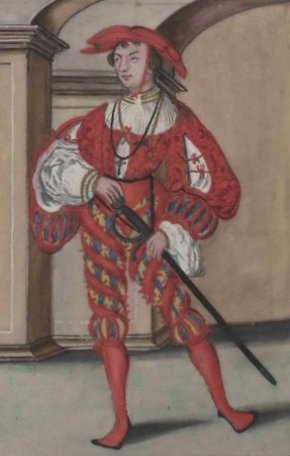
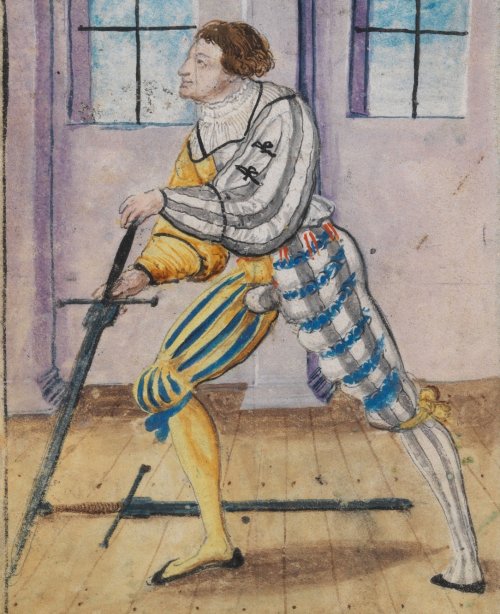
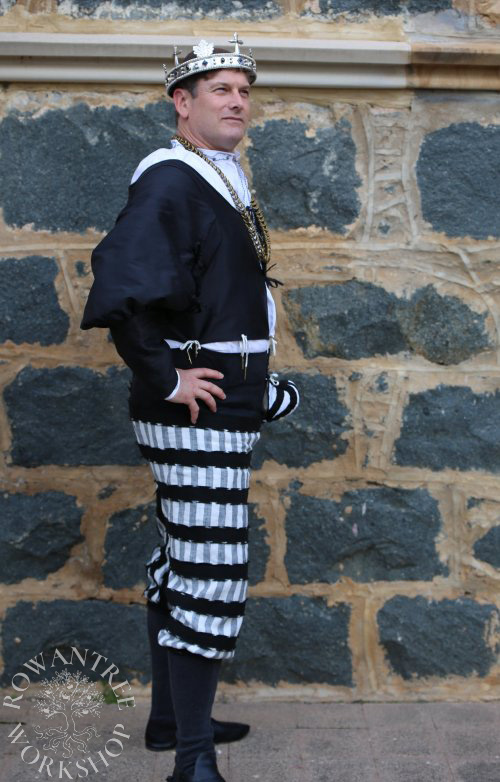
Image #27 above shows Matthäus wearing a black Wams with a wide neck and full upper sleeves with a double tied slit, gathered into fitted lower sleeves. This is the first time he wears these sleeves, but there are many examples after this, including those shown above. The opening on the black Wams is not visible, but the red Wams shows a front opening with ties, which would help with the ‘cool’ aspect.
The fabric for the black Wams is not listed, but Matthäus writes that Image #32 was ‘silk from Bruges’. In Textiler Hausrat (Zandler-Seidel 1990), the author notes Wams made from a range of silk fabrics, including damask, satin and taffeta and constructed with Barchent (fustian) and Schetter (buckram) for lining and interlining.
The Hosen in Image #27 could be interpreted as black leather or heavily fulled wool, with full length/width slashes, showing a grey and white striped lining. However, I think it unlikely that the thin bands would stay so evenly in position, so it is possible that they were sewn to the under layer. The same edge-cut decoration can be seen in other outfits worn by Matthäus at this time, such as in Image #32.
Radbot requested linen Hosen to reduce heat. Although leather and woollen cloth were the most common, Textiler Hausrat does note some examples of linen Hosen in 1514. It also refers to the distinctive early century ball-shaped codpieces seen in the Klaidungsbüchlein images.
Although other images show Matthäus wearing Hosen with just a Hemd (shirt), but I would need to custom-fit them – not possible in this case. Pointing (tying) the Hosen to the Wams would allow for some flexibility in size, and stop them falling down. Image #32 above shows the points (ties) hanging down, where they have been undone to allow more movement while fencing.
My stash included enough black silk taffeta, linen in grey stripes, black and natural, canvas and heavily felted wool to make the outfit.
I had one day to pattern, one to cut and 5 days to construct. I might need to take a few shortcuts…
Wams
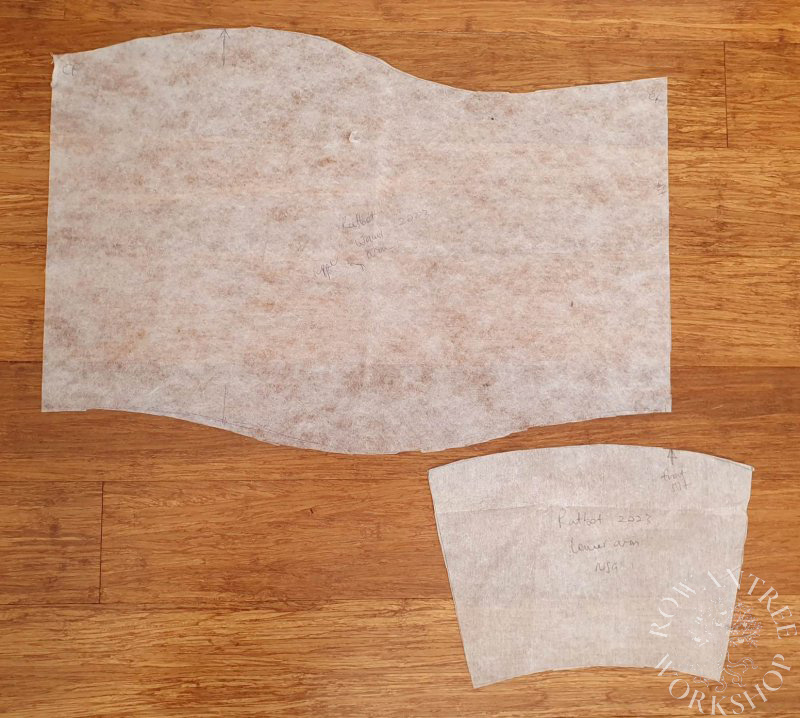
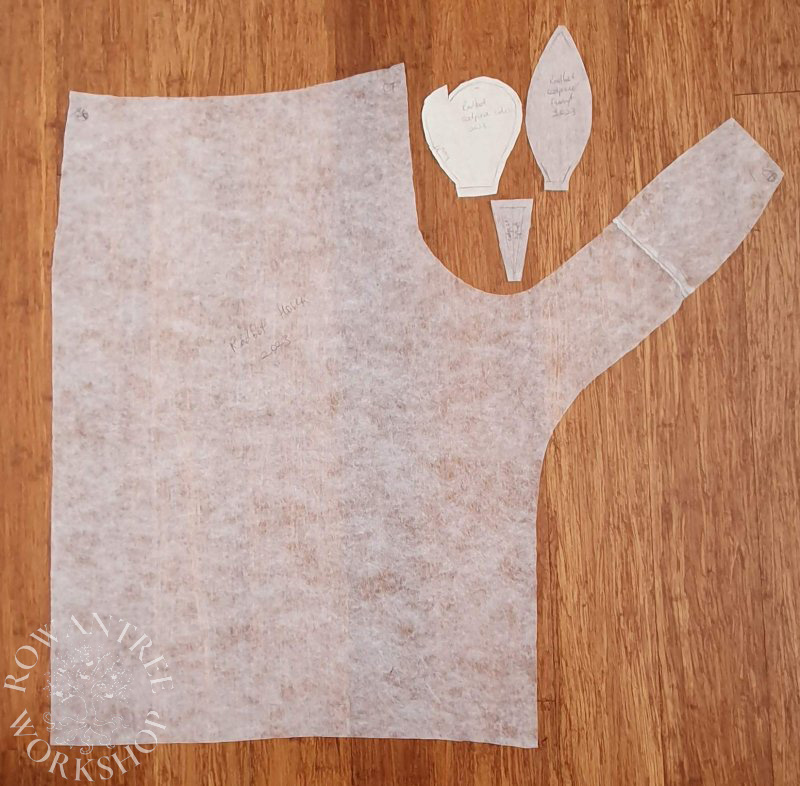
I drew up the bodice pattern based on the measurements I’d been given, then used the armscye measurement to develop the sleeve. With no gathering at the armscye, straight sides provided a good volume of gathering at the elbow and made the slit easy to manage. Instead of the usual seam rotation to the back, I rotated the seam on the upper sleeve to the front to provide the front opening.
Before I cut, I checked I had the latest measurements – nope! So a quick update on the bodice to match the new numbers (the sleeves were fine).
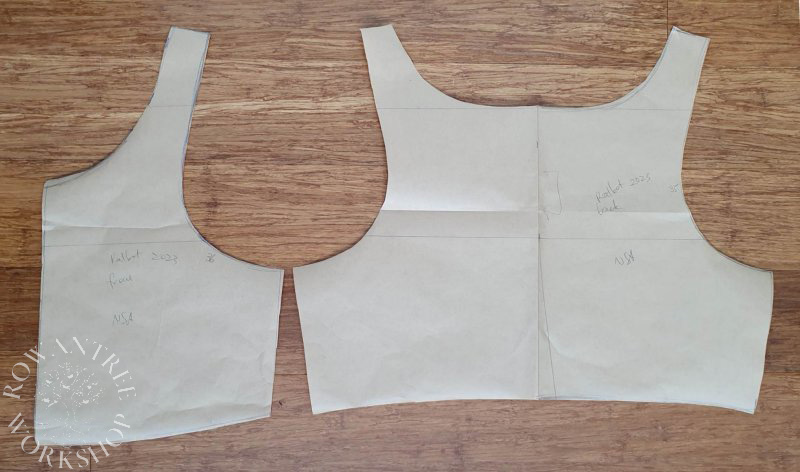
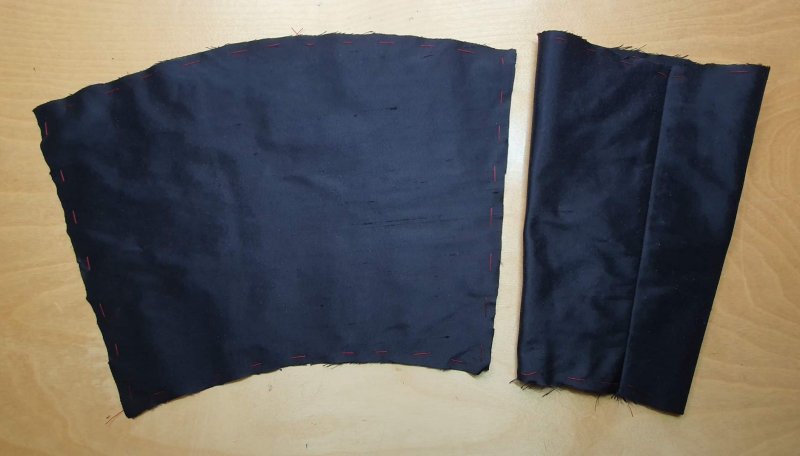
I cut the bodice in canvas, silk and linen, and the sleeves in silk and linen. To support the eyelets, I sewed a length of pre-shrunk twill-tape along the base of the canvas, then basted the canvas to the silk. I sewed the seams and pick-stitched them open, then turned up the hem and catch-stitched it to the twill tape.
I basted the lining in (back and then sides) and slip-stitched the side seams and bottom hem.
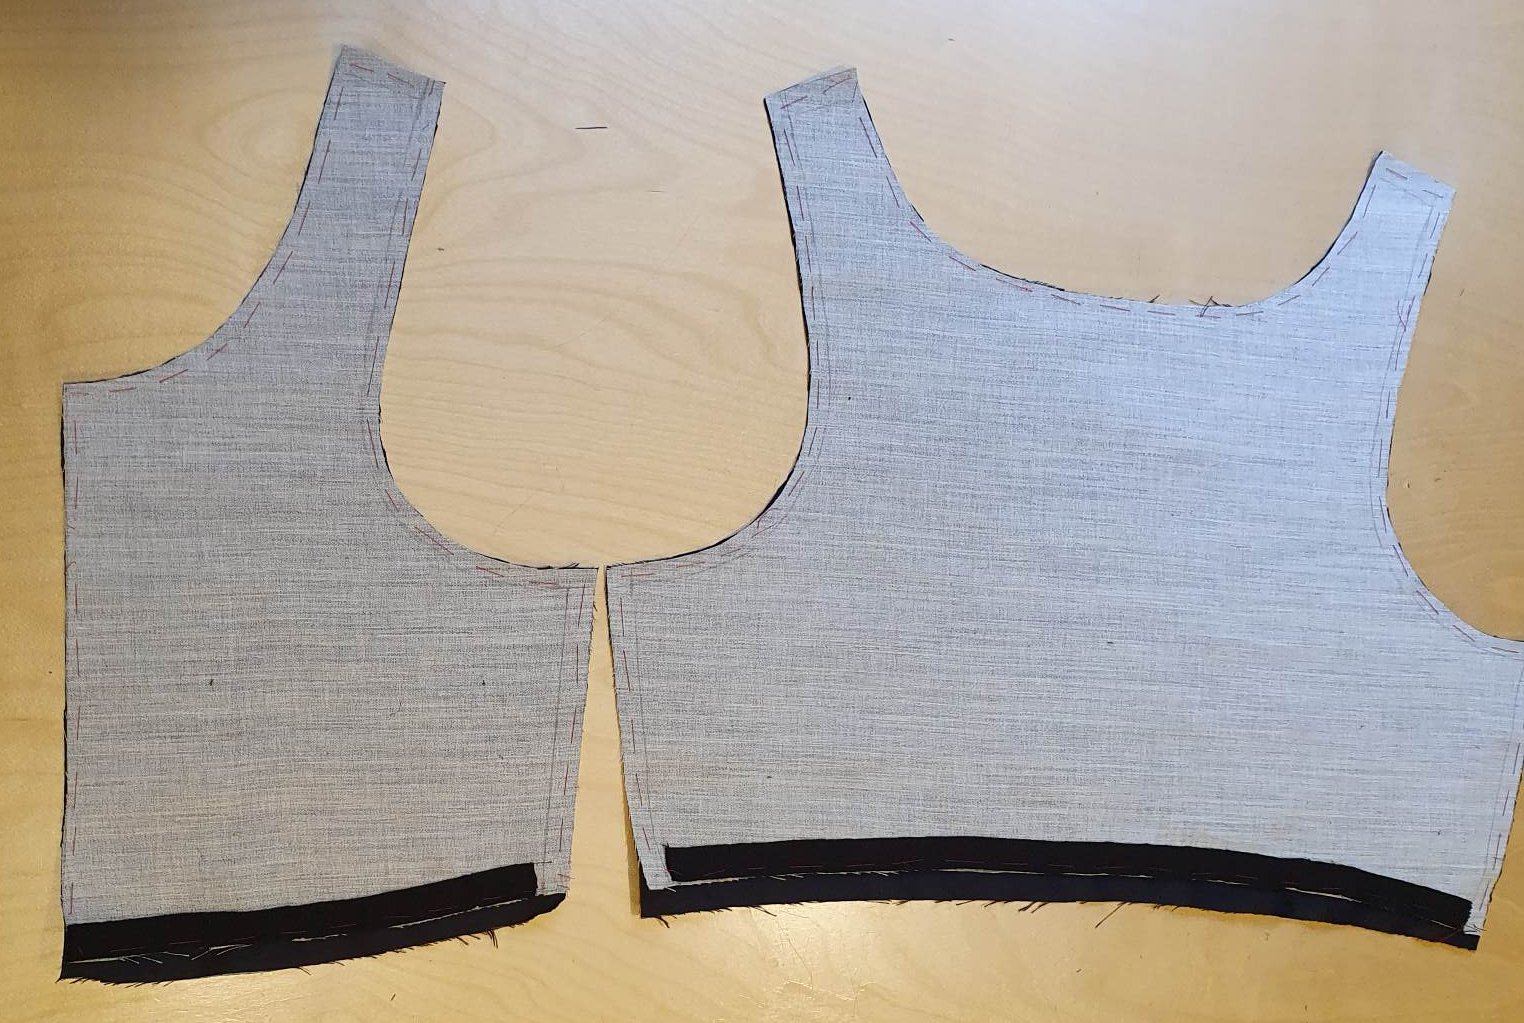
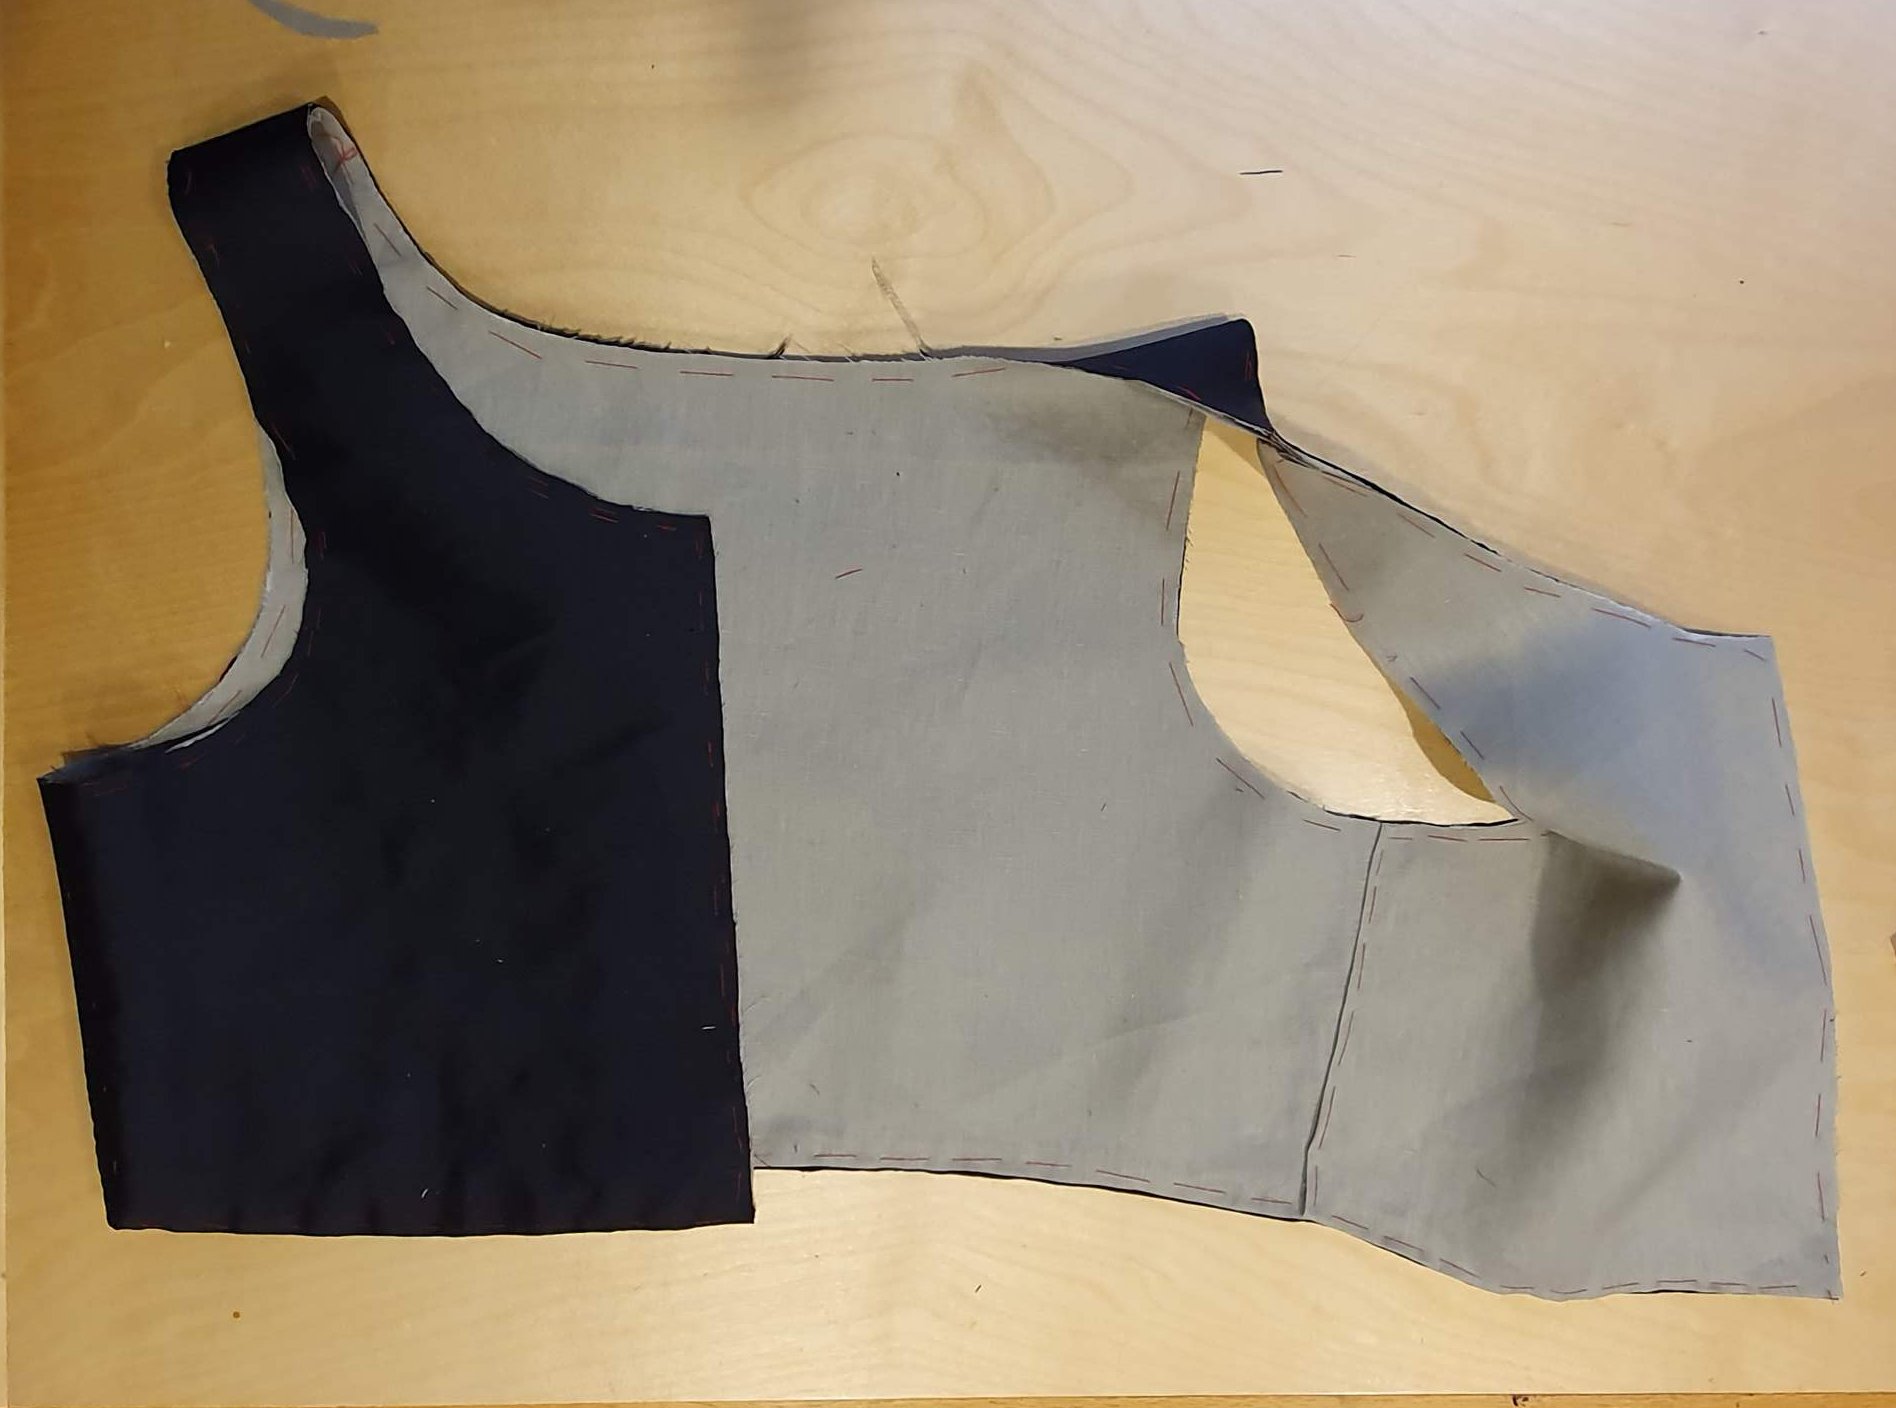
Next, since the images show matching ties, I made rouleaux from straight silk strips. I bound the front edge with a strip of silk (baste, sew, turn and slip-stitch), sewing in the mid-point tie. Then I bound the top edge, extending the binding strip to form the upper ties.
Binding the edges of the sleeves might make them too stiff, so I simply sewed them to the lining along the sides (capturing the ties), turned them and then worked a fine running stitch along the outside edge to avoid lining creep.
I sewed up the lower sleeves, then gathered the upper sleeves to fit, ensuring the slit matched the right point on the lower sleeve, so the seam would lie along the wrist-bone. I trimmed the gathers to minimise bulk and slip-stitched in the lower sleeve lining.
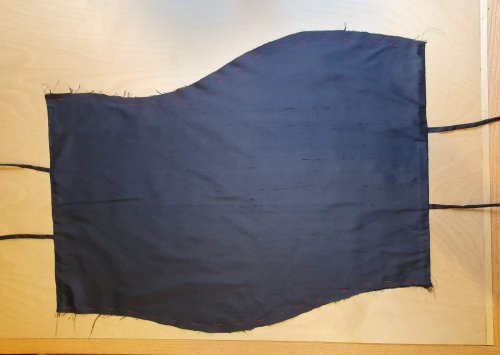
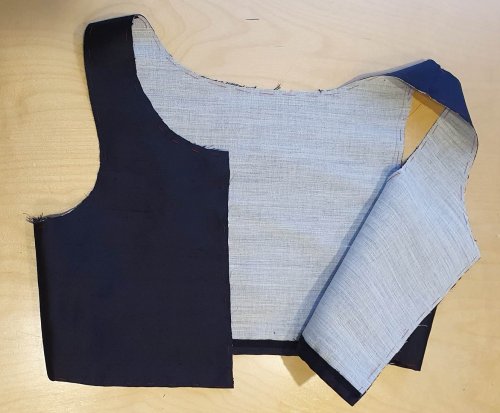
With the sleeves assembled, I sewed them into the armscyes (ensuring the slit was to the front), then slip-stitched the lining over the seam. I should have used black thread – I had to clip and re-do some stitches that showed through around the armscye. Rework was not what I needed at this point, but needs must…
Finally, I sewed 8 pairs of eyelets around the lower edge, for pointing the Hosen – Wams complete!
Hosen
Now for the Hosen.
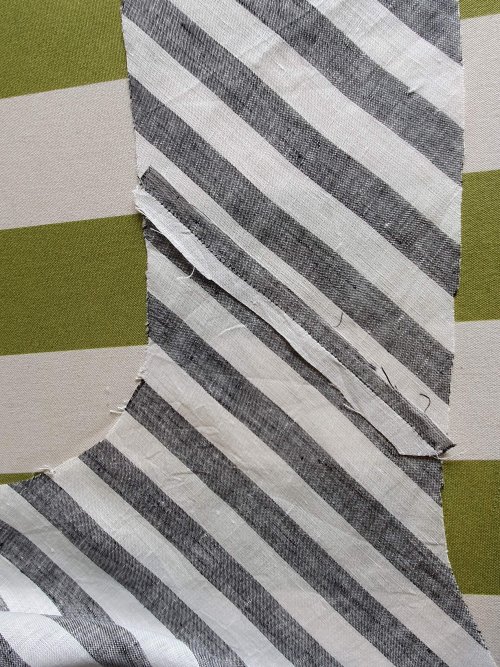
I developed the pattern starting with a standard 16th century men’s hose pattern, which is cut on the bias. Since the stripes in the Matthäus #27 painting run vertically, as did my fabric, I adapted the pattern to the straight grain, allowing extra ease over the seat. As for the Wams, I had to update the pattern with the new measurements, adding extra width.
The legs are cut straight to provide the gathered width around the knee. Had I been able to test a toile, I would have copied the painting more closely, with a shaped section around the right knee. As it was, I went with a simple gather below the knee.
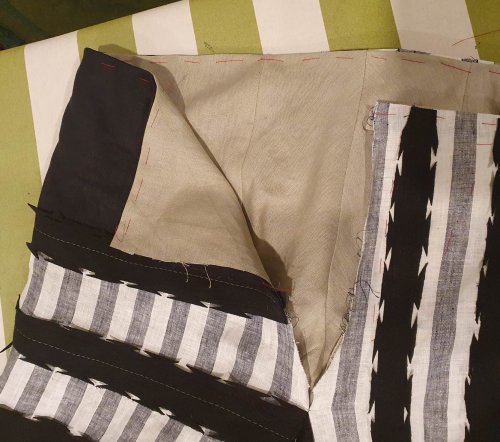
I cut the Hosen in striped linen, piecing the seat section to save fabric, carefully matching the stripes. The top of one side is solid black linen, which needed careful placement on the main section and seat, so the colours lined up exactly.
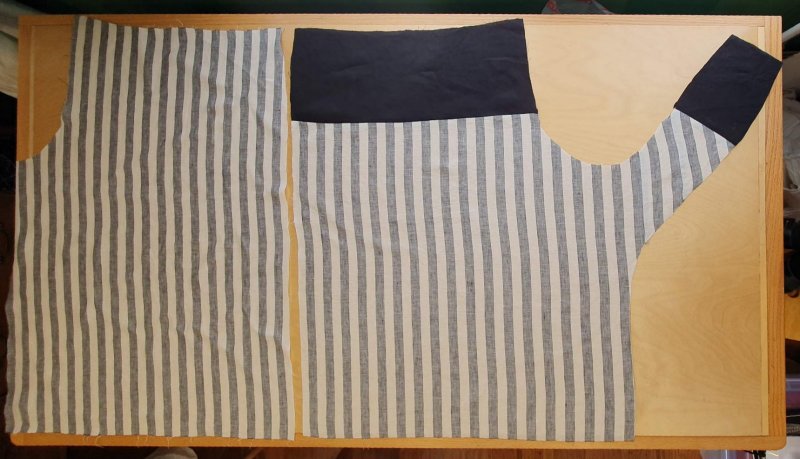
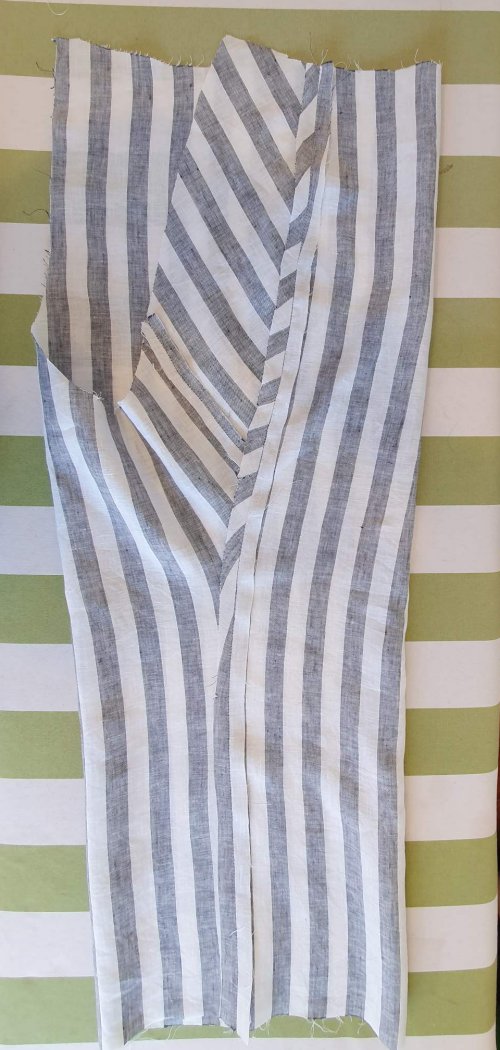
I sewed up the inseams and then sewed the legs together, up to the base of the codpiece support. Once I had the main pieces assembled, I sewed a strip of twill tape along the top hem to support eyelets, and basted canvas into the front, to support the codpiece and fly.
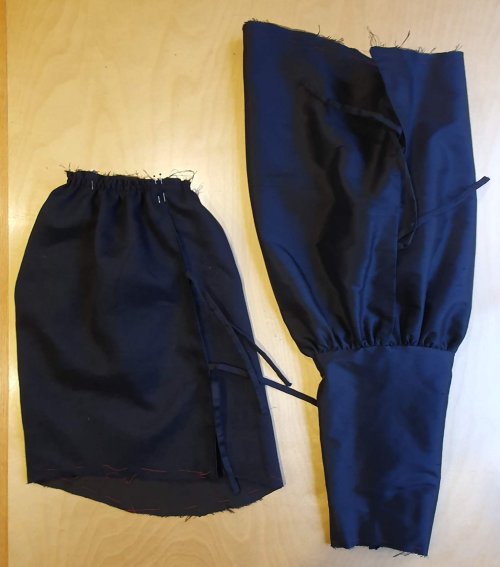
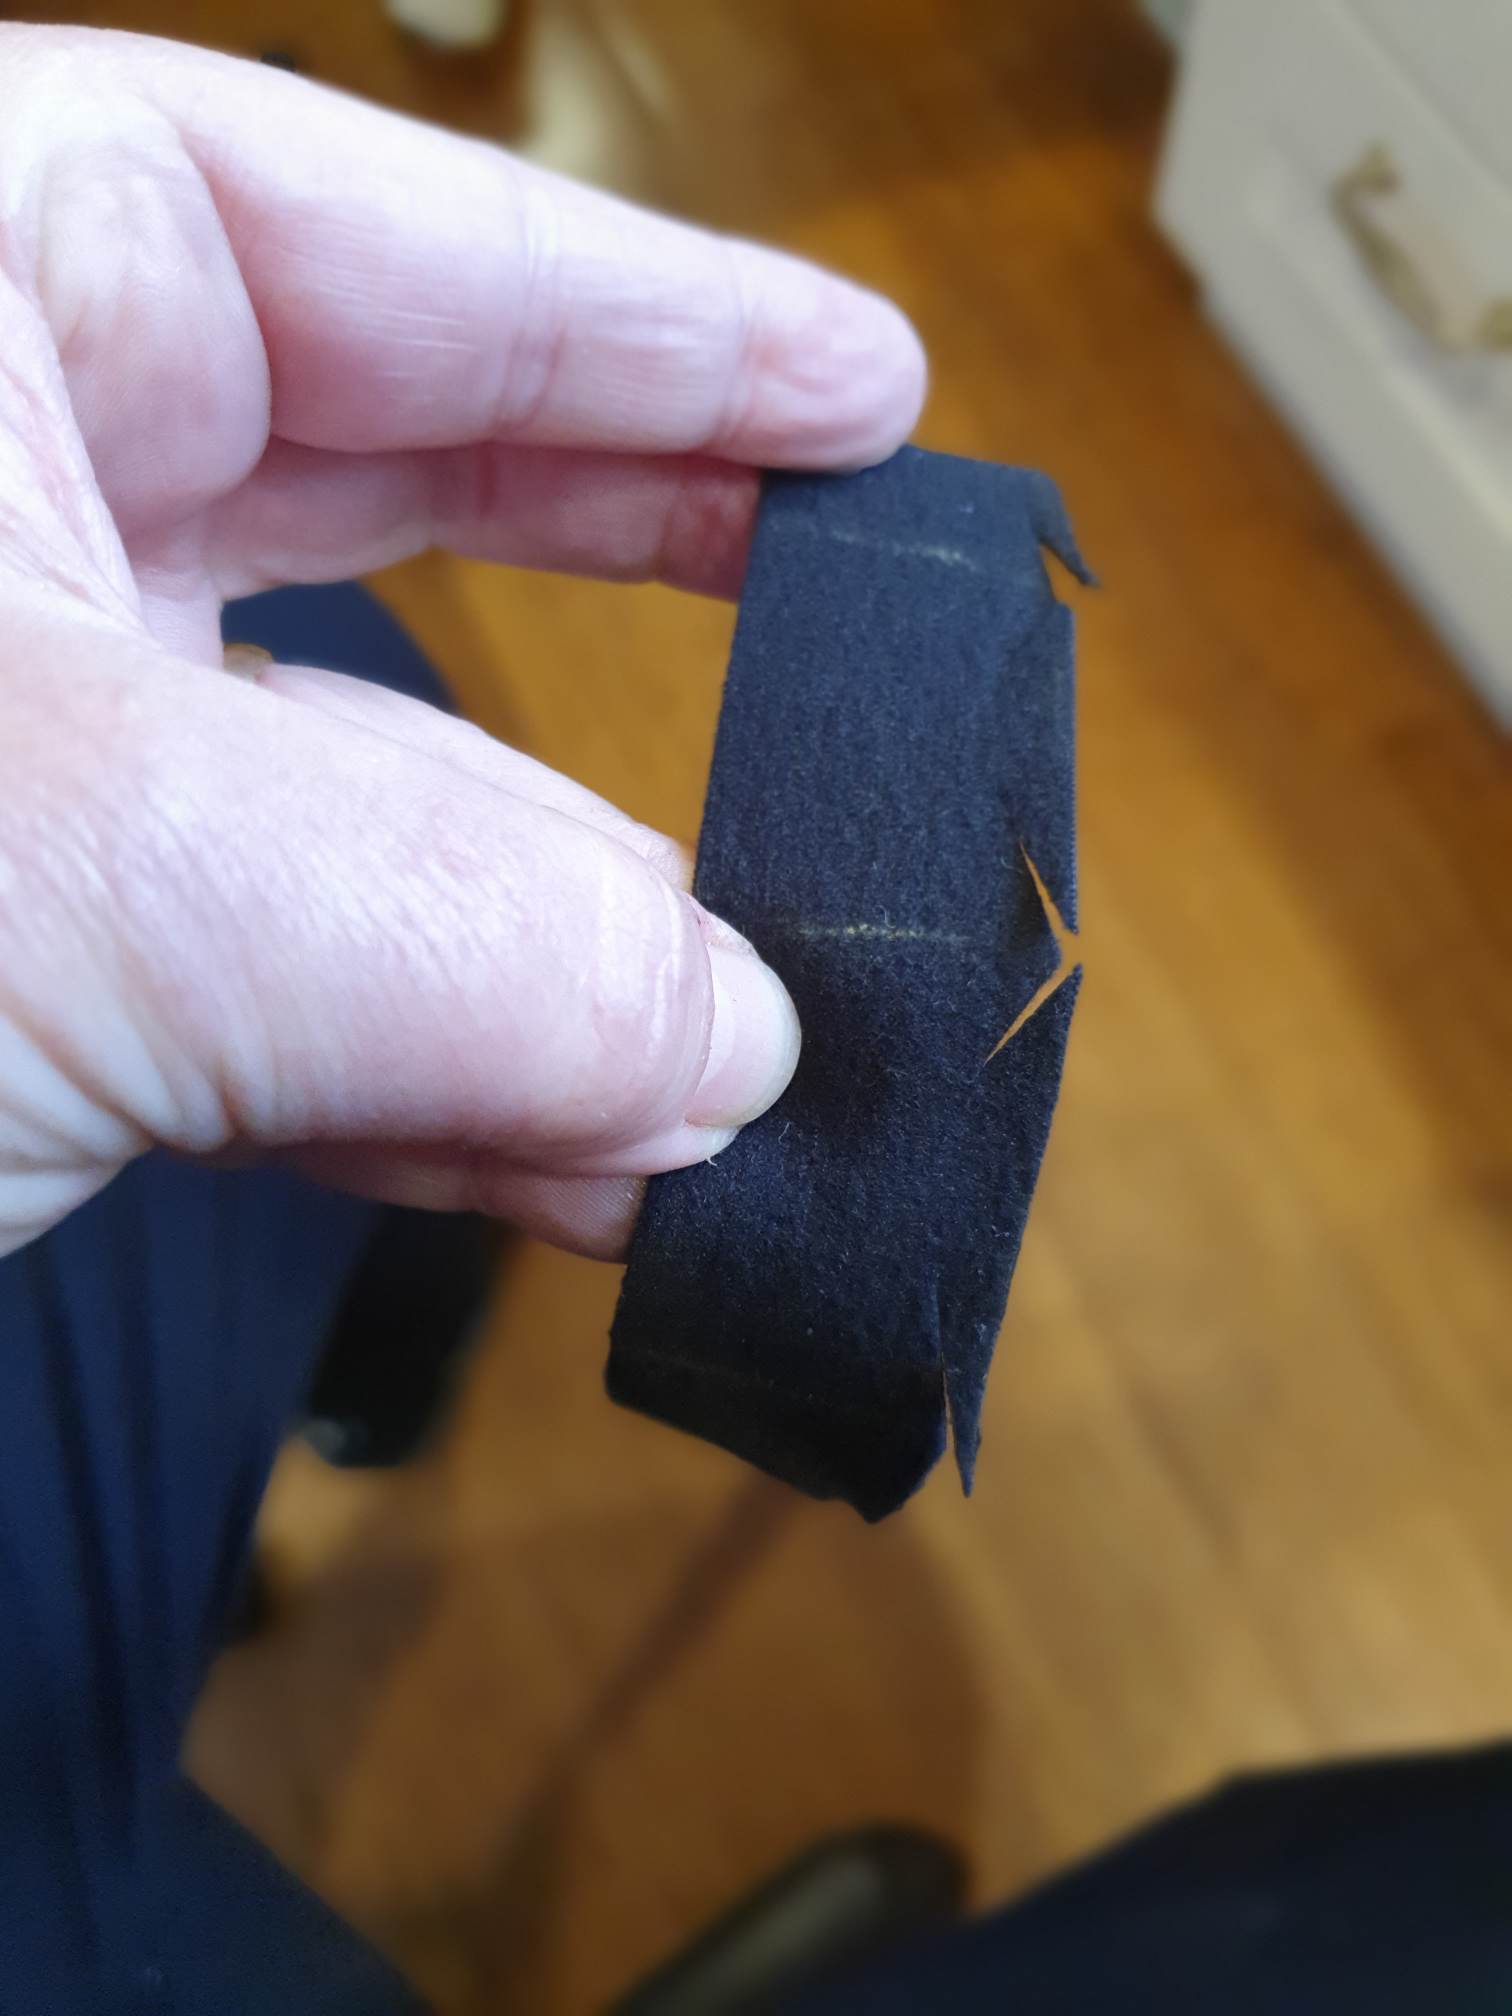
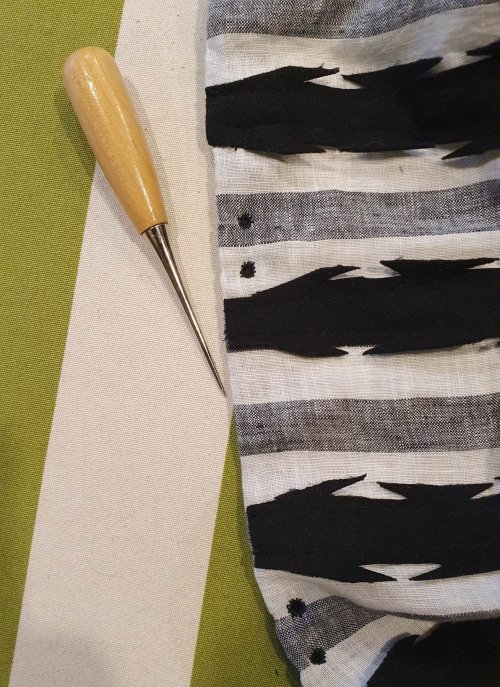
Next, the stripes. All the Matthäus paintings above (and several others in the Klaidungsbüchlein) show the same Hosen decoration of stripes with pairs of small curving tails at regular intervals along the edge.
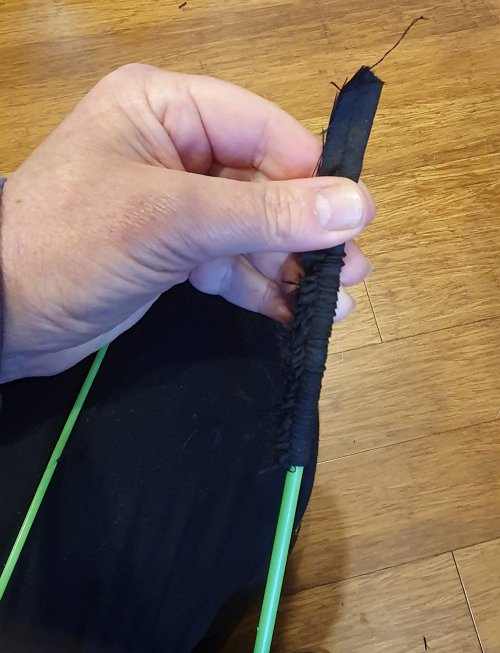
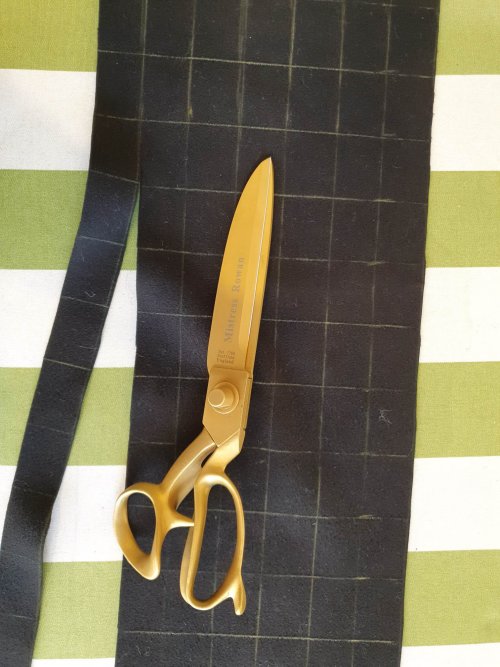
I did some experimenting with black felt to get the proportions right, then marked out strips on my sheet of millinery wool felt (strong, heavily fulled so no fraying). I cut shallow angles on each mark, then cut out the centres to leave the tails free. 5,100 snips later, the stripes were done – and small black triangles had migrated all over the house…
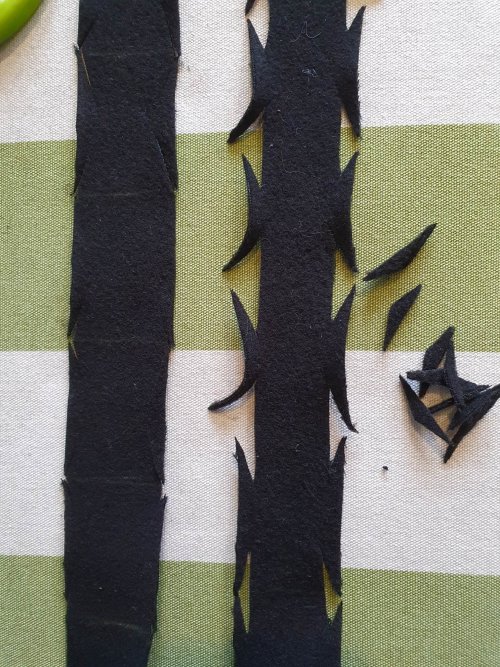
If I had the time, I would have hand-sewn the stripes on (I avoid visible machine sewing). As it was, I simply pinned on the stripes, machine basted (white thread, long stitches) and then sewed down both edges, leaving the tails free.
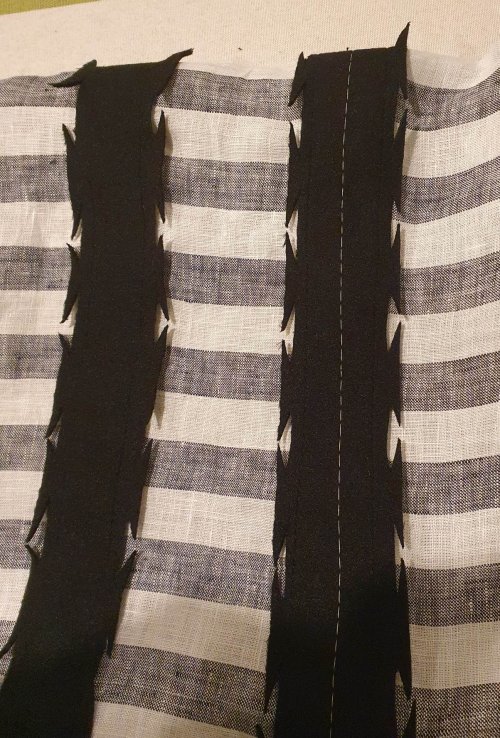
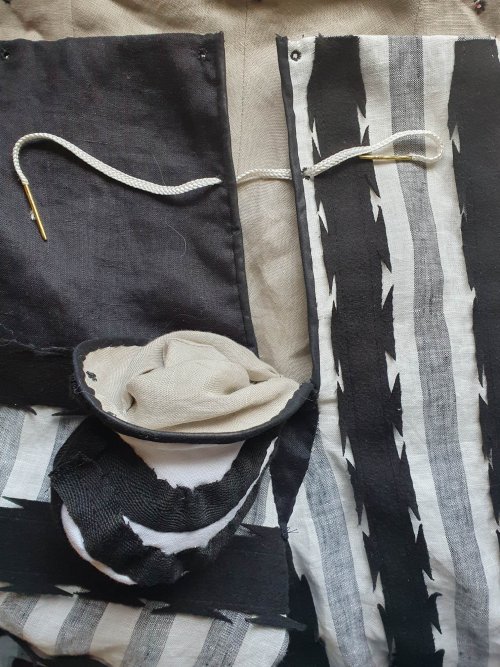
I made up a matching lining in natural linen and lined the Hosen, basting and slip-stitching along the top hem. I hung up the Hosen to check length, trimmed the lining and then gathered the lower edges into narrow cuffs, with the gathers all at the front, as seen in the images. Because I did not have the garter measurement, I made the cuffs open, with a lace running through to tighten them.
On to the codpiece!
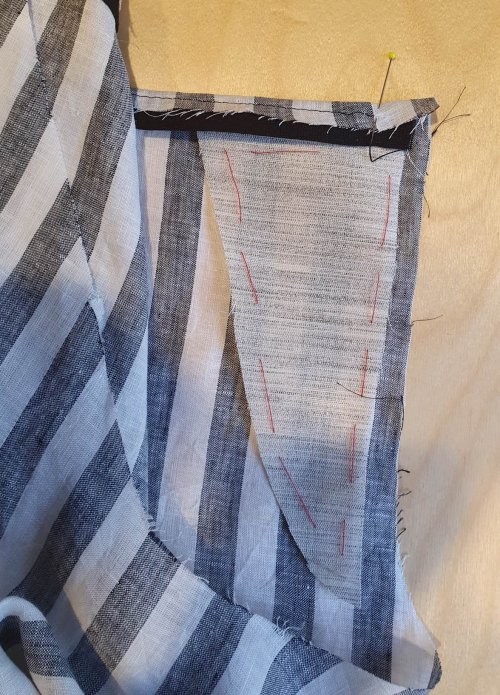
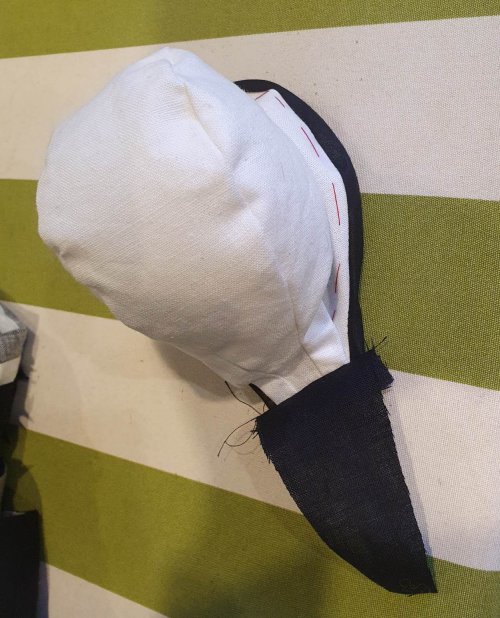
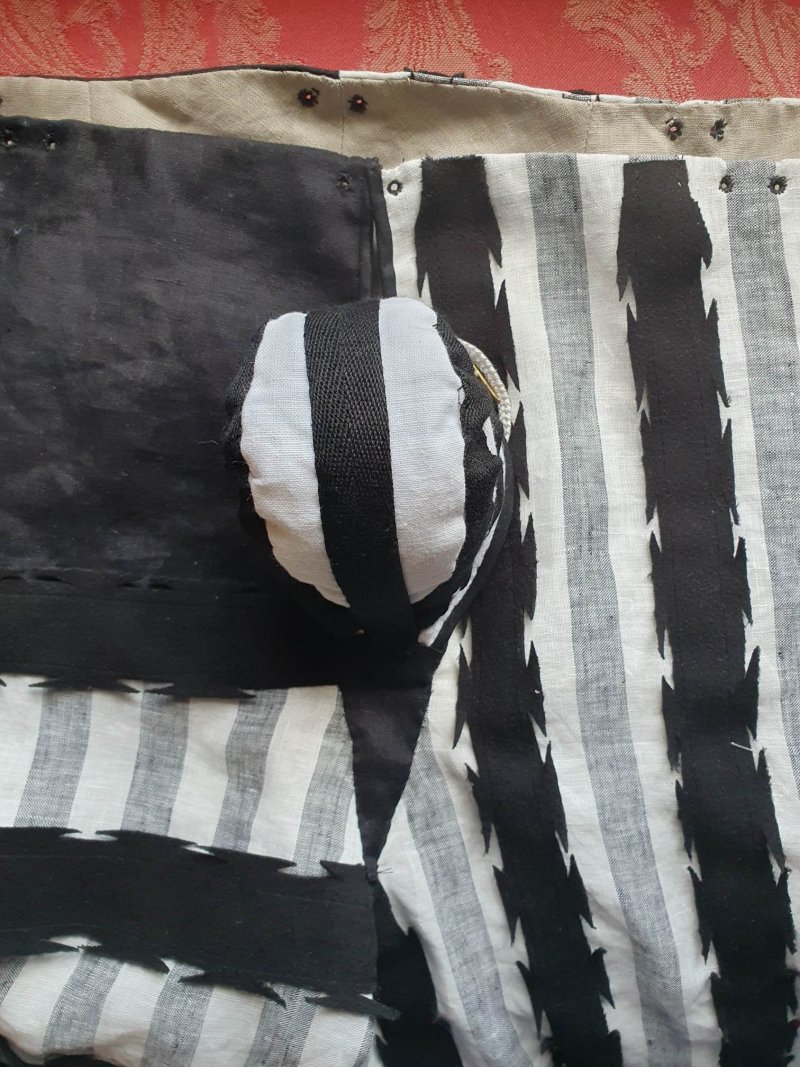
I had made codpieces before for mid 16thc trunkhose, based on Janet Arnold’s drawings, with a triangular gusset beneath and a very phallic profile. However, these 1510s outfits have a very different look: a ball-shaped codpiece, with no obvious wings for pointing to the Hosen.
Figure #32 shows a distinct central strip, so I played around with the shape, adding a central strip and reducing the flange, but keeping the pleating and the gusset, to provide a more practical opening than simply sewing the codpiece to the front of the seam.
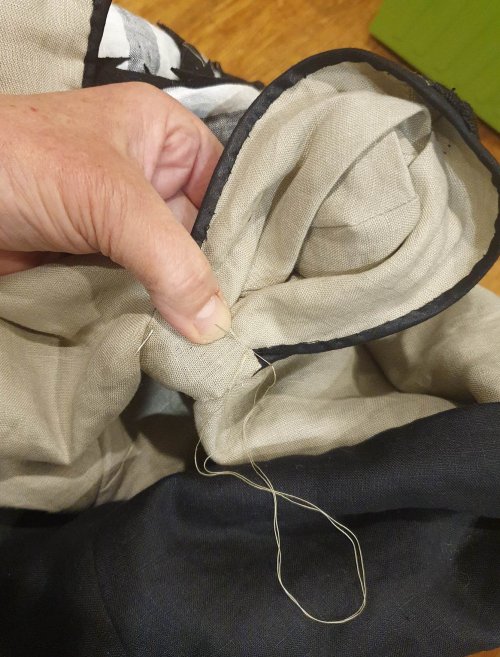
Although the #27 Hosen are white and grey striped, there is no grey visible on the codpiece, so I cut it out of white linen, with a 5mm seam allowance. The next steps were to clip, turn, stuff with wool, line in natural linen and bind the edge. I could have made a flat lining, but opted for a shaped version.
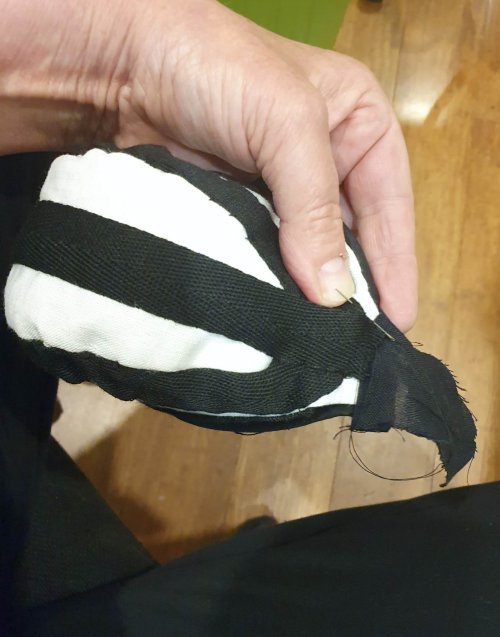
I pleated the base (as in my 1560s version) and sewed it to the triangular gusset. Now I had the finished shape, I could sew on the stripes. I tried some of the millinery wool, but it was too stiff, so I used black twill tape instead, which flexed more easily on the curves.
With the stripes done, I sewed the gusset into the crotch seam, then bound the fly edges (both outer and lining). Finally, I slip-stitched the gusset lining to finish the construction.
The last step was to work eyelets along the top to match the Wams, then work eyelets at the top of the codpiece and fly edge. The finished codpiece looks good and should function well.
I had planned to make a set of black points for the outfit, but I was completely out of time. I borrowed a white silk set from my husband’s collection, which solved the problem!
So, the suite was done just in time and handed over on the mornings of the event. I did not enjoy the push to the deadline, but I was very happy with the result.
The best news was that the Wams and Hosen fit well and were comfortable. HRM Radbot liked the outfit and enjoyed showing it off…
Afterthoughts
I would like to have another tilt at this style – but with access to the person, so I could do proper measurements, toile and fitting!
And now I’m looking forward to working on my next project at a more measured pace….
Shirt update
After reading about this project, Ceara Shionnach made him a new shirt in appropriate style – now all we need is a photo….
Repairs…
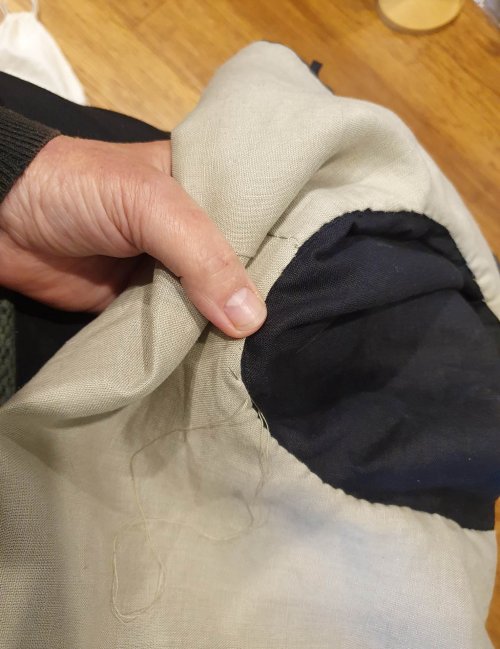
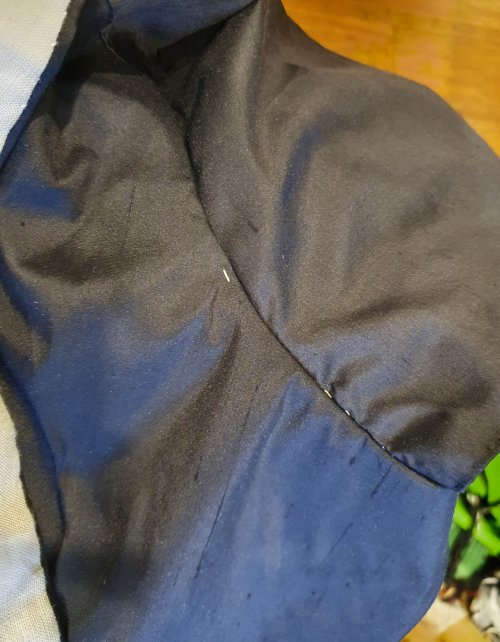
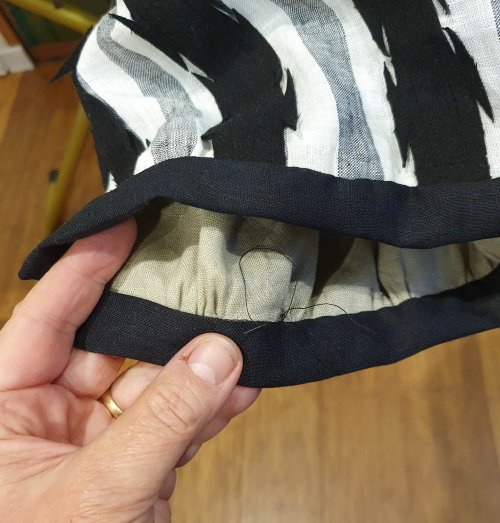
Four months after completing the outfit, a shame-faced Radbot explained he’d been playing fighting games with the kids and…
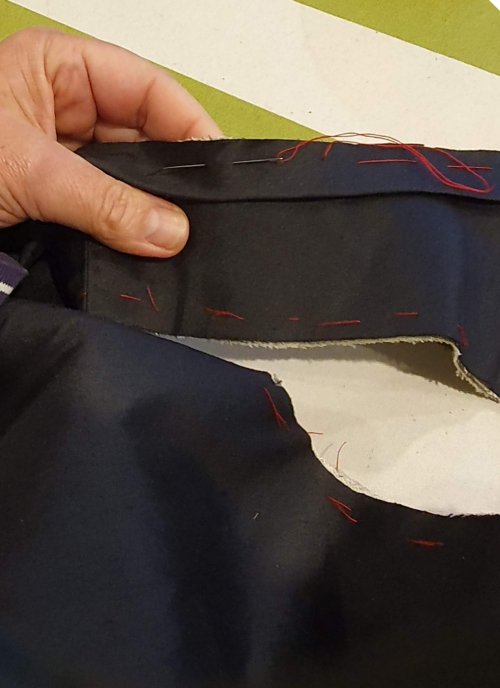
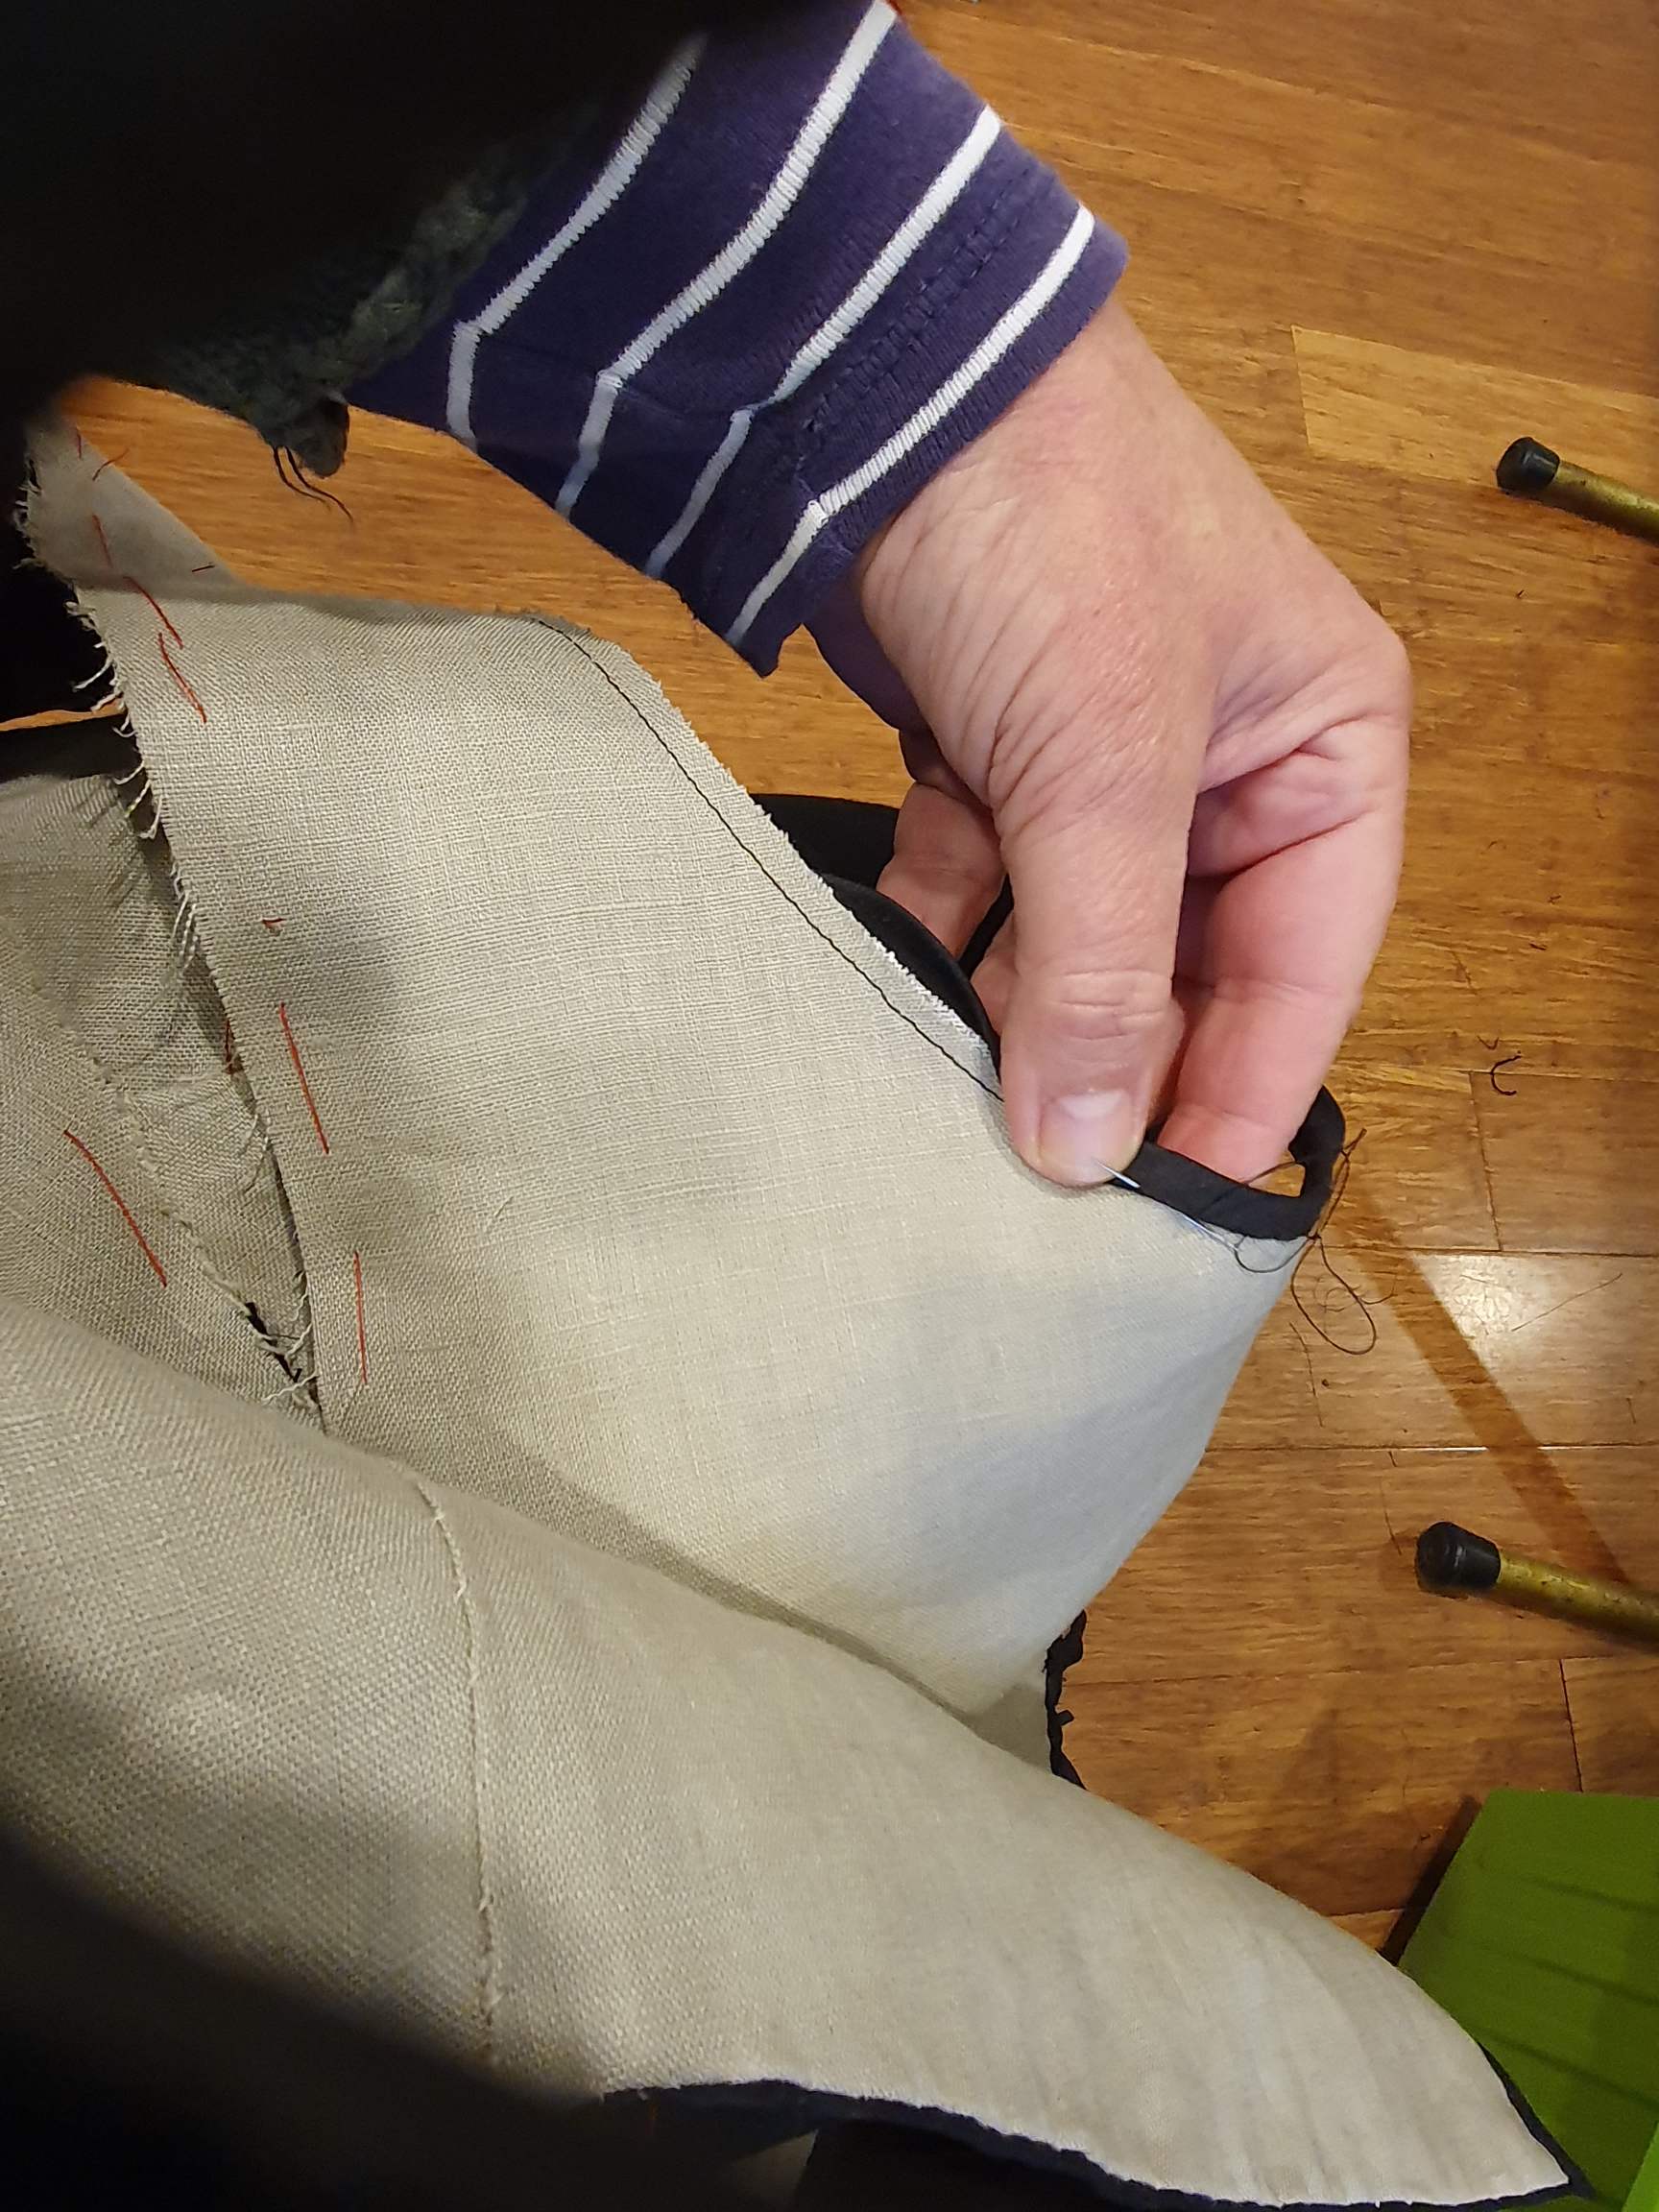
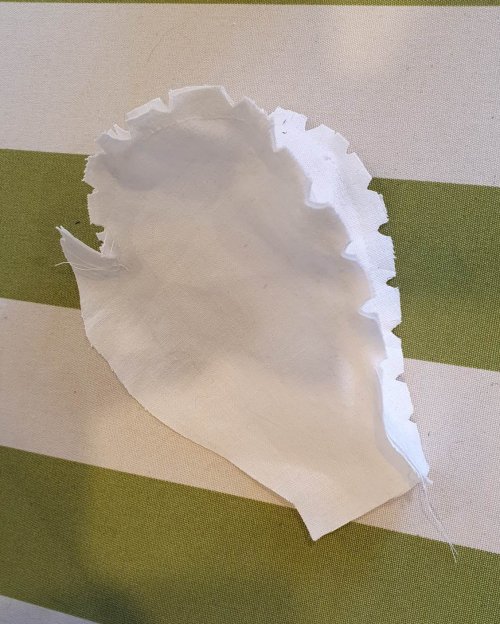
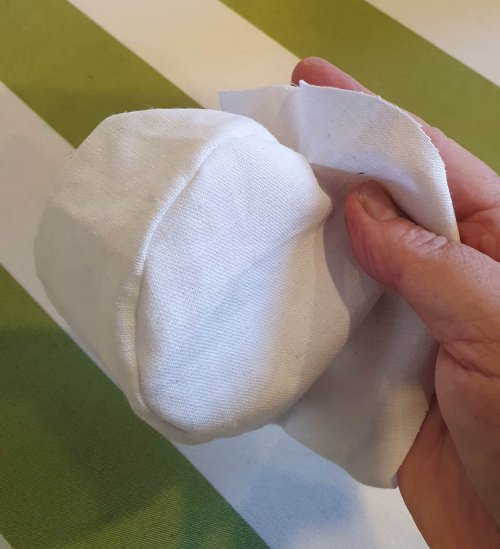
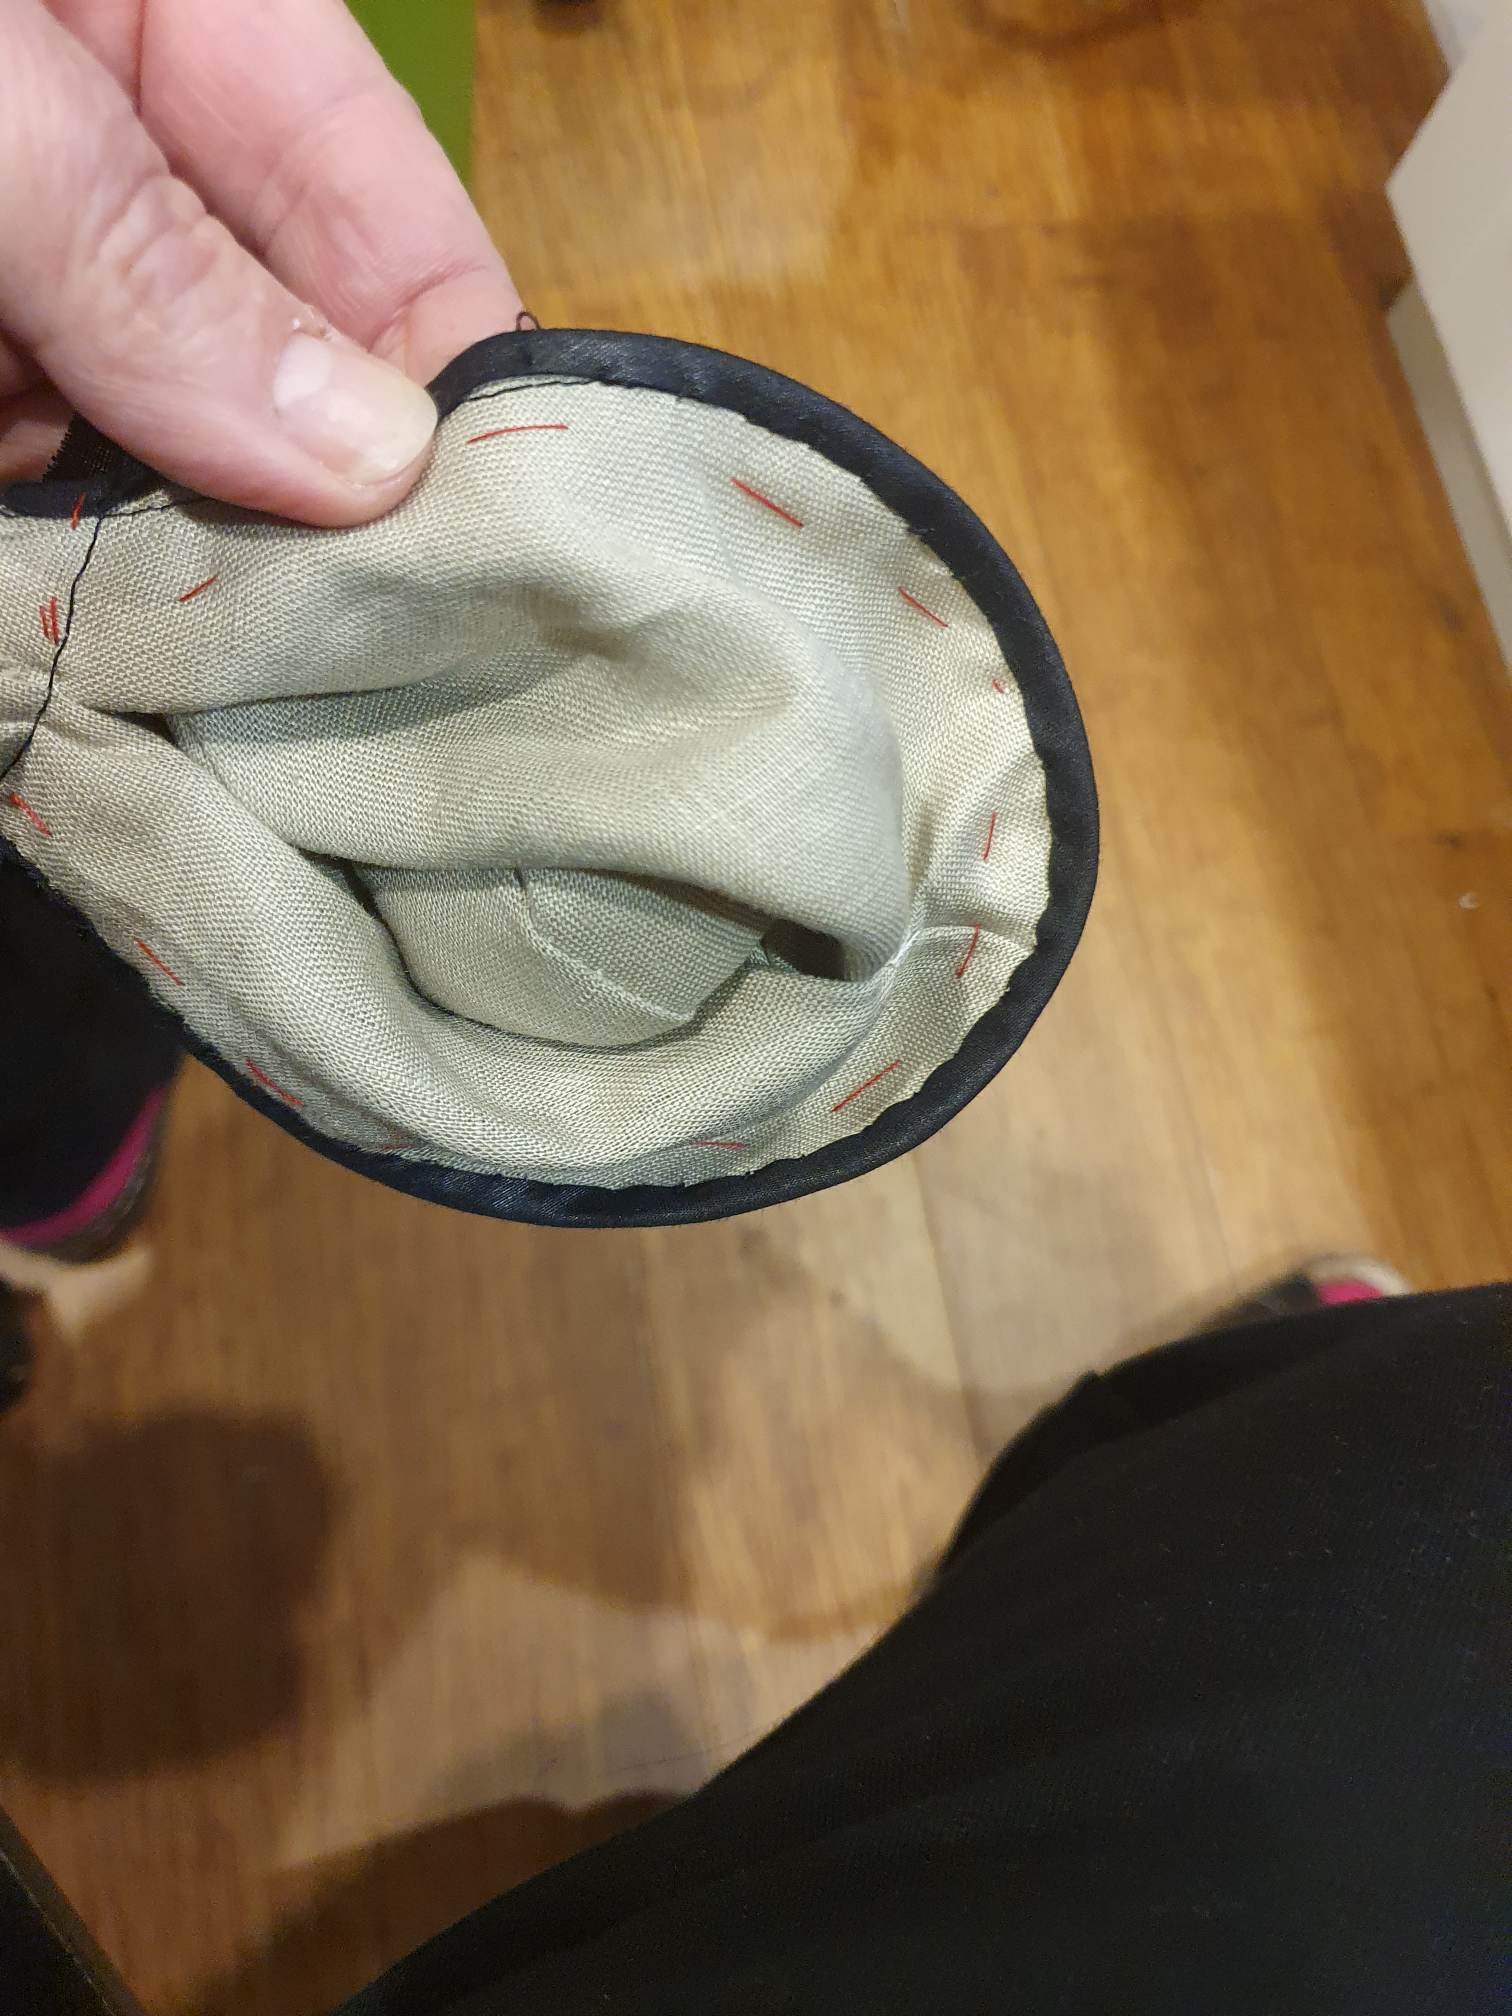
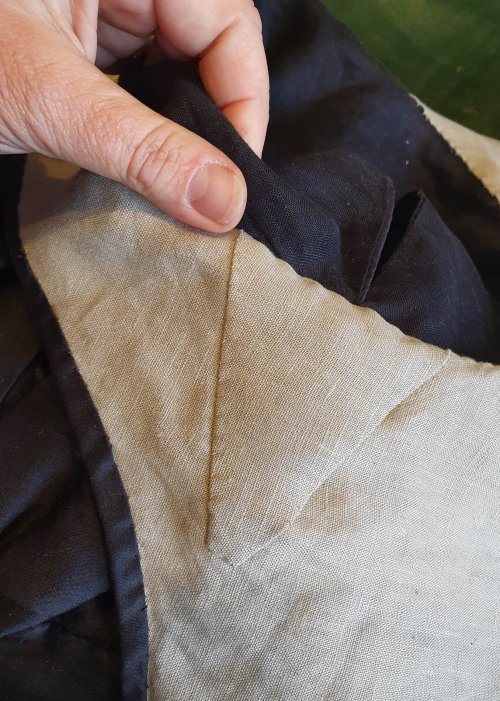
It was a bad rip, from the armscye across the bodice, through all three layers – silk, canvas and linen. But I would rather repair it than make it again.
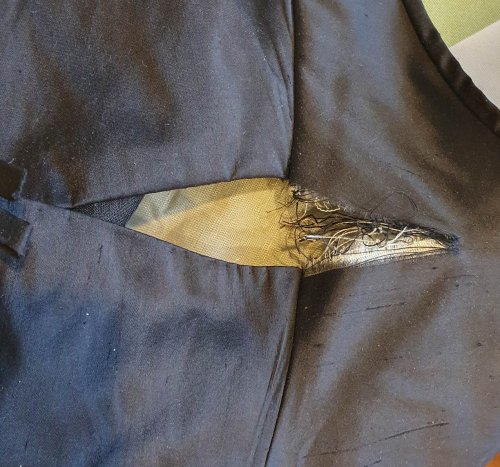
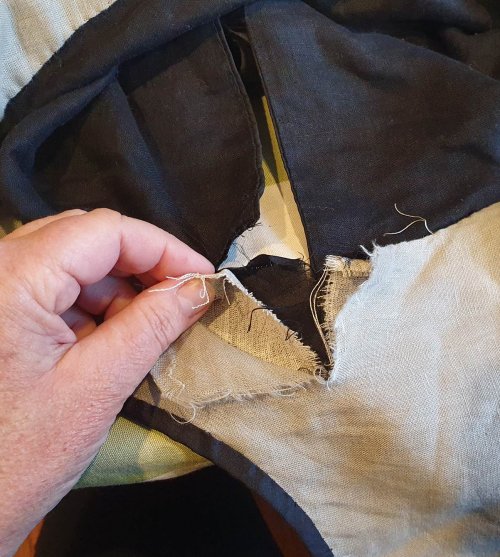
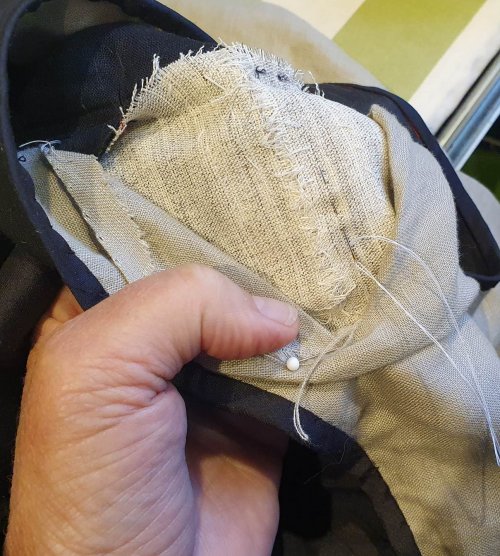
It took some time, starting by unpicking the armscye seam on each side of the rip to give better access. Then carefully mending each layer using Sailmaker’s stitch (Baseball stitch) to sew up the rip, then patching for strength and to cover the damage.
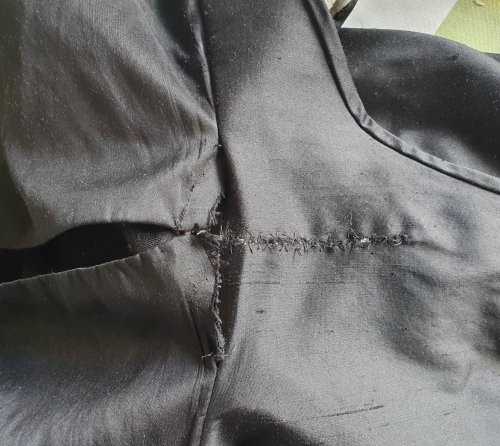
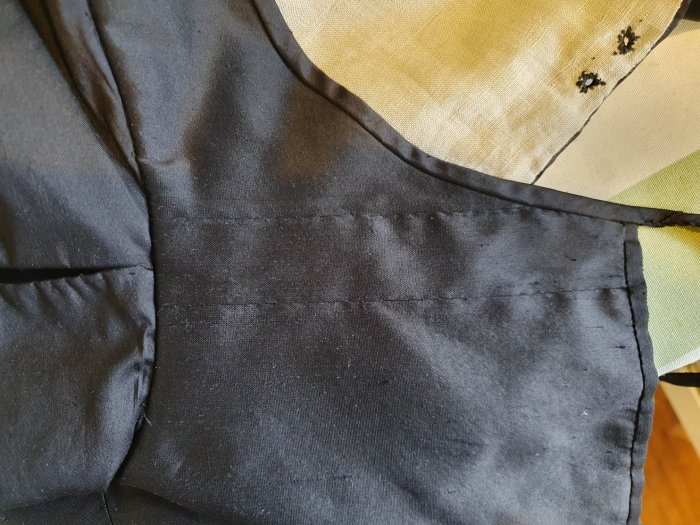
The final result is not too obvious and should be robust for normal wear. But no more horseplay!